
                                   /\
                               _  / |
                              / \ |  \
                             |  |\|  |
                             |  | | /
                             | /| |/
                             |/ |/
                        ,/;  ;  ;
                     ,'/|; ,/,/,
                   ,'/ |;/,/,/,/|
                ,/;  |;|/,/,/,/,/|
              ,/';   |;|,/,/,/,/,/|
            ,/';     |;|/,/,/,/,/,/|,
           /  ;      |;|,/,/,/,/,/,/|
          / ,';      |;|/,/,/,/,/,/,/|
         /,/';       |;|,/,/,/,/,/,/,/|
        /;/ ';       |;|/,/,/,/,/,/,/,/|

     ██████╗ ███████╗ ██████╗  █████╗ ███████╗██╗   ██╗███████╗
     ██╔══██╗██╔════╝██╔════╝ ██╔══██╗██╔════╝██║   ██║██╔════╝
     ██████╔╝█████╗  ██║  ███╗███████║███████╗██║   ██║███████╗
     ██╔═══╝ ██╔══╝  ██║   ██║██╔══██║╚════██║██║   ██║╚════██║
     ██║     ███████╗╚██████╔╝██║  ██║███████║╚██████╔╝███████║
     ╚═╝     ╚══════╝ ╚═════╝ ╚═╝  ╚═╝╚══════╝ ╚═════╝ ╚══════╝
                    P E N T E S T   A R S E N A L
A comprehensive web application security testing toolkit that combines 10 powerful penetration testing features into one tool.
Identifies potential security Misconfigurations" title="Misconfigurations">misconfigurations
JWT Token Inspector
Detects common JWT vulnerabilities
Parameter Pollution Finder
Detects server-side parameter handling issues
CORS Misconfiguration Scanner
Detects credential exposure risks
Upload Bypass Tester
Identifies dangerous file type handling
Exposed .git Directory Finder
Tests for sensitive information disclosure
SSRF (Server Side Request Forgery) Detector
Includes cloud metadata endpoint tests
Blind SQL Injection Time Delay Detector
Identifies injectable parameters
Local File Inclusion (LFI) Mapper
Supports various encoding bypasses
Web Application Firewall (WAF) Fingerprinter
git clone https://github.com/sobri3195/pegasus-pentest-arsenal.git
cd pegasus-pentest-arsenal
python -m venv venv
source venv/bin/activate  # On Windows: venv\Scripts\activate
pip install -r requirements.txt
python pegasus_pentest.py
This project is licensed under the MIT License - see the LICENSE file for details.
This tool is provided for educational and authorized testing purposes only. Users are responsible for obtaining proper authorization before testing any target. The authors are not responsible for any misuse or damage caused by this tool.
SubGPT looks at subdomains you have already discovered for a domain and uses BingGPT to find more. Best part? It's free!
The following subdomains were found by this tool with these 30 subdomains as input.
call-prompts-staging.example.com
dclb02-dca1.prod.example.com
activedirectory-sjc1.example.com
iadm-staging.example.com
elevatenetwork-c.example.com
If you like my work, you can support me with as little as $1, here :)
pip install subgpt
git clone https://github.com/s0md3v/SubGPT && cd SubGPT && python setup.py install
cookies.json
Note: Any issues regarding BingGPT itself should be reported EdgeGPT, not here.
It is supposed to be used after you have discovered some subdomains using all other methods. The standard way to run SubGPT is as follows:
subgpt -i input.txt -o output.txt -c /path/to/cookies.json
If you don't specify an output file, the output will be shown in your terminal (stdout) instead.
To generate subdomains and not resolve them, use the --dont-resolve option. It's a great way to see all subdomains generated by SubGPT and/or use your own resolver on them.
![]()
A Python script to check Next.js sites for corrupt middleware vulnerability (CVE-2025-29927).
The corrupt middleware vulnerability allows an attacker to bypass authentication and access protected routes by send a custom header x-middleware-subrequest.
Next JS versions affected: - 11.1.4 and up
[!WARNING] This tool is for educational purposes only. Do not use it on websites or systems you do not own or have explicit permission to test. Unauthorized testing may be illegal and unethical.
Clone the repo
git clone https://github.com/takumade/ghost-route.git
cd ghost-route
Create and activate virtual environment
python -m venv .venv
source .venv/bin/activate
Install dependencies
pip install -r requirements.txt
python ghost-route.py <url> <path> <show_headers>
<url>: Base URL of the Next.js site (e.g., https://example.com)<path>: Protected path to test (default: /admin)<show_headers>: Show response headers (default: False)Basic Example
python ghost-route.py https://example.com /admin
Show Response Headers
python ghost-route.py https://example.com /admin True
MIT License
![]()
Welcome to TruffleHog Explorer, a user-friendly web-based tool to visualize and analyze data extracted using TruffleHog. TruffleHog is one of the most powerful secrets discovery, classification, validation, and analysis open source tool. In this context, a secret refers to a credential a machine uses to authenticate itself to another machine. This includes API keys, database passwords, private encryption keys, and more.
With an improved UI/UX, powerful filtering options, and export capabilities, this tool helps security professionals efficiently review potential secrets and credentials found in their repositories.
⚠️ This dashboard has been tested only with GitHub TruffleHog JSON outputs. Expect updates soon to support additional formats and platforms.
You can use online version here: TruffleHog Explorer
$ git clone https://github.com/yourusername/trufflehog-explorer.git
$ cd trufflehog-explorer
index.html
Simply open the index.html file in your preferred web browser.
$ open index.html
.json files from TruffleHog output.Happy Securing! 🔒
Cybercriminals are selling hundreds of thousands of credential sets stolen with the help of a cracked version of Acunetix, a powerful commercial web app vulnerability scanner, new research finds. The cracked software is being resold as a cloud-based attack tool by at least two different services, one of which KrebsOnSecurity traced to an information technology firm based in Turkey.
Araneida Scanner.
Cyber threat analysts at Silent Push said they recently received reports from a partner organization that identified an aggressive scanning effort against their website using an Internet address previously associated with a campaign by FIN7, a notorious Russia-based hacking group.
But on closer inspection they discovered the address contained an HTML title of “Araneida Customer Panel,” and found they could search on that text string to find dozens of unique addresses hosting the same service.
It soon became apparent that Araneida was being resold as a cloud-based service using a cracked version of Acunetix, allowing paying customers to conduct offensive reconnaissance on potential target websites, scrape user data, and find vulnerabilities for exploitation.
Silent Push also learned Araneida bundles its service with a robust proxy offering, so that customer scans appear to come from Internet addresses that are randomly selected from a large pool of available traffic relays.
The makers of Acunetix, Texas-based application security vendor Invicti Security, confirmed Silent Push’s findings, saying someone had figured out how to crack the free trial version of the software so that it runs without a valid license key.
“We have been playing cat and mouse for a while with these guys,” said Matt Sciberras, chief information security officer at Invicti.
Silent Push said Araneida is being advertised by an eponymous user on multiple cybercrime forums. The service’s Telegram channel boasts nearly 500 subscribers and explains how to use the tool for malicious purposes.
In a “Fun Facts” list posted to the channel in late September, Araneida said their service was used to take over more than 30,000 websites in just six months, and that one customer used it to buy a Porsche with the payment card data (“dumps”) they sold.
Araneida Scanner’s Telegram channel bragging about how customers are using the service for cybercrime.
“They are constantly bragging with their community about the crimes that are being committed, how it’s making criminals money,” said Zach Edwards, a senior threat researcher at Silent Push. “They are also selling bulk data and dumps which appear to have been acquired with this tool or due to vulnerabilities found with the tool.”
Silent Push also found a cracked version of Acunetix was powering at least 20 instances of a similar cloud-based vulnerability testing service catering to Mandarin speakers, but they were unable to find any apparently related sales threads about them on the dark web.
Rumors of a cracked version of Acunetix being used by attackers surfaced in June 2023 on Twitter/X, when researchers first posited a connection between observed scanning activity and Araneida.
According to an August 2023 report (PDF) from the U.S. Department of Health and Human Services (HHS), Acunetix (presumably a cracked version) is among several tools used by APT 41, a prolific Chinese state-sponsored hacking group.
Silent Push notes that the website where Araneida is being sold — araneida[.]co — first came online in February 2023. But a review of this Araneida nickname on the cybercrime forums shows they have been active in the criminal hacking scene since at least 2018.
A search in the threat intelligence platform Intel 471 shows a user by the name Araneida promoted the scanner on two cybercrime forums since 2022, including Breached and Nulled. In 2022, Araneida told fellow Breached members they could be reached on Discord at the username “Ornie#9811.”
According to Intel 471, this same Discord account was advertised in 2019 by a person on the cybercrime forum Cracked who used the monikers “ORN” and “ori0n.” The user “ori0n” mentioned in several posts that they could be reached on Telegram at the username “@sirorny.”
Orn advertising Araneida Scanner in Feb. 2023 on the forum Cracked. Image: Ke-la.com.
The Sirorny Telegram identity also was referenced as a point of contact for a current user on the cybercrime forum Nulled who is selling website development services, and who references araneida[.]co as one of their projects. That user, “Exorn,” has posts dating back to August 2018.
In early 2020, Exorn promoted a website called “orndorks[.]com,” which they described as a service for automating the scanning for web-based vulnerabilities. A passive DNS lookup on this domain at DomainTools.com shows that its email records pointed to the address ori0nbusiness@protonmail.com.
Constella Intelligence, a company that tracks information exposed in data breaches, finds this email address was used to register an account at Breachforums in July 2024 under the nickname “Ornie.” Constella also finds the same email registered at the website netguard[.]codes in 2021 using the password “ceza2003” [full disclosure: Constella is currently an advertiser on KrebsOnSecurity].
A search on the password ceza2003 in Constella finds roughly a dozen email addresses that used it in an exposed data breach, most of them featuring some variation on the name “altugsara,” including altugsara321@gmail.com. Constella further finds altugsara321@gmail.com was used to create an account at the cybercrime community RaidForums under the username “ori0n,” from an Internet address in Istanbul.
According to DomainTools, altugsara321@gmail.com was used in 2020 to register the domain name altugsara[.]com. Archive.org’s history for that domain shows that in 2021 it featured a website for a then 18-year-old Altuğ Şara from Ankara, Turkey.
Archive.org’s recollection of what altugsara dot com looked like in 2021.
LinkedIn finds this same altugsara[.]com domain listed in the “contact info” section of a profile for an Altug Sara from Ankara, who says he has worked the past two years as a senior software developer for a Turkish IT firm called Bilitro Yazilim.
Neither Altug Sara nor Bilitro Yazilim responded to requests for comment.
Invicti’s website states that it has offices in Ankara, but the company’s CEO said none of their employees recognized either name.
“We do have a small team in Ankara, but as far as I know we have no connection to the individual other than the fact that they are also in Ankara,” Invicti CEO Neil Roseman told KrebsOnSecurity.
Researchers at Silent Push say despite Araneida using a seemingly endless supply of proxies to mask the true location of its users, it is a fairly “noisy” scanner that will kick off a large volume of requests to various API endpoints, and make requests to random URLs associated with different content management systems.
What’s more, the cracked version of Acunetix being resold to cybercriminals invokes legacy Acunetix SSL certificates on active control panels, which Silent Push says provides a solid pivot for finding some of this infrastructure, particularly from the Chinese threat actors.
Further reading: Silent Push’s research on Araneida Scanner.

secator is a task and workflow runner used for security assessments. It supports dozens of well-known security tools and it is designed to improve productivity for pentesters and security researchers.
Curated list of commands
Unified input options
Unified output schema
CLI and library usage
Distributed options with Celery
Complexity from simple tasks to complex workflows
secator integrates the following tools:
| Name | Description | Category |
|---|---|---|
| httpx | Fast HTTP prober. | http |
| cariddi | Fast crawler and endpoint secrets / api keys / tokens matcher. | http/crawler |
| gau | Offline URL crawler (Alien Vault, The Wayback Machine, Common Crawl, URLScan). | http/crawler |
| gospider | Fast web spider written in Go. | http/crawler |
| katana | Next-generation crawling and spidering framework. | http/crawler |
| dirsearch | Web path discovery. | http/fuzzer |
| feroxbuster | Simple, fast, recursive content discovery tool written in Rust. | http/fuzzer |
| ffuf | Fast web fuzzer written in Go. | http/fuzzer |
| h8mail | Email OSINT and breach hunting tool. | osint |
| dnsx | Fast and multi-purpose DNS toolkit designed for running DNS queries. | recon/dns |
| dnsxbrute | Fast and multi-purpose DNS toolkit designed for running DNS queries (bruteforce mode). | recon/dns |
| subfinder | Fast subdomain finder. | recon/dns |
| fping | Find alive hosts on local networks. | recon/ip |
| mapcidr | Expand CIDR ranges into IPs. | recon/ip |
| naabu | Fast port discovery tool. | recon/port |
| maigret | Hunt for user accounts across many websites. | recon/user |
| gf | A wrapper around grep to avoid typing common patterns. | tagger |
| grype | A vulnerability scanner for container images and filesystems. | vuln/code |
| dalfox | Powerful XSS scanning tool and parameter analyzer. | vuln/http |
| msfconsole | CLI to access and work with the Metasploit Framework. | vuln/http |
| wpscan | WordPress Security Scanner | vuln/multi |
| nmap | Vulnerability scanner using NSE scripts. | vuln/multi |
| nuclei | Fast and customisable vulnerability scanner based on simple YAML based DSL. | vuln/multi |
| searchsploit | Exploit searcher. | exploit/search |
Feel free to request new tools to be added by opening an issue, but please check that the tool complies with our selection criterias before doing so. If it doesn't but you still want to integrate it into secator, you can plug it in (see the dev guide).
pipx install secator
pip install secator
wget -O - https://raw.githubusercontent.com/freelabz/secator/main/scripts/install.sh | sh
docker run -it --rm --net=host -v ~/.secator:/root/.secator freelabz/secator --help
alias secator="docker run -it --rm --net=host -v ~/.secator:/root/.secator freelabz/secator"
secator --help
git clone https://github.com/freelabz/secator
cd secator
docker-compose up -d
docker-compose exec secator secator --help
Note: If you chose the Bash, Docker or Docker Compose installation methods, you can skip the next sections and go straight to Usage.
secator uses external tools, so you might need to install languages used by those tools assuming they are not already installed on your system.
We provide utilities to install required languages if you don't manage them externally:
secator install langs go
secator install langs ruby
secator does not install any of the external tools it supports by default.
We provide utilities to install or update each supported tool which should work on all systems supporting apt:
secator install tools
secator install tools <TOOL_NAME>
secator install tools httpx
Please make sure you are using the latest available versions for each tool before you run secator or you might run into parsing / formatting issues.
secator comes installed with the minimum amount of dependencies.
There are several addons available for secator:
secator install addons worker
secator install addons google
secator install addons mongodb
secator install addons redis
secator install addons dev
secator install addons trace
secator install addons build
secator makes remote API calls to https://cve.circl.lu/ to get in-depth information about the CVEs it encounters. We provide a subcommand to download all known CVEs locally so that future lookups are made from disk instead:
secator install cves
To figure out which languages or tools are installed on your system (along with their version):
secator health
secator --help

Run a fuzzing task (ffuf):
secator x ffuf http://testphp.vulnweb.com/FUZZ
Run a url crawl workflow:
secator w url_crawl http://testphp.vulnweb.com
Run a host scan:
secator s host mydomain.com
and more... to list all tasks / workflows / scans that you can use:
secator x --help
secator w --help
secator s --help
To go deeper with secator, check out: * Our complete documentation * Our getting started tutorial video * Our Medium post * Follow us on social media: @freelabz on Twitter and @FreeLabz on YouTube
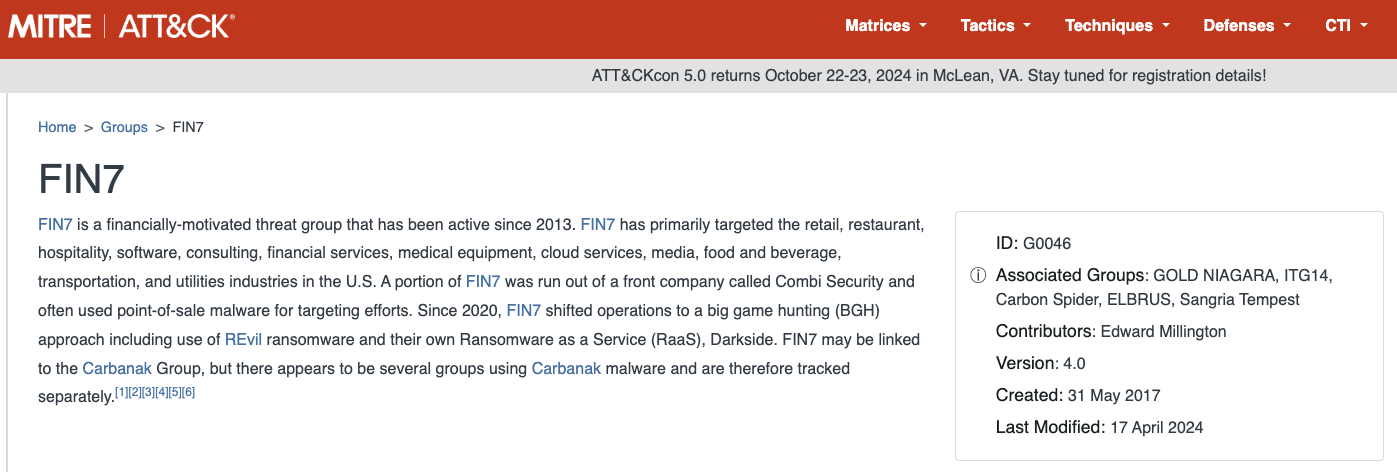
The Russia-based cybercrime group dubbed “Fin7,” known for phishing and malware attacks that have cost victim organizations an estimated $3 billion in losses since 2013, was declared dead last year by U.S. authorities. But experts say Fin7 has roared back to life in 2024 — setting up thousands of websites mimicking a range of media and technology companies — with the help of Stark Industries Solutions, a sprawling hosting provider that is a persistent source of cyberattacks against enemies of Russia.
In May 2023, the U.S. attorney for Washington state declared “Fin7 is an entity no more,” after prosecutors secured convictions and prison sentences against three men found to be high-level Fin7 hackers or managers. This was a bold declaration against a group that the U.S. Department of Justice described as a criminal enterprise with more than 70 people organized into distinct business units and teams.
The first signs of Fin7’s revival came in April 2024, when Blackberry wrote about an intrusion at a large automotive firm that began with malware served by a typosquatting attack targeting people searching for a popular free network scanning tool.
Now, researchers at security firm Silent Push say they have devised a way to map out Fin7’s rapidly regrowing cybercrime infrastructure, which includes more than 4,000 hosts that employ a range of exploits, from typosquatting and booby-trapped ads to malicious browser extensions and spearphishing domains.
Silent Push said it found Fin7 domains targeting or spoofing brands including American Express, Affinity Energy, Airtable, Alliant, Android Developer, Asana, Bitwarden, Bloomberg, Cisco (Webex), CNN, Costco, Dropbox, Grammarly, Google, Goto.com, Harvard, Lexis Nexis, Meta, Microsoft 365, Midjourney, Netflix, Paycor, Quickbooks, Quicken, Reuters, Regions Bank Onepass, RuPay, SAP (Ariba), Trezor, Twitter/X, Wall Street Journal, Westlaw, and Zoom, among others.
Zach Edwards, senior threat analyst at Silent Push, said many of the Fin7 domains are innocuous-looking websites for generic businesses that sometimes include text from default website templates (the content on these sites often has nothing to do with the entity’s stated business or mission).
Edwards said Fin7 does this to “age” the domains and to give them a positive or at least benign reputation before they’re eventually converted for use in hosting brand-specific phishing pages.
“It took them six to nine months to ramp up, but ever since January of this year they have been humming, building a giant phishing infrastructure and aging domains,” Edwards said of the cybercrime group.
In typosquatting attacks, Fin7 registers domains that are similar to those for popular free software tools. Those look-alike domains are then advertised on Google so that sponsored links to them show up prominently in search results, which is usually above the legitimate source of the software in question.
A malicious site spoofing FreeCAD showed up prominently as a sponsored result in Google search results earlier this year.
According to Silent Push, the software currently being targeted by Fin7 includes 7-zip, PuTTY, ProtectedPDFViewer, AIMP, Notepad++, Advanced IP Scanner, AnyDesk, pgAdmin, AutoDesk, Bitwarden, Rest Proxy, Python, Sublime Text, and Node.js.
In May 2024, security firm eSentire warned that Fin7 was spotted using sponsored Google ads to serve pop-ups prompting people to download phony browser extensions that install malware. Malwarebytes blogged about a similar campaign in April, but did not attribute the activity to any particular group.
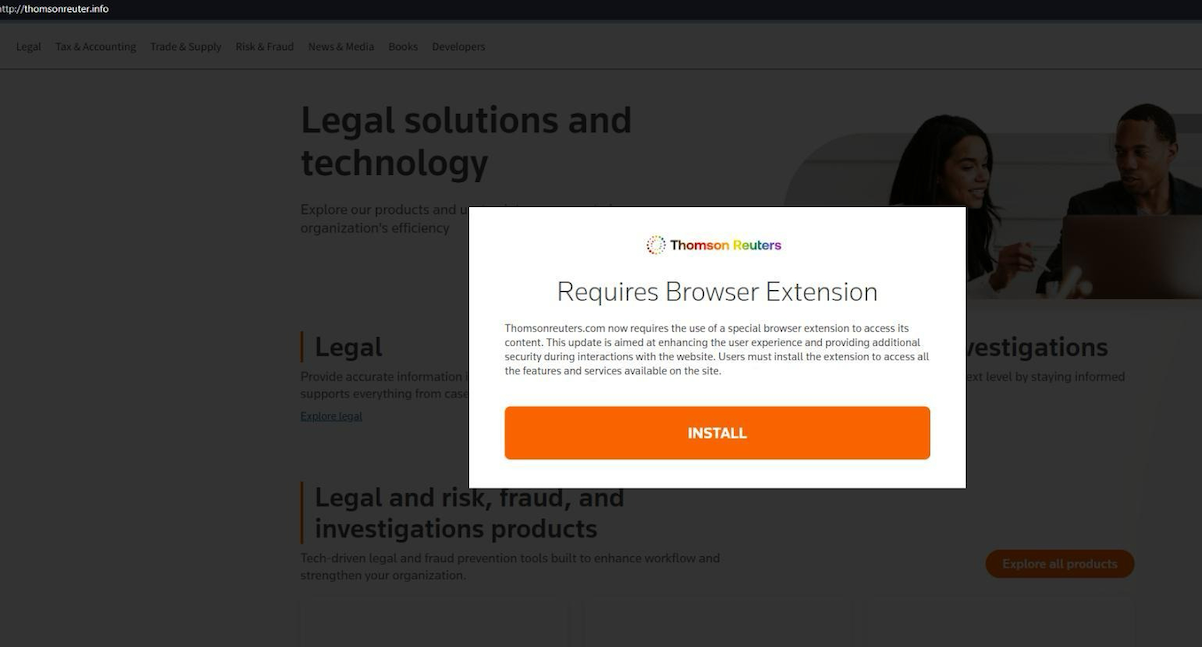
A pop-up at a Thomson Reuters typosquatting domain telling visitors they need to install a browser extension to view the news content.
Edwards said Silent Push discovered the new Fin7 domains after a hearing from an organization that was targeted by Fin7 in years past and suspected the group was once again active. Searching for hosts that matched Fin7’s known profile revealed just one active site. But Edwards said that one site pointed to many other Fin7 properties at Stark Industries Solutions, a large hosting provider that materialized just two weeks before Russia invaded Ukraine.
As KrebsOnSecurity wrote in May, Stark Industries Solutions is being used as a staging ground for wave after wave of cyberattacks against Ukraine that have been tied to Russian military and intelligence agencies.
“FIN7 rents a large amount of dedicated IP on Stark Industries,” Edwards said. “Our analysts have discovered numerous Stark Industries IPs that are solely dedicated to hosting FIN7 infrastructure.”
Fin7 once famously operated behind fake cybersecurity companies — with names like Combi Security and Bastion Secure — which they used for hiring security experts to aid in ransomware attacks. One of the new Fin7 domains identified by Silent Push is cybercloudsec[.]com, which promises to “grow your business with our IT, cyber security and cloud solutions.”
The fake Fin7 security firm Cybercloudsec.
Like other phishing groups, Fin7 seizes on current events, and at the moment it is targeting tourists visiting France for the Summer Olympics later this month. Among the new Fin7 domains Silent Push found are several sites phishing people seeking tickets at the Louvre.
“We believe this research makes it clear that Fin7 is back and scaling up quickly,” Edwards said. “It’s our hope that the law enforcement community takes notice of this and puts Fin7 back on their radar for additional enforcement actions, and that quite a few of our competitors will be able to take this pool and expand into all or a good chunk of their infrastructure.”
Further reading:
Stark Industries Solutions: An Iron Hammer in the Cloud.
A 2022 deep dive on Fin7 from the Swiss threat intelligence firm Prodaft (PDF).
Retrieves relevant subdomains for the target website and consolidates them into a whitelist. These subdomains can be utilized during the scraping process.
Site-wide Link Discovery:
Collects all links throughout the website based on the provided whitelist and the specified max_depth.
Form and Input Extraction:
Identifies all forms and inputs found within the extracted links, generating a JSON output. This JSON output serves as a foundation for leveraging the XSS scanning capability of the tool.
XSS Scanning:
Note:
The scanning functionality is currently inactive on SPA (Single Page Application) web applications, and we have only tested it on websites developed with PHP, yielding remarkable results. In the future, we plan to incorporate these features into the tool.
Note:
This tool maintains an up-to-date list of file extensions that it skips during the exploration process. The default list includes common file types such as images, stylesheets, and scripts (
".css",".js",".mp4",".zip","png",".svg",".jpeg",".webp",".jpg",".gif"). You can customize this list to better suit your needs by editing the setting.json file..
$ git clone https://github.com/joshkar/X-Recon
$ cd X-Recon
$ python3 -m pip install -r requirements.txt
$ python3 xr.py
You can use this address in the Get URL section
http://testphp.vulnweb.com
A new approach to Browser In The Browser (BITB) without the use of iframes, allowing the bypass of traditional framebusters implemented by login pages like Microsoft.
This POC code is built for using this new BITB with Evilginx, and a Microsoft Enterprise phishlet.
Before diving deep into this, I recommend that you first check my talk at BSides 2023, where I first introduced this concept along with important details on how to craft the "perfect" phishing attack. ▶ Watch Video
This tool is for educational and research purposes only. It demonstrates a non-iframe based Browser In The Browser (BITB) method. The author is not responsible for any misuse. Use this tool only legally and ethically, in controlled environments for cybersecurity defense testing. By using this tool, you agree to do so responsibly and at your own risk.
Over the past year, I've been experimenting with different tricks to craft the "perfect" phishing attack. The typical "red flags" people are trained to look for are things like urgency, threats, authority, poor grammar, etc. The next best thing people nowadays check is the link/URL of the website they are interacting with, and they tend to get very conscious the moment they are asked to enter sensitive credentials like emails and passwords.
That's where Browser In The Browser (BITB) came into play. Originally introduced by @mrd0x, BITB is a concept of creating the appearance of a believable browser window inside of which the attacker controls the content (by serving the malicious website inside an iframe). However, the fake URL bar of the fake browser window is set to the legitimate site the user would expect. This combined with a tool like Evilginx becomes the perfect recipe for a believable phishing attack.
The problem is that over the past months/years, major websites like Microsoft implemented various little tricks called "framebusters/framekillers" which mainly attempt to break iframes that might be used to serve the proxied website like in the case of Evilginx.
In short, Evilginx + BITB for websites like Microsoft no longer works. At least not with a BITB that relies on iframes.
A Browser In The Browser (BITB) without any iframes! As simple as that.
Meaning that we can now use BITB with Evilginx on websites like Microsoft.
Evilginx here is just a strong example, but the same concept can be used for other use-cases as well.
Framebusters target iframes specifically, so the idea is to create the BITB effect without the use of iframes, and without disrupting the original structure/content of the proxied page. This can be achieved by injecting scripts and HTML besides the original content using search and replace (aka substitutions), then relying completely on HTML/CSS/JS tricks to make the visual effect. We also use an additional trick called "Shadow DOM" in HTML to place the content of the landing page (background) in such a way that it does not interfere with the proxied content, allowing us to flexibly use any landing page with minor additional JS scripts.
Create a local Linux VM. (I personally use Ubuntu 22 on VMWare Player or Parallels Desktop)
Update and Upgrade system packages:
sudo apt update && sudo apt upgrade -y
Create a new evilginx user, and add user to sudo group:
sudo su
adduser evilginx
usermod -aG sudo evilginx
Test that evilginx user is in sudo group:
su - evilginx
sudo ls -la /root
Navigate to users home dir:
cd /home/evilginx
(You can do everything as sudo user as well since we're running everything locally)
Download and build Evilginx: Official Docs
Copy Evilginx files to /home/evilginx
Install Go: Official Docs
wget https://go.dev/dl/go1.21.4.linux-amd64.tar.gz
sudo tar -C /usr/local -xzf go1.21.4.linux-amd64.tar.gz
nano ~/.profile
ADD: export PATH=$PATH:/usr/local/go/bin
source ~/.profile
Check:
go version
Install make:
sudo apt install make
Build Evilginx:
cd /home/evilginx/evilginx2
make
Create a new directory for our evilginx build along with phishlets and redirectors:
mkdir /home/evilginx/evilginx
Copy build, phishlets, and redirectors:
cp /home/evilginx/evilginx2/build/evilginx /home/evilginx/evilginx/evilginx

cp -r /home/evilginx/evilginx2/redirectors /home/evilginx/evilginx/redirectors

cp -r /home/evilginx/evilginx2/phishlets /home/evilginx/evilginx/phishlets
Ubuntu firewall quick fix (thanks to @kgretzky)
sudo setcap CAP_NET_BIND_SERVICE=+eip /home/evilginx/evilginx/evilginx
On Ubuntu, if you get Failed to start nameserver on: :53 error, try modifying this file
sudo nano /etc/systemd/resolved.conf
edit/add the DNSStubListener to no > DNSStubListener=no
then
sudo systemctl restart systemd-resolved
Since we will be using Apache2 in front of Evilginx, we need to make Evilginx listen to a different port than 443.
nano ~/.evilginx/config.json
CHANGE https_port from 443 to 8443
Install Apache2:
sudo apt install apache2 -y
Enable Apache2 mods that will be used: (We are also disabling access_compat module as it sometimes causes issues)
sudo a2enmod proxy
sudo a2enmod proxy_http
sudo a2enmod proxy_balancer
sudo a2enmod lbmethod_byrequests
sudo a2enmod env
sudo a2enmod include
sudo a2enmod setenvif
sudo a2enmod ssl
sudo a2ensite default-ssl
sudo a2enmod cache
sudo a2enmod substitute
sudo a2enmod headers
sudo a2enmod rewrite
sudo a2dismod access_compat
Start and enable Apache:
sudo systemctl start apache2
sudo systemctl enable apache2
Try if Apache and VM networking works by visiting the VM's IP from a browser on the host machine.
Install git if not already available:
sudo apt -y install git
Clone this repo:
git clone https://github.com/waelmas/frameless-bitb
cd frameless-bitb
Make directories for the pages we will be serving:
sudo mkdir /var/www/home
sudo mkdir /var/www/primary
sudo mkdir /var/www/secondary
Copy the directories for each page:
sudo cp -r ./pages/home/ /var/www/

sudo cp -r ./pages/primary/ /var/www/

sudo cp -r ./pages/secondary/ /var/www/
Optional: Remove the default Apache page (not used):
sudo rm -r /var/www/html/
Copy the O365 phishlet to phishlets directory:
sudo cp ./O365.yaml /home/evilginx/evilginx/phishlets/O365.yaml
Optional: To set the Calendly widget to use your account instead of the default I have inside, go to pages/primary/script.js and change the CALENDLY_PAGE_NAME and CALENDLY_EVENT_TYPE.
Note on Demo Obfuscation: As I explain in the walkthrough video, I included a minimal obfuscation for text content like URLs and titles of the BITB. You can open the demo obfuscator by opening demo-obfuscator.html in your browser. In a real-world scenario, I would highly recommend that you obfuscate larger chunks of the HTML code injected or use JS tricks to avoid being detected and flagged. The advanced version I am working on will use a combination of advanced tricks to make it nearly impossible for scanners to fingerprint/detect the BITB code, so stay tuned.
Since we are running everything locally, we need to generate self-signed SSL certificates that will be used by Apache. Evilginx will not need the certs as we will be running it in developer mode.
We will use the domain fake.com which will point to our local VM. If you want to use a different domain, make sure to change the domain in all files (Apache conf files, JS files, etc.)
Create dir and parents if they do not exist:
sudo mkdir -p /etc/ssl/localcerts/fake.com/
Generate the SSL certs using the OpenSSL config file:
sudo openssl req -x509 -nodes -days 365 -newkey rsa:2048 \
-keyout /etc/ssl/localcerts/fake.com/privkey.pem -out /etc/ssl/localcerts/fake.com/fullchain.pem \
-config openssl-local.cnf
Modify private key permissions:
sudo chmod 600 /etc/ssl/localcerts/fake.com/privkey.pem
Copy custom substitution files (the core of our approach):
sudo cp -r ./custom-subs /etc/apache2/custom-subs
Important Note: In this repo I have included 2 substitution configs for Chrome on Mac and Chrome on Windows BITB. Both have auto-detection and styling for light/dark mode and they should act as base templates to achieve the same for other browser/OS combos. Since I did not include automatic detection of the browser/OS combo used to visit our phishing page, you will have to use one of two or implement your own logic for automatic switching.
Both config files under /apache-configs/ are the same, only with a different Include directive used for the substitution file that will be included. (there are 2 references for each file)
# Uncomment the one you want and remember to restart Apache after any changes:
#Include /etc/apache2/custom-subs/win-chrome.conf
Include /etc/apache2/custom-subs/mac-chrome.conf
Simply to make it easier, I included both versions as separate files for this next step.
Windows/Chrome BITB:
sudo cp ./apache-configs/win-chrome-bitb.conf /etc/apache2/sites-enabled/000-default.conf
Mac/Chrome BITB:
sudo cp ./apache-configs/mac-chrome-bitb.conf /etc/apache2/sites-enabled/000-default.conf
Test Apache configs to ensure there are no errors:
sudo apache2ctl configtest
Restart Apache to apply changes:
sudo systemctl restart apache2
Get the IP of the VM using ifconfig and note it somewhere for the next step.
We now need to add new entries to our hosts file, to point the domain used in this demo fake.com and all used subdomains to our VM on which Apache and Evilginx are running.
On Windows:
Open Notepad as Administrator (Search > Notepad > Right-Click > Run as Administrator)
Click on the File option (top-left) and in the File Explorer address bar, copy and paste the following:
C:\Windows\System32\drivers\etc\
Change the file types (bottom-right) to "All files".
Double-click the file named hosts
On Mac:
Open a terminal and run the following:
sudo nano /private/etc/hosts
Now modify the following records (replace [IP] with the IP of your VM) then paste the records at the end of the hosts file:
# Local Apache and Evilginx Setup
[IP] login.fake.com
[IP] account.fake.com
[IP] sso.fake.com
[IP] www.fake.com
[IP] portal.fake.com
[IP] fake.com
# End of section
Save and exit.
Now restart your browser before moving to the next step.
Note: On Mac, use the following command to flush the DNS cache:
sudo dscacheutil -flushcache; sudo killall -HUP mDNSResponder
This demo is made with the provided Office 365 Enterprise phishlet. To get the host entries you need to add for a different phishlet, use phishlet get-hosts [PHISHLET_NAME] but remember to replace the 127.0.0.1 with the actual local IP of your VM.
Since we are using self-signed SSL certificates, our browser will warn us every time we try to visit fake.com so we need to make our host machine trust the certificate authority that signed the SSL certs.
For this step, it's easier to follow the video instructions, but here is the gist anyway.
Open https://fake.com/ in your Chrome browser.
Ignore the Unsafe Site warning and proceed to the page.
Click the SSL icon > Details > Export Certificate IMPORTANT: When saving, the name MUST end with .crt for Windows to open it correctly.
Double-click it > install for current user. Do NOT select automatic, instead place the certificate in specific store: select "Trusted Route Certification Authorities".
On Mac: to install for current user only > select "Keychain: login" AND click on "View Certificates" > details > trust > Always trust
Now RESTART your Browser
You should be able to visit https://fake.com now and see the homepage without any SSL warnings.
At this point, everything should be ready so we can go ahead and start Evilginx, set up the phishlet, create our lure, and test it.
Optional: Install tmux (to keep evilginx running even if the terminal session is closed. Mainly useful when running on remote VM.)
sudo apt install tmux -y
Start Evilginx in developer mode (using tmux to avoid losing the session):
tmux new-session -s evilginx
cd ~/evilginx/
./evilginx -developer
(To re-attach to the tmux session use tmux attach-session -t evilginx)
Evilginx Config:
config domain fake.com
config ipv4 127.0.0.1
IMPORTANT: Set Evilginx Blacklist mode to NoAdd to avoid blacklisting Apache since all requests will be coming from Apache and not the actual visitor IP.
blacklist noadd
Setup Phishlet and Lure:
phishlets hostname O365 fake.com
phishlets enable O365
lures create O365
lures get-url 0
Copy the lure URL and visit it from your browser (use Guest user on Chrome to avoid having to delete all saved/cached data between tests).
Original iframe-based BITB by @mrd0x: https://github.com/mrd0x/BITB
Evilginx Mastery Course by the creator of Evilginx @kgretzky: https://academy.breakdev.org/evilginx-mastery
My talk at BSides 2023: https://www.youtube.com/watch?v=p1opa2wnRvg
How to protect Evilginx using Cloudflare and HTML Obfuscation: https://www.jackphilipbutton.com/post/how-to-protect-evilginx-using-cloudflare-and-html-obfuscation
Evilginx resources for Microsoft 365 by @BakkerJan: https://janbakker.tech/evilginx-resources-for-microsoft-365/
![]()
In the dynamic realm of cybersecurity, vigilance and proactive defense are key. Malicious actors often leverage Microsoft Office files and Zip archives, embedding covert URLs or macros to initiate harmful actions. This Python script is crafted to detect potential threats by scrutinizing the contents of Microsoft Office documents, Acrobat Reader PDF documents and Zip files, reducing the risk of inadvertently triggering malicious code.
The script smartly identifies Microsoft Office documents (.docx, .xlsx, .pptx), Acrobat Reader PDF documents (.pdf) and Zip files. These file types, including Office documents, are zip archives that can be examined programmatically.
For both Office and Zip files, the script decompresses the contents into a temporary directory. It then scans these contents for URLs using regular expressions, searching for potential signs of compromise.
To minimize false positives, the script includes a list of domains to ignore, filtering out common URLs typically found in Office documents. This ensures focused analysis on unusual or potentially harmful URLs.
Files with URLs not on the ignored list are marked as suspicious. This heuristic method allows for adaptability based on your specific security context and threat landscape.
Post-scanning, the script cleans up by erasing temporary decompressed files, leaving no traces.
To effectively utilize the script:
Execute the script with the command: python CanaryTokenScanner.py FILE_OR_DIRECTORY_PATH (Replace FILE_OR_DIRECTORY_PATH with the actual file or directory path.)
Interpretation
![]()
An example of the Canary Token Scanner script in action, demonstrating its capability to detect suspicious URLs.
This script is intended for educational and security testing purposes only. Utilize it responsibly and in compliance with applicable laws and regulations.

CATSploit is an automated penetration testing tool using Cyber Attack Techniques Scoring (CATS) method that can be used without pentester. Currently, pentesters implicitly made the selection of suitable attack techniques for target systems to be attacked. CATSploit uses system configuration information such as OS, open ports, software version collected by scanner and calculates a score value for capture eVc and detectability eVd of each attack techniques for target system. By selecting the highest score values, it is possible to select the most appropriate attack technique for the target system without hack knack(professional pentester’s skill) .
CATSploit automatically performs penetration tests in the following sequence:
Information gathering and prior information input First, gathering information of target systems. CATSploit supports nmap and OpenVAS to gather information of target systems. CATSploit also supports prior information of target systems if you have.
Calculating score value of attack techniques Using information obtained in the previous phase and attack techniques database, evaluation values of capture (eVc) and detectability (eVd) of each attack techniques are calculated. For each target computer, the values of each attack technique are calculated.
Selection of attack techniques by using scores and make attack scenario Select attack techniques and create attack scenarios according to pre-defined policies. For example, for a policy that prioritized hard-to-detect, the attack techniques with the lowest eVd(Detectable Score) will be selected.
Execution of attack scenario CATSploit executes the attack techniques according to attack scenario constructed in the previous phase. CATSploit uses Metasploit as a framework and Metasploit API to execute actual attacks.
CATSploit has the following prerequisites:
For Metasploit, Nmap and OpenVAS, it is assumed to be installed with the Kali Distribution.
To install the latest version of CATSploit, please use the following commands:
$ git clone https://github.com/catsploit/catsploit.git
$ cd catsploit
$ git clone https://github.com/catsploit/cats-helper.git
$ sudo ./setup.sh
CATSploit is a server-client configuration, and the server reads the configuration JSON file at startup. In config.json, the following fields should be modified for your environment.
(*) Adjust the number according to the specs of your machine.
To start the server, execute the following command:
$ python cats_server.py -c [CONFIG_FILE]
Next, prepare another console, start the client program, and initiate a connection to the server.
$ python catsploit.py -s [SOCKET_PATH]
After successfully connecting to the server and initializing it, the session will start.
   _________  ___________       __      _ __
  / ____/   |/_  __/ ___/____  / /___  (_) /_
 / /   / /| | / /  \__ \/ __ \/ / __ \/ / __/
/ /___/ ___ |/ /  ___/ / /_/ / / /_/ / / /_
\____/_/  |_/_/  /____/ .___/_/\____/_/\__/
                     /_/

[*] Connecting to cats-server
[*] Done.
[*] Initializing server
[*] Done.
catsploit>
The client can execute a variety of commands. Each command can be executed with -h option to display the format of its arguments.
usage: [-h] {host,scenario,scan,plan,attack,post,reset,help,exit} ...

positional arguments:
  {host,scenario,scan,plan,attack,post,reset,help,exit}

options:
  -h, --help       show this help message and exit
I've posted the commands and options below as well for reference.
host list:
 show information about the hosts
 usage:  host list [-h]
 options:
  -h, --help       show this help message and exit

host detail:
 show more information about one host
 usage:  host detail [-h] host_id
 positional arguments:
  host_id          ID of the host for which you want to show information
 options:
  -h, --help       show this help message and exit

scenario list:
 show information about the scenarios
 usage:  scenario list [-h]
 options:
  -h, --help       show this help message and exit

scenario detail:
 show more information about one scenario
 usage:  scenario detail [-h] scenario_id
 positional arguments:
  scenario_id      ID of the scenario for which you want to show information
 options:
  -h, --help       show this help message and exit

scan:
 run network-scan and security-scan
 usage:  scan [-h] [--port PORT] targe   t_host [target_host ...]
 positional arguments:
  target_host      IP address to be scanned
 options:
  -h, --help       show this help message and exit
  --port PORT      ports to be scanned

plan:
 planning attack scenarios
 usage:  plan [-h] src_host_id dst_host_id
 positional arguments:
  src_host_id      originating host
  dst_host_id      target host
 options:
  -h, --help       show this help message and exit

attack:
 execute attack scenario
 usage:  attack [-h] scenario_id
 positional arguments:
  scenario_id      ID of the scenario you want to execute

 options:
  -h, --help       show this help message and exit

post find-secret:
 find confidential information files that can be performed on the pwned host
 usage:  post find-secret [-h] host_id
 positional arguments:
  host_id          ID of the host for which you want to find confidential information
 op   tions:
  -h, --help       show this help message and exit

reset:
 reset data on the server
 usage:  reset [-h] {system} ...
 positional arguments:
  {system}         reset system
options:
  -h, --help  show this help message and exit

exit:
  exit CATSploit
  usage:  exit [-h]
  options:
   -h, --help  show this help message and exit
In this example, we use CATSploit to scan network, plan the attack scenario, and execute the attack.
catsploit> scan 192.168.0.0/24
Network Scanning ... 100%
[*] Total 2 hosts were discovered.
Vulnerability Scanning ... 100%
[*] Total 14 vulnerabilities were discovered.
catsploit> host list
┏━━━━━━━━━━┳━━━━━━━━━━━━━━━━┳━━━━━━━━━━┳━━━━━━━━━━━━━━━━━━━━━━━━━━━━━━━━━━┳━━━━━━━┓
┃ hostID ┃ IP ┃ Hostname ┃ Platform ┃ Pwned ┃
┡━━━━━━ ━━━╇━━━━━━━━━━━━━━━━╇━━━━━━━━━━╇━━━━━━━━━━━━━━━━━━━━━━━━━━━━━━━━━━╇━━━━━━━┩
│ attacker │ 0.0.0.0 │ kali │ kali 2022.4 │ True │
│ h_exbiy6 │ 192.168.0.10 │ │ Linux 3.10 - 4.11 │ False │
│ h_nhqyfq │ 192.168.0.20 │ │ Microsoft Windows 7 SP1 │ False │
└──────────┴ ───────────────┴──────────┴──────────────────────────────────┴───────┘
catsploit> host detail h_exbiy6
┏━━━━━━━━━━┳━━━━━━━━━━━━━━┳━━━━━━━━━━┳━━━━━━━━━━━━━━┳━━━━━━━┓
┃ hostID ┃ IP ┃ Hostname ┃ Platform ┃ Pwned ┃
┡━━━━━━━━━━╇━━━━━━━━━━━━━━╇━━━━━━━━━━╇━━━━━━━━━━━━━━╇━━━━━━━┩
│ h_exbiy6 │ 192.168.0.10 │ ubuntu │ ubuntu 14.04 │ False │
└──────────┴──────────────┴──────────┴──────────────┴─ ─────┘
[IP address]
┏━━━━━━━━━━━━━━┳━━━━━━━━━━┳━━━━━━┳━━━━━━━━━━━━┓
┃ ipv4 ┃ ipv4mask ┃ ipv6 ┃ ipv6prefix ┃
┡━━━━━━━━━━━━━━╇━━━━━━━━━━╇━━━━━━╇━━━━━━━━━━━━┩
│ 192.168.0.10 │ │ │ │
└──────────── ─┴──────────┴──────┴────────────┘
[Open ports]
┏━━━━━━━━━━━━━━┳━━━━━━━┳━━━━━━┳━━━━━━━━━━━━━┳━━━━━━━━━━━━━━┳━━━━━━━━━━━━━━━━━━━━━━━━━━━━┓
┃ ip ┃ proto ┃ port ┃ service ┃ product ┃ version ┃
┡━━━━━━━━━━━━━━╇━━━━━━━╇━━━━━━╇━━━━━━━━━━━━━╇━━━━━━━━━━━━━━╇━━━━━━━━━━━━━━━━━━━━━━━━━━━━┩
│ 192.168.0.10 │ tcp │ 21 │ ftp │ ProFTPD │ 1.3.5 │
│ 192.168.0.10 │ tcp │ 22 │ ssh │ OpenSSH │ 6.6.1p1 Ubuntu 2ubuntu2.10 │
│ 192.168.0.10 │ tcp │ 80 │ http │ Apache httpd │ 2.4.7 │
│ 192.168.0.10 │ tcp │ 445 │ netbios-ssn │ Samba smbd │ 3.X - 4.X │
│ 192.168.0.10 │ tcp │ 631 │ ipp │ CUPS │ 1.7 │
└──────────────┴───────┴──────┴─────────────┴──────────────┴────────────────────────────┘
[Vulnerabilities]
┏━━━━━━━━━━━━━━┳━━━━━━━┳━━━━━━┳━━━━━━━━━━━━━━━━━━━━━━━━━━━━━━━━━━━━━━━━━━━━━━━━━━━━━━━━━━━━━━━━━━━━━┳━━━━━━━━━━━━━━━━┓
┃ ip ┃ proto ┃ port ┃ vuln_name ┃ cve ┃
┡━━━━━━━━━━━━━━╇━━━━━━━╇━━━━━━╇━━━━━━━━━━━━━━━━━━━━━━━━━━━━━━━━━━━━━━━━━━━━━━━━━━━━━━━━━━━━━━━━━━━━━╇━━━━━━━━━━━━━━━━┩
│ 192.168.0.10 │ tcp │ 0 │ TCP Timestamps Information Disclosure │ N/A │
│ 192.168.0.10 │ tcp │ 21 │ FTP Unencrypted Cleartext Login │ N/A │
│ 192.168.0.10 │ tcp │ 22 │ Weak MAC Algorithm(s) Supported (SSH) │ N/A │
│ 192.168.0.10 │ tcp │ 22 │ Weak Encryption Algorithm(s) Supported (SSH) │ N/A │
│ 192.168.0.10 │ tcp │ 22 │ Weak Host Key Algorithm(s) (SSH) │ N/A │
│ 192.168.0.10 │ tcp │ 22 │ Weak Key Exchange (KEX) Algorithm(s) Supported (SSH) │ N/A │
│ 192.168.0.10 │ tcp │ 80 │ Test HTTP dangerous methods │ N/A │
│ 192.168.0.10 │ tcp │ 80 │ Drupal Core SQLi Vulnerability (SA-CORE-2014-005) - Active Check │ CVE-2014-3704 │
│ 192.168.0.10 │ tcp │ 80 │ Drupal Coder RCE Vulnerability (SA-CONTRIB-2016-039) - Active Check │ N/A │
│ 192.168.0.10 │ tcp │ 80 │ Sensitive File Disclosure (HTTP) │ N/A │
│ 192.168.0.10 │ tcp │ 80 │ Unprotected Web App / Device Installers (HTTP) │ N/A │
│ 192.168.0.10 │ tcp │ 80 │ Cleartext Transmission of Sensitive Information via HTTP │ N/A │
│ 192.168.0.10 │ tcp │ 80 │ jQuery < 1.9.0 XSS Vulnerability │ CVE-2012-6708 │
│ 192.168.0.10 │ tcp │ 80 │ jQuery < 1.6.3 XSS Vulnerability │ CVE-2011-4969 │
│ 192.168.0.10 │ tcp │ 80 │ Drupal 7.0 Information Disclosure Vulnerability - Active Check │ CVE-2011-3730 │
│ 192.168.0.10 │ tcp │ 631 │ SSL/TLS: Report Vulnerable Cipher Suites for HTTPS │ CVE-2016-2183 │
│ 192.168.0.10 │ tcp │ 631 │ SSL/TLS: Report Vulnerable Cipher Suites for HTTPS │ CVE-2016-6329 │
│ 192.168.0.10 │ tcp │ 631 │ SSL/TLS: Report Vulnerable Cipher Suites for HTTPS │ CVE-2020-12872 │
│ 192.168.0.10 │ tcp │ 631 │ SSL/TLS: Deprecated TLSv1.0 and TLSv1.1 Protocol Detection │ CVE-2011-3389 │
│ 192.168.0.10 │ tcp │ 631 │ SSL/TLS: Deprecated TLSv1.0 and TLSv1.1 Protocol Detection │ CVE-2015-0204 │
└──────────────┴───────┴──────┴─────────────────────────────────────────────────────────────────────┴───& #9472;────────────┘
[Users]
┏━━━━━━━━━━━┳━━━━━━━┓
┃ user name ┃ group ┃
┡━━━━━━━━━━━╇━━━━━━━┩
└───────────┴───────┘
catsploit> plan attacker h_exbiy6
Planning attack scenario...100%
[*] Done. 15 scenarios was planned.
[*] To check each scenario, try 'scenario list' and/or 'scenario detail'.
catsploit> scenario list
┏━━━━━━━━━━━━━┳━━━━━ ━━━━━━━┳━━━━━━━━━━━━━━━━┳━━━━━━━┳━━━━━━━┳━━━━━━━┳━━━━━━━━━━━━━━━━━━━━━━━━━━━━━━━┓
┃ scenario id ┃ src host ip ┃ target host ip ┃ eVc ┃ eVd ┃ steps ┃ first attack step ┃
┡━━━━━━━━━━━━━╇━━━━━━━━━━━━━╇━━━━━━━━γ 3;━━━━━━━╇━━━━━━━╇━━━━━━━╇━━━━━━━╇━━━━━━━━━━━━━━━━━━━━━━━━━━━━━━━┩
│ 3d3ivc │ 0.0.0.0 │ 192.168.0.10 │ 1.0 │ 32.0 │ 1 │ exploit/multi/http/jenkins_s… │
│ 5gnsvh │ 0.0.0.0 │ 192.168.0.10 │ 1.0 │ 53.76 │ 2 │ exploit/multi/http/jenkins_s… │
│ 6nlxyc │ 0.0.0.0 │ 192.168.0.10 │ 0.0 │ 48.32 │ 2 │ exploit/multi/http/jenkins_s… │
│ 8jos4z │ 0.0.0.0 │ 192.168.0.1 0 │ 0.7 │ 72.8 │ 2 │ exploit/multi/http/jenkins_s… │
│ 8kmmts │ 0.0.0.0 │ 192.168.0.10 │ 0.0 │ 32.0 │ 1 │ exploit/multi/elasticsearch/… │
│ agjmma │ 0.0.0.0 │ 192.168.0.10 │ 0.0 │ 24.0 │ 1 │ exploit/windows/http/managee… │
│ joglhf │ 0.0.0.0 │ 192.168.0.10 │ 70.0 │ 60.0 │ 1 │ auxiliary/scanner/ssh/ssh_lo… │
│ rmgrof │ 0.0.0.0 │ 192.168.0.10 │ 100.0 │ 32.0 │ 1 │ exploit/multi/http/drupal_dr… │
│ xuowzk │ 0.0.0.0 │ 192.168.0.10 │ 0.0 │ 24.0 │ 1 │ exploit/multi/http/struts_dm… │
│ yttv51 │ 0.0.0.0 │ 192.168.0.10 │ 0.01 │ 53.76 │ 2 │ exploit/multi/http/jenkins_s… │
│ znv76x │ 0.0.0.0 │ 192.168.0.10 │ 0.01 │ 53.76 │ 2 │ exploit/multi/http/jenkins_s… │
└─────────────┴─────────────┴────────────────┴───────┴───────┴───────┴───────────────────────────────┘
catsploit> scenario detail rmgrof
┏━━━━━━━━━━━━━┳━━━━━━━━━━━━━━━━┳━━━━━━━┳━━━━━━┓
┃ src host ip ┃ target host ip ┃ eVc ┃ eVd ┃
┡━━━━━━━━━━━━━╇━━━━━━━━━━━━━━━━╇━━━━━━━╇━━━━━━┩
│ 0.0.0.0 │ 192.168.0.10 │ 100.0 │ 32.0 │
└─────────────┴──────── ───────┴───────┴──────┘
[Steps]
┏━━━┳━━━━━━━━━━━━━━━━━━━━━━━━━━━━━━━━━━━━━━━┳━━━━━━━━━━━━━━━━━━━━━━━┓
┃ # ┃ step ┃ params ┃
┡━━━╇━━━━━━━━━━━━━━━━━━━━━━━━━━━ ━━━━━━━━━━━╇━━━━━━━━━━━━━━━━━━━━━━━┩
│ 1 │ exploit/multi/http/drupal_drupageddon │ RHOSTS: 192.168.0.10 │
│ │ │ LHOST: 192.168.10.100 │
└───┴───────────────────────────────────────┴───────────────────────┘
catsploit> attack rmgrof
> ~> ~
> Metasploit Console Log
> ~
> ~
[+] Attack scenario succeeded!
catsploit> exit
Bye.
All informations and codes are provided solely for educational purposes and/or testing your own systems.
For any inquiry, please contact the email address as follows:
catsploit@nk.MitsubishiElectric.co.jp
![]()
NetworkSherlock is a powerful and flexible port scanning tool designed for network security professionals and penetration testers. With its advanced capabilities, NetworkSherlock can efficiently scan IP ranges, CIDR blocks, and multiple targets. It stands out with its detailed banner grabbing capabilities across various protocols and integration with Shodan, the world's premier service for scanning and analyzing internet-connected devices. This Shodan integration enables NetworkSherlock to provide enhanced scanning capabilities, giving users deeper insights into network vulnerabilities and potential threats. By combining local port scanning with Shodan's extensive database, NetworkSherlock offers a comprehensive tool for identifying and analyzing network security issues.
NetworkSherlock requires Python 3.6 or later.
git clone https://github.com/HalilDeniz/NetworkSherlock.gitpip install -r requirements.txtUpdate the networksherlock.cfg file with your Shodan API key:
[SHODAN]
api_key = YOUR_SHODAN_API_KEYpython3 networksherlock.py --help
usage: networksherlock.py [-h] [-p PORTS] [-t THREADS] [-P {tcp,udp}] [-V] [-s SAVE_RESULTS] [-c] target
NetworkSherlock: Port Scan Tool
positional arguments:
target Target IP address(es), range, or CIDR (e.g., 192.168.1.1, 192.168.1.1-192.168.1.5,
192.168.1.0/24)
options:
-h, --help show this help message and exit
-p PORTS, --ports PORTS
Ports to scan (e.g. 1-1024, 21,22,80, or 80)
-t THREADS, --threads THREADS
Number of threads to use
-P {tcp,udp}, --protocol {tcp,udp}
Protocol to use for scanning
-V, --version-info Used to get version information
-s SAVE_RESULTS, --save-results SAVE_RESULTS
File to save scan results
-c, --ping-check Perform ping check before scanning
--use-shodan Enable Shodan integration for additional information
target: The target IP address(es), IP range, or CIDR block to scan.-p, --ports: Ports to scan (e.g., 1-1000, 22,80,443).-t, --threads: Number of threads to use.-P, --protocol: Protocol to use for scanning (tcp or udp).-V, --version-info: Obtain version information during banner grabbing.-s, --save-results: Save results to the specified file.-c, --ping-check: Perform a ping check before scanning.--use-shodan: Enable Shodan integration.Scan a single IP address on default ports:
python networksherlock.py 192.168.1.1Scan an IP address with a custom range of ports:
python networksherlock.py 192.168.1.1 -p 1-1024Scan multiple IP addresses on specific ports:
python networksherlock.py 192.168.1.1,192.168.1.2 -p 22,80,443Scan an entire subnet using CIDR notation:
python networksherlock.py 192.168.1.0/24 -p 80Perform a scan using multiple threads for faster execution:
python networksherlock.py 192.168.1.1-192.168.1.5 -p 1-1024 -t 20Scan using a specific protocol (TCP or UDP):
python networksherlock.py 192.168.1.1 -p 53 -P udppython networksherlock.py 192.168.1.1 --use-shodanpython networksherlock.py 192.168.1.1,192.168.1.2 -p 22,80,443 -V --use-shodanPerform a detailed scan with banner grabbing and save results to a file:
python networksherlock.py 192.168.1.1 -p 1-1000 -V -s results.txtScan an IP range after performing a ping check:
python networksherlock.py 10.0.0.1-10.0.0.255 -c$ python3 networksherlock.py 10.0.2.12 -t 25 -V -p 21-6000 -t 25
********************************************
Scanning target: 10.0.2.12
Scanning IP : 10.0.2.12
Ports : 21-6000
Threads : 25
Protocol : tcp
---------------------------------------------
Port Status Service VERSION
22 /tcp open ssh SSH-2.0-OpenSSH_4.7p1 Debian-8ubuntu1
21 /tcp open telnet 220 (vsFTPd 2.3.4)
80 /tcp open http HTTP/1.1 200 OK
139 /tcp open netbios-ssn %SMBr
25 /tcp open smtp 220 metasploitable.localdomain ESMTP Postfix (Ubuntu)
23 /tcp open smtp #' #'
445 /tcp open microsoft-ds %SMBr
514 /tcp open shell
512 /tcp open exec Where are you?
1524/tcp open ingreslock ro ot@metasploitable:/#
2121/tcp open iprop 220 ProFTPD 1.3.1 Server (Debian) [::ffff:10.0.2.12]
3306/tcp open mysql >
5900/tcp open unknown RFB 003.003
53 /tcp open domain
---------------------------------------------$ python3 networksherlock.py 10.0.2.0/24 -t 10 -V -p 21-1000
********************************************
Scanning target: 10.0.2.1
Scanning IP : 10.0.2.1
Ports : 21-1000
Threads : 10
Protocol : tcp
---------------------------------------------
Port Status Service VERSION
53 /tcp open domain
********************************************
Scanning target: 10.0.2.2
Scanning IP : 10.0.2.2
Ports : 21-1000
Threads : 10
Protocol : tcp
---------------------------------------------
Port Status Service VERSION
445 /tcp open microsoft-ds
135 /tcp open epmap
********************************************
Scanning target: 10.0.2.12
Scanning IP : 10.0.2.12
Ports : 21- 1000
Threads : 10
Protocol : tcp
---------------------------------------------
Port Status Service VERSION
21 /tcp open ftp 220 (vsFTPd 2.3.4)
22 /tcp open ssh SSH-2.0-OpenSSH_4.7p1 Debian-8ubuntu1
23 /tcp open telnet #'
80 /tcp open http HTTP/1.1 200 OK
53 /tcp open kpasswd 464/udpcp
445 /tcp open domain %SMBr
3306/tcp open mysql >
********************************************
Scanning target: 10.0.2.20
Scanning IP : 10.0.2.20
Ports : 21-1000
Threads : 10
Protocol : tcp
---------------------------------------------
Port Status Service VERSION
22 /tcp open ssh SSH-2.0-OpenSSH_8.2p1 Ubuntu-4ubuntu0.9Contributions are welcome! To contribute to NetworkSherlock, follow these steps:

NetProbe is a tool you can use to scan for devices on your network. The program sends ARP requests to any IP address on your network and lists the IP addresses, MAC addresses, manufacturers, and device models of the responding devices.
You can download the program from the GitHub page.
$ git clone https://github.com/HalilDeniz/NetProbe.gitTo install the required libraries, run the following command:
$ pip install -r requirements.txtTo run the program, use the following command:
$ python3 netprobe.py [-h] -t [...] -i [...] [-l] [-o] [-m] [-r] [-s]-h,--help: show this help message and exit-t,--target: Target IP address or subnet (default: 192.168.1.0/24)-i,--interface: Interface to use (default: None)-l,--live: Enable live tracking of devices-o,--output: Output file to save the results-m,--manufacturer: Filter by manufacturer (e.g., 'Apple')-r,--ip-range: Filter by IP range (e.g., '192.168.1.0/24')-s,--scan-rate: Scan rate in seconds (default: 5)$ python3 netprobe.py -t 192.168.1.0/24 -i eth0 -o results.txt -l$ python3 netprobe.py --help
usage: netprobe.py [-h] -t [...] -i [...] [-l] [-o] [-m] [-r] [-s]
NetProbe: Network Scanner Tool
options:
-h, --help show this help message and exit
-t [ ...], --target [ ...]
Target IP address or subnet (default: 192.168.1.0/24)
-i [ ...], --interface [ ...]
Interface to use (default: None)
-l, --live Enable live tracking of devices
-o , --output Output file to save the results
-m , --manufacturer Filter by manufacturer (e.g., 'Apple')
-r , --ip-range Filter by IP range (e.g., '192.168.1.0/24')
-s , --scan-rate Scan rate in seconds (default: 5)
$ python3 netprobe.py You can enable live tracking of devices on your network by using the -l or --live flag. This will continuously update the device list every 5 seconds.
$ python3 netprobe.py -t 192.168.1.0/24 -i eth0 -lYou can save the scan results to a file by using the -o or --output flag followed by the desired output file name.
$ python3 netprobe.py -t 192.168.1.0/24 -i eth0 -l -o results.txt
┏━━━━━━━━━━━━━━┳━━━━━━━━━━━━━━━━━━━┳━━━━━━━━━━━━━┳━━━━━━━━━━━━━━━━━━━━━━━━━━━━━━┓
┃ IP Address   ┃ MAC Address       ┃ Packet Size ┃ Manufacturer                 ┃
┡━━━━━━━━━━━━━━╇━━━━━━━━━━━━━━━━━━━╇━━━━━━━━━━━━━╇━━━━━━━━━━━━━━━━━━━━━━━━━━━━━━┩
│ 192.168.1.1  │ **:6e:**:97:**:28 │ 102         │ ASUSTek COMPUTER INC.        │
│ 192.168.1.3  │ 00:**:22:**:12:** │ 102         │ InPro Comm                   │
│ 192.168.1.2  │ **:32:**:bf:**:00 │ 102         │ Xiaomi Communications Co Ltd │
│ 192.168.1.98 │ d4:**:64:**:5c:** │ 102         │ ASUSTek COMPUTER INC.        │
│ 192.168.1.25 │ **:49:**:00:**:38 │ 102         │ Unknown                      │
└──────────────┴───────────────────┴─────────────┴──────────────────────────────┘
If you have any questions, suggestions, or feedback about the program, please feel free to reach out to me through any of the following platforms:
This program is released under the MIT LICENSE. See LICENSE for more information.

Existing tools don't really "understand" code. Instead, they mostly parse texts.
DeepSecrets expands classic regex-search approaches with semantic analysis, dangerous variable detection, and more efficient usage of entropy analysis. Code understanding supports 500+ languages and formats and is achieved by lexing and parsing - techniques commonly used in SAST tools.
DeepSecrets also introduces a new way to find secrets: just use hashed values of your known secrets and get them found plain in your code.
Under the hood story is in articles here: https://hackernoon.com/modernizing-secrets-scanning-part-1-the-problem
Pff, is it still regex-based?
Yes and no. Of course, it uses regexes and finds typed secrets like any other tool. But language understanding (the lexing stage) and variable detection also use regexes under the hood. So regexes is an instrument, not a problem.
Why don't you build true abstract syntax trees? It's academically more correct!
DeepSecrets tries to keep a balance between complexity and effectiveness. Building a true AST is a pretty complex thing and simply an overkill for our specific task. So the tool still follows the generic SAST-way of code analysis but optimizes the AST part using a different approach.
I'd like to build my own semantic rules. How do I do that?
Only through the code by the moment. Formalizing the rules and moving them into a flexible and user-controlled ruleset is in the plans.
I still have a question
Feel free to communicate with the maintainer
From Github via pip
$ pip install git+https://github.com/avito-tech/deepsecrets.git
From PyPi
$ pip install deepsecrets
The easiest way:
$ deepsecrets --target-dir /path/to/your/code --outfile report.json
This will run a scan against /path/to/your/code using the default configuration:
Report will be saved to report.json
Run deepsecrets --help for details.
Basically, you can use your own ruleset by specifying --regex-rules. Paths to be excluded from scanning can be set via --excluded-paths.
The built-in ruleset for regex checks is located in /deepsecrets/rules/regexes.json. You're free to follow the format and create a custom ruleset.
Example ruleset for regex checks is located in /deepsecrets/rules/regexes.json. You're free to follow the format and create a custom ruleset.
There are several core concepts:
FileTokenizerTokenEngineFindingScanModeJust a pythonic representation of a file with all needed methods for management.
A component able to break the content of a file into pieces - Tokens - by its logic. There are four types of tokenizers available:
FullContentTokenizer: treats all content as a single token. Useful for regex-based search.PerWordTokenizer: breaks given content by words and line breaks.LexerTokenizer: uses language-specific smarts to break code into semantically correct pieces with additional context for each token.A string with additional information about its semantic role, corresponding file, and location inside it.
A component performing secrets search for a single token by its own logic. Returns a set of Findings. There are three engines available:
RegexEngine: checks tokens' values through a special rulesetSemanticEngine: checks tokens produced by the LexerTokenizer using additional context - variable names and valuesHashedSecretEngine: checks tokens' values by hashing them and trying to find coinciding hashes inside a special rulesetThis is a data structure representing a problem detected inside code. Features information about the precise location inside a file and a rule that found it.
This component is responsible for the scan process.
PerFileAnalyzer - the method called against each file, returning a list of findings. The primary usage is to initialize necessary engines, tokenizers, and rulesets.The current implementation has a CliScanMode built by the user-provided config through the cli args.
The project is supposed to be developed using VSCode and 'Remote containers' feature.
Steps:
VTScanner is a versatile Python tool that empowers users to perform comprehensive file scans within a selected directory for malware detection and analysis. It seamlessly integrates with the VirusTotal API to deliver extensive insights into the safety of your files. VTScanner is compatible with Windows, macOS, and Linux, making it a valuable asset for security-conscious individuals and professionals alike.
VTScanner enables users to choose a specific directory for scanning. By doing so, you can assess all the files within that directory for potential malware threats.
Upon completing a scan, VTScanner generates detailed reports summarizing the results. These reports provide essential information about the scanned files, including their hash, file type, and detection status.
VTScanner leverages file hashes for efficient malware detection. By comparing the hash of each file to known malware signatures, it can quickly identify potential threats.
VTScanner interacts seamlessly with the VirusTotal API. If a file has not been scanned on VirusTotal previously, VTScanner automatically submits its hash for analysis. It then waits for the response, allowing you to access comprehensive VirusTotal reports.
For users with free VirusTotal accounts, VTScanner offers a time delay feature. This function introduces a specified delay (recommended between 20-25 seconds) between each scan request, ensuring compliance with VirusTotal's rate limits.
If you have a premium VirusTotal API account, VTScanner provides the option for concurrent scanning. This feature allows you to optimize scanning speed, making it an ideal choice for more extensive file collections.
VTScanner goes the extra mile by enabling users to explore VirusTotal's detailed reports for any file with a simple double-click. This feature offers valuable insights into file detections and behavior.
For added convenience, VTScanner comes with preinstalled Windows binaries compiled using PyInstaller. These binaries are detected by 10 antivirus scanners.
If you prefer to generate your own binaries or use VTScanner on non-Windows platforms, you can easily create custom binaries with PyInstaller.
Before installing VTScanner, make sure you have the following prerequisites in place:
pip install -r requirements.txtYou can acquire VTScanner by cloning the GitHub repository to your local machine:
git clone https://github.com/samhaxr/VTScanner.git
To initiate VTScanner, follow these steps:
cd VTScanner
python3 VTScanner.py
VTScanner is released under the GPL License. Refer to the LICENSE file for full licensing details.
VTScanner is a tool designed to enhance security by identifying potential malware threats. However, it's crucial to remember that no tool provides foolproof protection. Always exercise caution and employ additional security measures when handling files that may contain malicious content. For inquiries, issues, or feedback, please don't hesitate to open an issue on our GitHub repository. Thank you for choosing VTScanner v1.0.
![]()
A modular web reconnaissance tool and vulnerability scanner based on Karton (https://github.com/CERT-Polska/karton).
The Artemis project has been initiated by the KN Cyber science club of Warsaw University of Technology and is currently being maintained by CERT Polska.
Artemis is experimental software, under active development - use at your own risk.
For an up-to-date list of features, please refer to the documentation.
To run the tests, use:
./scripts/test
Artemis uses pre-commit to run linters and format the code. pre-commit is executed on CI to verify that the code is formatted properly.
To run it locally, use:
pre-commit run --all-files
To setup pre-commit so that it runs before each commit, use:
pre-commit install
To build the documentation, use:
cd docs
python3 -m venv venv
. venv/bin/activate
pip install -r requirements.txt
make html
Please refer to the documentation.
Contributions are welcome! We will appreciate both ideas for new Artemis modules (added as GitHub issues) as well as pull requests with new modules or code improvements.
However obvious it may seem we kindly remind you that by contributing to Artemis you agree that the BSD 3-Clause License shall apply to your input automatically, without the need for any additional declarations to be made.

| Serial No. | Tool Name | Serial No. | Tool Name | |
|---|---|---|---|---|
| 1 | whatweb | 2 | nmap | |
| 3 | golismero | 4 | host | |
| 5 | wget | 6 | uniscan | |
| 7 | wafw00f | 8 | dirb | |
| 9 | davtest | 10 | theharvester | |
| 11 | xsser | 12 | fierce | |
| 13 | dnswalk | 14 | dnsrecon | |
| 15 | dnsenum | 16 | dnsmap | |
| 17 | dmitry | 18 | nikto | |
| 19 | whois | 20 | lbd | |
| 21 | wapiti | 22 | devtest | |
| 23 | sslyze |
Critical:- Vulnerabilities that score in the critical range usually have most of the following characteristics: Exploitation of the vulnerability likely results in root-level compromise of servers or infrastructure devices.Exploitation is usually straightforward, in the sense that the attacker does not need any special authentication credentials or knowledge about individual victims, and does not need to persuade a target user, for example via social engineering, into performing any special functions.
High:- An attacker can fully compromise the confidentiality, integrity or availability, of a target system without specialized access, user interaction or circumstances that are beyond the attacker’s control. Very likely to allow lateral movement and escalation of attack to other systems on the internal network of the vulnerable application. The vulnerability is difficult to exploit. Exploitation could result in elevated privileges. Exploitation could result in a significant data loss or downtime.
Medium:- An attacker can partially compromise the confidentiality, integrity, or availability of a target system. Specialized access, user interaction, or circumstances that are beyond the attacker’s control may be required for an attack to succeed. Very likely to be used in conjunction with other vulnerabilities to escalate an attack.Vulnerabilities that require the attacker to manipulate individual victims via social engineering tactics. Denial of service vulnerabilities that are difficult to set up. Exploits that require an attacker to reside on the same local network as the victim. Vulnerabilities where exploitation provides only very limited access. Vulnerabilities that require user privileges for successful exploitation.
Low:- An attacker has limited scope to compromise the confidentiality, integrity, or availability of a target system. Specialized access, user interaction, or circumstances that are beyond the attacker’s control is required for an attack to succeed. Needs to be used in conjunction with other vulnerabilities to escalate an attack.
Info:- An attacker can obtain information about the web site. This is not necessarily a vulnerability, but any information which an attacker obtains might be used to more accurately craft an attack at a later date. Recommended to restrict as far as possible any information disclosure.
CVSS V3 SCORE RANGE SEVERITY IN ADVISORY 0.1 - 3.9 Low 4.0 - 6.9 Medium 7.0 - 8.9 High 9.0 - 10.0 Critical
Use Program as python3 web_scan.py (https or http) ://example.com
--help
--update
| Serial No. | Vulnerabilities to Scan | Serial No. | Vulnerabilities to Scan | |
|---|---|---|---|---|
| 1 | IPv6 | 2 | Wordpress | |
| 3 | SiteMap/Robot.txt | 4 | Firewall | |
| 5 | Slowloris Denial of Service | 6 | HEARTBLEED | |
| 7 | POODLE | 8 | OpenSSL CCS Injection | |
| 9 | FREAK | 10 | Firewall | |
| 11 | LOGJAM | 12 | FTP Service | |
| 13 | STUXNET | 14 | Telnet Service | |
| 15 | LOG4j | 16 | Stress Tests | |
| 17 | WebDAV | 18 | LFI, RFI or RCE. | |
| 19 | XSS, SQLi, BSQL | 20 | XSS Header not present | |
| 21 | Shellshock Bug | 22 | Leaks Internal IP | |
| 23 | HTTP PUT DEL Methods | 24 | MS10-070 | |
| 25 | Outdated | 26 | CGI Directories | |
| 27 | Interesting Files | 28 | Injectable Paths | |
| 29 | Subdomains | 30 | MS-SQL DB Service | |
| 31 | ORACLE DB Service | 32 | MySQL DB Service | |
| 33 | RDP Server over UDP and TCP | 34 | SNMP Service | |
| 35 | Elmah | 36 | SMB Ports over TCP and UDP | |
| 37 | IIS WebDAV | 38 | X-XSS Protection |
git clone https://github.com/Malwareman007/Scanner-and-Patcher.git
cd Scanner-and-Patcher/setup
python3 -m pip install --no-cache-dir -r requirements.txt

Template contributions , Feature Requests and Bug Reports are more than welcome.
Contributions, issues and feature requests are welcome!
Feel free to check issues page.
![]()
It's a Burp Suite's extension to allow for recursive crawling and scanning of Single Page Applications.
It runs a Chromium browser to scan the webpage for DOM-based XSS.
It can also collect all the requests (XHR, fetch, websockets, etc) issued during the crawling allowing them to be forwarded to Burp's Proxy, Repeater and Intruder.
It requires node and DOMDig.
Latest release can be downloaded here
node's executable and the path of domdig.js in the extension's UI.Burp DOM Scanner uses DOMDig as the crawling and scanning engine.
DOMDig is a DOM XSS scanner that runs inside the Chromium web browser and it can scan single page applications (SPA) recursively. Unlike other scanners, DOMDig can crawl any webapplication (including gmail) by keeping track of DOM modifications and XHR/fetch/websocket requests and it can simulate a real user interaction by firing events. During this process, XSS payloads are put into input fields and their execution is tracked in order to find injection points and the related URL modifications.
Details about usage, performed checks and reported vulnerabilities, can be found at DOMDig's page