                              ____                                  _   _
                             |  _ \ ___  __ _  __ _ ___ _   _ ___| \ | |
                             | |_) / _ \/ _` |/ _` / __| | | / __|  \| |
                             |  __/  __/ (_| | (_| \__ \ |_| \__ \ |\  |
                             |_|   \___|\__, |\__,_|___/\__,_|___/_| \_|
                                       |___/
                                 ███▄    █ ▓█████  ▒█████
                                 ██ ▀█   █ ▓█   ▀ ▒██▒  ██▒
                                ▓██  ▀█ ██▒▒███   ▒██░  ██▒
                                ▓██▒  ▐▌██▒▒▓█  ▄ ▒██   ██░
                                ▒██░   ▓██░░▒████▒░ ████▓▒░
                                ░ ▒░   ▒ ▒ ░░ ▒░ ░░ ▒░▒░▒░
                                ░ ░░   ░ ▒░ ░ ░  ░  ░ ▒ ▒░
                                   ░   ░ ░    ░   ░ ░ ░ ▒
                                         ░    ░  ░    ░ ░
PEGASUS-NEO is a comprehensive penetration testing framework designed for security professionals and ethical hackers. It combines multiple security tools and custom modules for reconnaissance, exploitation, wireless attacks, web hacking, and more.
This tool is provided for educational and ethical testing purposes only. Usage of PEGASUS-NEO for attacking targets without prior mutual consent is illegal. It is the end user's responsibility to obey all applicable local, state, and federal laws.
Developers assume no liability and are not responsible for any misuse or damage caused by this program.
PEGASUS-NEO - Advanced Penetration Testing Framework
Copyright (C) 2024 Letda Kes dr. Sobri. All rights reserved.

This software is proprietary and confidential. Unauthorized copying, transfer, or
reproduction of this software, via any medium is strictly prohibited.

Written by Letda Kes dr. Sobri <muhammadsobrimaulana31@gmail.com>, January 2024
Password: Sobri
Social media tracking
Exploitation & Pentesting
Custom payload generation
Wireless Attacks
WPS exploitation
Web Attacks
CMS scanning
Social Engineering
Credential harvesting
Tracking & Analysis
# Clone the repository
git clone https://github.com/sobri3195/pegasus-neo.git

# Change directory
cd pegasus-neo

# Install dependencies
sudo python3 -m pip install -r requirements.txt

# Run the tool
sudo python3 pegasus_neo.py
sudo python3 pegasus_neo.py
This is a proprietary project and contributions are not accepted at this time.
For support, please email muhammadsobrimaulana31@gmail.com atau https://lynk.id/muhsobrimaulana
This project is protected under proprietary license. See the LICENSE file for details.
Made with ❤️ by Letda Kes dr. Sobri

Bytes Revealer is a powerful reverse engineering and binary analysis tool designed for security researchers, forensic analysts, and developers. With features like hex view, visual representation, string extraction, entropy calculation, and file signature detection, it helps users uncover hidden data inside files. Whether you are analyzing malware, debugging binaries, or investigating unknown file formats, Bytes Revealer makes it easy to explore, search, and extract valuable information from any binary file.
Bytes Revealer do NOT store any file or data. All analysis is performed in your browser.
Current Limitation: Files less than 50MB can perform all analysis, files bigger up to 1.5GB will only do Visual View and Hex View analysis.
# Node.js 14+ is required
node -v
docker-compose build --no-cache

docker-compose up -d
Now open your browser: http://localhost:8080/
To stop the docker container
docker-compose down
# Clone the repository
git clone https://github.com/vulnex/bytesrevealer

# Navigate to project directory
cd bytesrevealer

# Install dependencies
npm install

# Start development server
npm run dev
# Build the application
npm run build

# Preview production build
npm run preview
Progress bar shows upload and analysis status
Analysis Views
Real-time updates as you navigate
Search Functions
Results are highlighted in the current view
String Analysis
git checkout -b feature/AmazingFeature)git commit -m 'Add some AmazingFeature')git push origin feature/AmazingFeature)This project is licensed under the MIT License - see the LICENSE.md file for details.

Clone the repository: bash git clone https://github.com/ALW1EZ/PANO.git cd PANO
Run the application:
./start_pano.sh
start_pano.bat
The startup script will automatically: - Check for updates - Set up the Python environment - Install dependencies - Launch PANO
In order to use Email Lookup transform You need to login with GHunt first. After starting the pano via starter scripts;
source venv/bin/activate
call venv\Scripts\activate
Visual node and edge styling
Timeline Analysis
Temporal relationship analysis
Map Integration
Connected services discovery
Username Analysis
Web presence analysis
Image Analysis
Entities are the fundamental building blocks of PANO. They represent distinct pieces of information that can be connected and analyzed:
📝 Text: Generic text content
Properties System
Transforms are automated operations that process entities to discover new information and relationships:
🔄 Enrichment: Add data to existing entities
Features
Helpers are specialized tools with dedicated UIs for specific investigation tasks:
🔄 Translator: Translate text between languages
Helper Features
We welcome contributions! To contribute to PANO:
Note: We use a single
mainbranch for development. All pull requests should be made directly tomain.
from dataclasses import dataclass
from typing import ClassVar, Dict, Any
from .base import Entity

@dataclass
class PhoneNumber(Entity):
    name: ClassVar[str] = "Phone Number"
    description: ClassVar[str] = "A phone number entity with country code and validation"

    def init_properties(self):
        """Initialize phone number properties"""
        self.setup_properties({
            "number": str,
            "country_code": str,
            "carrier": str,
            "type": str,  # mobile, landline, etc.
            "verified": bool
        })

    def update_label(self):
        """Update the display label"""
        self.label = self.format_label(["country_code", "number"])
from dataclasses import dataclass
from typing import ClassVar, List
from .base import Transform
from entities.base import Entity
from entities.phone_number import PhoneNumber
from entities.location import Location
from ui.managers.status_manager import StatusManager

@dataclass
class PhoneLookup(Transform):
    name: ClassVar[str] = "Phone Number Lookup"
    description: ClassVar[str] = "Lookup phone number details and location"
    input_types: ClassVar[List[str]] = ["PhoneNumber"]
    output_types: ClassVar[List[str]] = ["Location"]

    async def run(self, entity: PhoneNumber, graph) -> List[Entity]:
        if not isinstance(entity, PhoneNumber):
            return []

        status = StatusManager.get()
        operation_id = status.start_loading("Phone Lookup")

        try:
            # Your phone number lookup logic here
            # Example: query an API for phone number details
            location = Location(properties={
                "country": "Example Country",
                "region": "Example Region",
                "carrier": "Example Carrier",
                "source": "PhoneLookup transform"
            })

            return [location]

        except Exception as e:
            status.set_text(f"Error during phone lookup: {str(e)}")
            return []

        finally:
            status.stop_loading(operation_id)
from PySide6.QtWidgets import (
    QWidget, QVBoxLayout, QHBoxLayout, QPushButton,
    QTextEdit, QLabel, QComboBox
)
from .base import BaseHelper
from qasync import asyncSlot

class DummyHelper(BaseHelper):
    """A dummy helper for testing"""

    name = "Dummy Helper"
    description = "A dummy helper for testing"

    def setup_ui(self):
        """Initialize the helper's user interface"""
        # Create input text area
        self.input_label = QLabel("Input:")
        self.input_text = QTextEdit()
        self.input_text.setPlaceholderText("Enter text to process...")
        self.input_text.setMinimumHeight(100)

        # Create operation selector
        operation_layout = QHBoxLayout()
        self.operation_label = QLabel("Operation:")
        self.operation_combo = QComboBox()
        self.operation_combo.addItems(["Uppercase", "Lowercase", "Title Case"])
        operation_layout.addWidget(self.operation_label)
        operation_layout.addWidget(self.operation_combo)

        # Create process button
        self.process_btn = QPushButton("Process")
        self.process_btn.clicked.connect(self.process_text)

        # Create output text area
        self.output_label = QLabel("Output:")
        self.output_text = QTextEdit()
        self.output_text.setReadOnly(True)
        self.output_text.setMinimumHeight(100)

        # Add widgets to main layout
        self.main_layout.addWidget(self.input_label)
        self.main_layout.addWidget(self.input_text)
        self.main_layout.addLayout(operation_layout)
        self.main_layout.addWidget(self.process_btn)
        self.main_layout.addWidget(self.output_label)
        self.main_layout.addWidget(self.output_text)

        # Set dialog size
        self.resize(400, 500)

    @asyncSlot()
    async def process_text(self):
        """Process the input text based on selected operation"""
        text = self.input_text.toPlainText()
        operation = self.operation_combo.currentText()

        if operation == "Uppercase":
            result = text.upper()
        elif operation == "Lowercase":
            result = text.lower()
        else:  # Title Case
            result = text.title()

        self.output_text.setPlainText(result)
This project is licensed under the Creative Commons Attribution-NonCommercial (CC BY-NC) License.
You are free to: - ✅ Share: Copy and redistribute the material - ✅ Adapt: Remix, transform, and build upon the material
Under these terms: - ℹ️ Attribution: You must give appropriate credit - 🚫 NonCommercial: No commercial use - 🔓 No additional restrictions
Special thanks to all library authors and contributors who made this project possible.
Created by ALW1EZ with AI ❤️

A powerful Python script that allows you to scrape messages and media from Telegram channels using the Telethon library. Features include real-time continuous scraping, media downloading, and data export capabilities.
___________________  _________
\__    ___/  _____/ /   _____/
  |    | /   \  ___ \_____  \
  |    | \    \_\  \/        \
  |____|  \______  /_______  /
                 \/        \/
Before running the script, you'll need:
pip install -r requirements.txt
Contents of requirements.txt:
telethon
aiohttp
asyncio
api_id: A numberapi_hash: A string of letters and numbersKeep these credentials safe, you'll need them to run the script!
git clone https://github.com/unnohwn/telegram-scraper.git
cd telegram-scraper
pip install -r requirements.txt
python telegram-scraper.py
When scraping a channel for the first time, please note:
The script provides an interactive menu with the following options:
You can use either: - Channel username (e.g., channelname) - Channel ID (e.g., -1001234567890)
Data is stored in SQLite databases, one per channel: - Location: ./channelname/channelname.db - Table: messages - id: Primary key - message_id: Telegram message ID - date: Message timestamp - sender_id: Sender's Telegram ID - first_name: Sender's first name - last_name: Sender's last name - username: Sender's username - message: Message text - media_type: Type of media (if any) - media_path: Local path to downloaded media - reply_to: ID of replied message (if any)
Media files are stored in: - Location: ./channelname/media/ - Files are named using message ID or original filename
Data can be exported in two formats: 1. CSV: ./channelname/channelname.csv - Human-readable spreadsheet format - Easy to import into Excel/Google Sheets
./channelname/channelname.json
The continuous scraping feature ([C] option) allows you to: - Monitor channels in real-time - Automatically download new messages - Download media as it's posted - Run indefinitely until interrupted (Ctrl+C) - Maintains state between runs
The script can download: - Photos - Documents - Other media types supported by Telegram - Automatically retries failed downloads - Skips existing files to avoid duplicates
The script includes: - Automatic retry mechanism for failed media downloads - State preservation in case of interruption - Flood control compliance - Error logging for failed operations
Contributions are welcome! Please feel free to submit a Pull Request.
This project is licensed under the MIT License - see the LICENSE file for details.
This tool is for educational purposes only. Make sure to: - Respect Telegram's Terms of Service - Obtain necessary permissions before scraping - Use responsibly and ethically - Comply with data protection regulations
Lobo Guará is a platform aimed at cybersecurity professionals, with various features focused on Cyber Threat Intelligence (CTI). It offers tools that make it easier to identify threats, monitor data leaks, analyze suspicious domains and URLs, and much more.
Allows identifying domains and subdomains that may pose a threat to organizations. SSL certificates issued by trusted authorities are indexed in real-time, and users can search using keywords of 4 or more characters.
Note: The current database contains certificates issued from September 5, 2024.
Allows the insertion of keywords for monitoring. When a certificate is issued and the common name contains the keyword (minimum of 5 characters), it will be displayed to the user.
Generates a link to capture device information from attackers. Useful when the security professional can contact the attacker in some way.
Performs a scan on a domain, displaying whois information and subdomains associated with that domain.
Allows performing a scan on a URL to identify URIs (web paths) related to that URL.
Performs a scan on a URL, generating a screenshot and a mirror of the page. The result can be made public to assist in taking down malicious websites.
Monitors a URL with no active application until it returns an HTTP 200 code. At that moment, it automatically initiates a URL scan, providing evidence for actions against malicious sites.
Centralizes intelligence news from various channels, keeping users updated on the latest threats.
The application installation has been approved on Ubuntu 24.04 Server and Red Hat 9.4 distributions, the links for which are below:
Lobo Guará Implementation on Ubuntu 24.04
Lobo Guará Implementation on Red Hat 9.4
There is a Dockerfile and a docker-compose version of Lobo Guará too. Just clone the repo and do:
docker compose up
Then, go to your web browser at localhost:7405.
Before proceeding with the installation, ensure the following dependencies are installed:
git clone https://github.com/olivsec/loboguara.git
cd loboguara/
nano server/app/config.py
Fill in the required parameters in the config.py file:
class Config:
    SECRET_KEY = 'YOUR_SECRET_KEY_HERE'
    SQLALCHEMY_DATABASE_URI = 'postgresql://guarauser:YOUR_PASSWORD_HERE@localhost/guaradb?sslmode=disable'
    SQLALCHEMY_TRACK_MODIFICATIONS = False

    MAIL_SERVER = 'smtp.example.com'
    MAIL_PORT = 587
    MAIL_USE_TLS = True
    MAIL_USERNAME = 'no-reply@example.com'
    MAIL_PASSWORD = 'YOUR_SMTP_PASSWORD_HERE'
    MAIL_DEFAULT_SENDER = 'no-reply@example.com'

    ALLOWED_DOMAINS = ['yourdomain1.my.id', 'yourdomain2.com', 'yourdomain3.net']

    API_ACCESS_TOKEN = 'YOUR_LOBOGUARA_API_TOKEN_HERE'
    API_URL = 'https://loboguara.olivsec.com.br/api'

    CHROME_DRIVER_PATH = '/opt/loboguara/bin/chromedriver'
    GOOGLE_CHROME_PATH = '/opt/loboguara/bin/google-chrome'
    FFUF_PATH = '/opt/loboguara/bin/ffuf'
    SUBFINDER_PATH = '/opt/loboguara/bin/subfinder'

    LOG_LEVEL = 'ERROR'
    LOG_FILE = '/opt/loboguara/logs/loboguara.log'
sudo chmod +x ./install.sh
sudo ./install.sh
sudo -u loboguara /opt/loboguara/start.sh
Access the URL below to register the Lobo Guará Super Admin
http://your_address:7405/admin
Access the Lobo Guará platform online: https://loboguara.olivsec.com.br/

Lazywarden is a Python automation tool designed to Backup and Restore data from your vault, including Bitwarden attachments. It allows you to upload backups to multiple cloud storage services and receive notifications across multiple platforms. It also offers AES encrypted backups and uses key derivation with Argon2, ensuring maximum security for your data.


Free to use IOC feed for various tools/malware. It started out for just C2 tools but has morphed into tracking infostealers and botnets as well. It uses shodan.io/">Shodan searches to collect the IPs. The most recent collection is always stored in data; the IPs are broken down by tool and there is an all.txt.
The feed should update daily. Actively working on making the backend more reliable
Many of the Shodan queries have been sourced from other CTI researchers:
Huge shoutout to them!
Thanks to BertJanCyber for creating the KQL query for ingesting this feed
And finally, thanks to Y_nexro for creating C2Live in order to visualize the data
If you want to host a private version, put your Shodan API key in an environment variable called SHODAN_API_KEY
echo SHODAN_API_KEY=API_KEY >> ~/.bashrc
bash
python3 -m pip install -r requirements.txt
python3 tracker.py
I encourage opening an issue/PR if you know of any additional Shodan searches for identifying adversary infrastructure. I will not set any hard guidelines around what can be submitted, just know, fidelity is paramount (high true/false positive ratio is the focus).
CureIAM is an easy-to-use, reliable, and performant engine for Least Privilege Principle Enforcement on GCP cloud infra. It enables DevOps and Security team to quickly clean up accounts in GCP infra that have granted permissions of more than what are required. CureIAM fetches the recommendations and insights from GCP IAM recommender, scores them and enforce those recommendations automatically on daily basic. It takes care of scheduling and all other aspects of running these enforcement jobs at scale. It is built on top of GCP IAM recommender APIs and Cloudmarker framework.
Discover what makes CureIAM scalable and production grade.
safe_to_apply_score, risk_score, over_privilege_score. Each score serves a different purpose. For safe_to_apply_score identifies the capability to apply recommendation on automated basis, based on the threshold set in CureIAM.yaml config file.Since CureIAM is built with python, you can run it locally with these commands. Before running make sure to have a configuration file ready in either of /etc/CureIAM.yaml, ~/.CureIAM.yaml, ~/CureIAM.yaml, or CureIAM.yaml and there is Service account JSON file present in current directory with name preferably cureiamSA.json. This SA private key can be named anything, but for docker image build, it is preferred to use this name. Make you to reference this file in config for GCP cloud.
# Install necessary dependencies
$ pip install -r requirements.txt
# Run CureIAM now
$ python -m CureIAM -n
# Run CureIAM process as schedular
$ python -m CureIAM
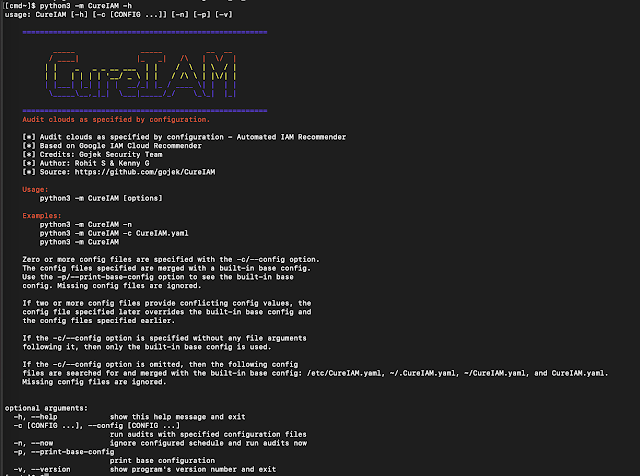
# Check CureIAM help
$ python -m CureIAM --helpCureIAM can be also run inside a docker environment, this is completely optional and can be used for CI/CD with K8s cluster deployment.
# Build docker image from dockerfile
$ docker build -t cureiam .

# Run the image, as schedular
$ docker run -d cureiam

# Run the image now
$ docker run -f cureiam -m cureiam -n CureIAM.yaml configuration file is the heart of CureIAM engine. Everything that engine does it does it based on the pipeline configured in this config file. Let's break this down in different sections to make this config look simpler.
  logger:
    version: 1

    disable_existing_loggers: false

    formatters:
      verysimple:
        format: >-
            [%(process)s]
            %(name)s:%(lineno)d - %(message)s
        datefmt: "%Y-%m-%d %H:%M:%S"

    handlers:
      rich_console:
        class: rich.logging.RichHandler
        formatter: verysimple

      file:
        class: logging.handlers.TimedRotatingFileHandler
        formatter: simple
        filename: /tmp/CureIAM.log
        when: midnight
        encoding: utf8
        backupCount: 5

    loggers:
      adal-python:
        level: INFO

    root:
      level: INFO
      handlers:
        - rich_console
        - file

  schedule: "16:00"
This subsection of config uses, Rich logging module and schedules CureIAM to run daily at 16:00.
plugins section in CureIAM.yaml. You can think of this section as declaration for different plugins. plugins:
gcpCloud:
plugin: CureIAM.plugins.gcp.gcpcloud.GCPCloudIAMRecommendations
params:
key_file_path: cureiamSA.json
filestore:
plugin: CureIAM.plugins.files.filestore.FileStore
gcpIamProcessor:
plugin: CureIAM.plugins.gcp.gcpcloudiam.GCPIAMRecommendationProcessor
params:
mode_scan: true
mode_enforce: true
enforcer:
key_file_path: cureiamSA.json
allowlist_projects:
- alpha
blocklist_projects:
- beta
blocklist_accounts:
- foo@bar.com
allowlist_account_types:
- user
- group
- serviceAccount
blocklist_account_types:
- None
min_safe_to_apply_score_user: 0
min_safe_to_apply_scor e_group: 0
min_safe_to_apply_score_SA: 50
esstore:
plugin: CureIAM.plugins.elastic.esstore.EsStore
params:
# Change http to https later if your elastic are using https
scheme: http
host: es-host.com
port: 9200
index: cureiam-stg
username: security
password: securepasswordEach of these plugins declaration has to be of this form:
  plugins:
    <plugin-name>:
      plugin: <class-name-as-python-path>
      params:
        param1: val1
        param2: val2
For example, for plugins CureIAM.stores.esstore.EsStore which is this file and class EsStore. All the params which are defined in yaml has to match the declaration in __init__() function of the same plugin class.
  audits:
    IAMAudit:
      clouds:
        - gcpCloud
      processors:
        - gcpIamProcessor
      stores:
        - filestore
        - esstore
Multiple Audits can be created out of this. The one created here is named IAMAudit with three plugins in use, gcpCloud, gcpIamProcessor, filestores and esstore. Note these are the same plugin names defined in Step 2. Again this is like defining the pipeline, not actually running it. It will be considered for running with definition in next step.
CureIAM to run the Audits defined in previous step. run:
- IAMAuditsAnd this makes the entire configuration for CureIAM, you can find the full sample here, this config driven pipeline concept is inherited from Cloudmarker framework.
The JSON which is indexed in elasticsearch using Elasticsearch store plugin, can be used to generate dashboard in Kibana.
[Please do!] We are looking for any kind of contribution to improve CureIAM's core funtionality and documentation. When in doubt, make a PR!
Gojek Product Security Team
<>
=============
Adding the version in library to avoid any back compatibility issues.
Running docker compose: docker-compose -f docker_compose_es.yaml up
      mode_scan: true
      mode_enforce: false
HardHat is a multiplayer C# .NET-based command and control framework. Designed to aid in red team engagements and penetration testing. HardHat aims to improve the quality of life factors during engagements by providing an easy-to-use but still robust C2 framework.
It contains three primary components, an ASP.NET teamserver, a blazor .NET client, and C# based implants.
Alpha Release - 3/29/23 NOTE: HardHat is in Alpha release; it will have bugs, missing features, and unexpected things will happen. Thank you for trying it, and please report back any issues or missing features so they can be addressed.
Discord Join the community to talk about HardHat C2, Programming, Red teaming and general cyber security things The discord community is also a great way to request help, submit new features, stay up to date on the latest additions, and submit bugs.

documentation can be found at docs
To configure the team server's starting address (where clients will connect), edit the HardHatC2\TeamServer\Properties\LaunchSettings.json changing the "applicationUrl": "https://127.0.0.1:5000" to the desired location and port. start the teamserver with dotnet run from its top-level folder ../HrdHatC2/Teamserver/
Code contributions are welcome feel free to submit feature requests, pull requests or send me your ideas on discord.